You can create a schedule to enable script execution at a specific date and time in future. Schedules can be of two types:
- One-time schedule
- Recurring schedule
Only an approved script can be scheduled.
A script can be scheduled from the Quick Actions menu in the Scripts sub-tab or from the Schedules sub-tab.
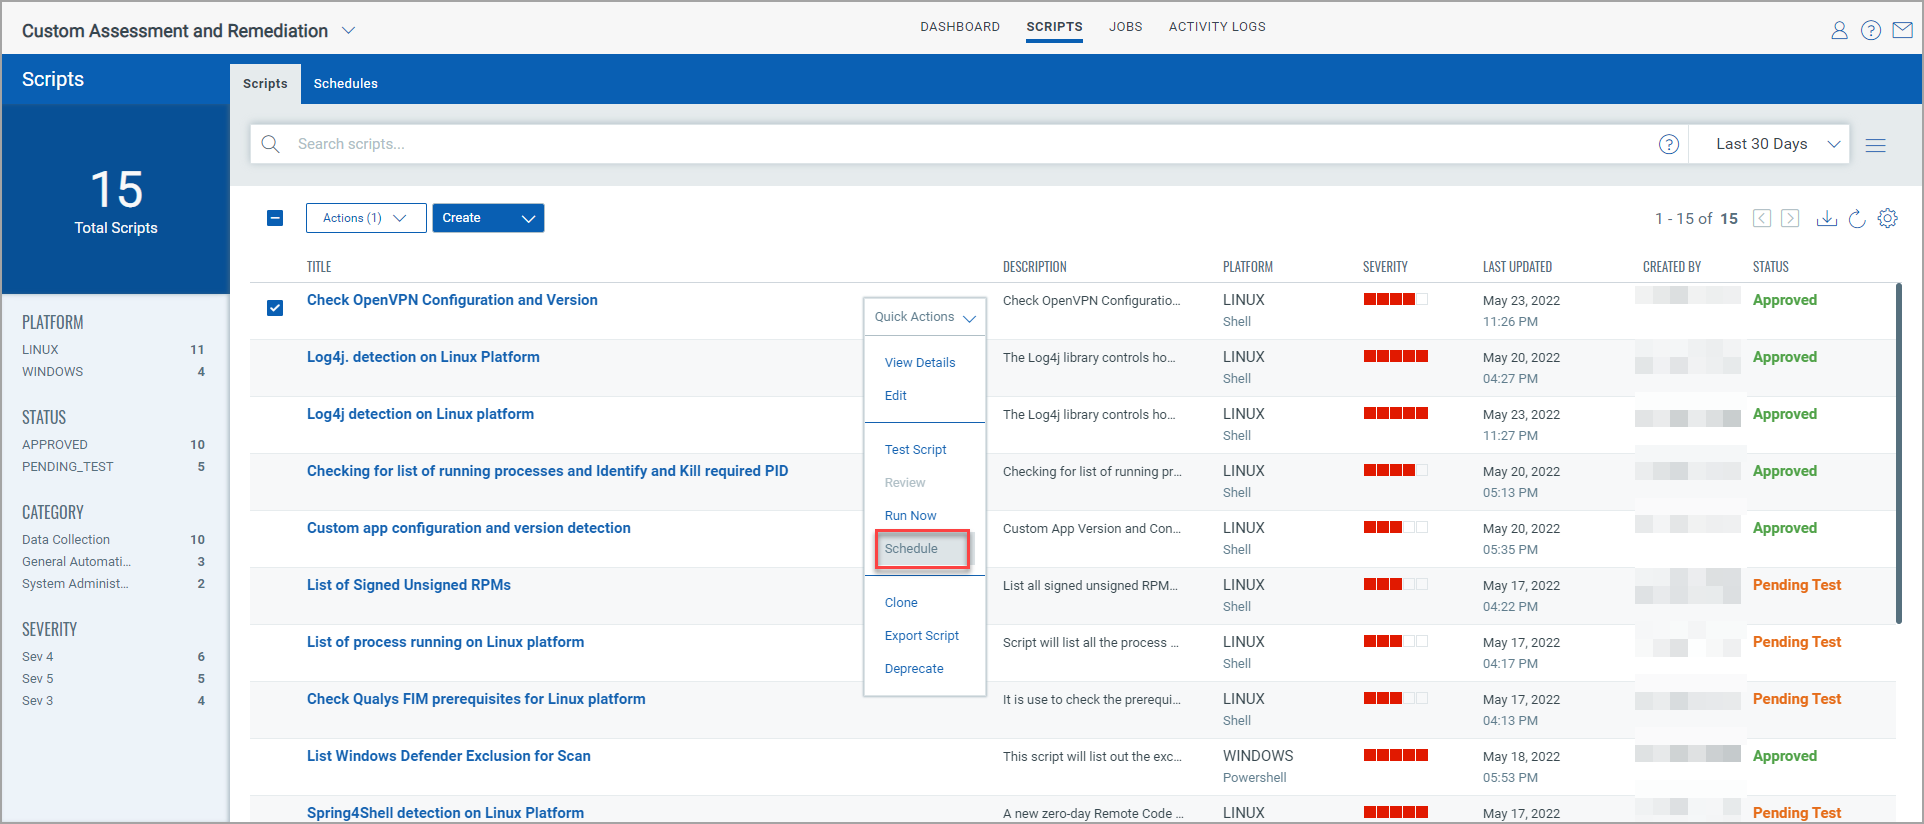
From the Scripts > Scripts sub-tab:
1. On the Scripts sub-tab, select the script that you want to schedule.
2. Select Quick Actions and then select Schedule.
3. In the Schedule: <script name> > Basic Information page, enter a name and description in the relevant fields and then click Next.
4. The Select Script page displays the script that you have selected.
Note: If you are creating a schedule from the Schedule sub-tab, click the + sign to select a script using the Select Script page.
5. Click Next.
6. In the Select Assets page, do the following and then click Next.
Include the Assets |
Click the + sign to add assets to define the scope of the script and then click Apply. |
Include the Asset Tags |
Click the + sign to add asset groups by selecting asset tags and the click Apply. |
Exclude host for the tags |
This check-box is available only if you add asset tags. Select the check-box if you want to exclude the host asset for the selected tags. |

7. Use the Bypass Powershell Execution Policy toggle switch to specify if you want to override the PowerShell execution policy on Windows agents. When you switch this option to Yes, both signed and unsigned scripts will be executed on the agent irrespective of the PowerShell execution policy set on the asset.
Note: This option is displayed only when you schedule a Windows PowerShell script.
8. In the Schedule page, specify the start date and time for the script to configure a one-time schedule, and then click Next.
9. If you want the script to automatically recur as per your specifications, do the following and then click Next:
- Select the Recurring Job check box if you want to schedule a recurring schedule for the script.
Selecting the Recurring Job check box makes the Repeats and End Date fields active, which enable you to configure the recurring schedule for the script.
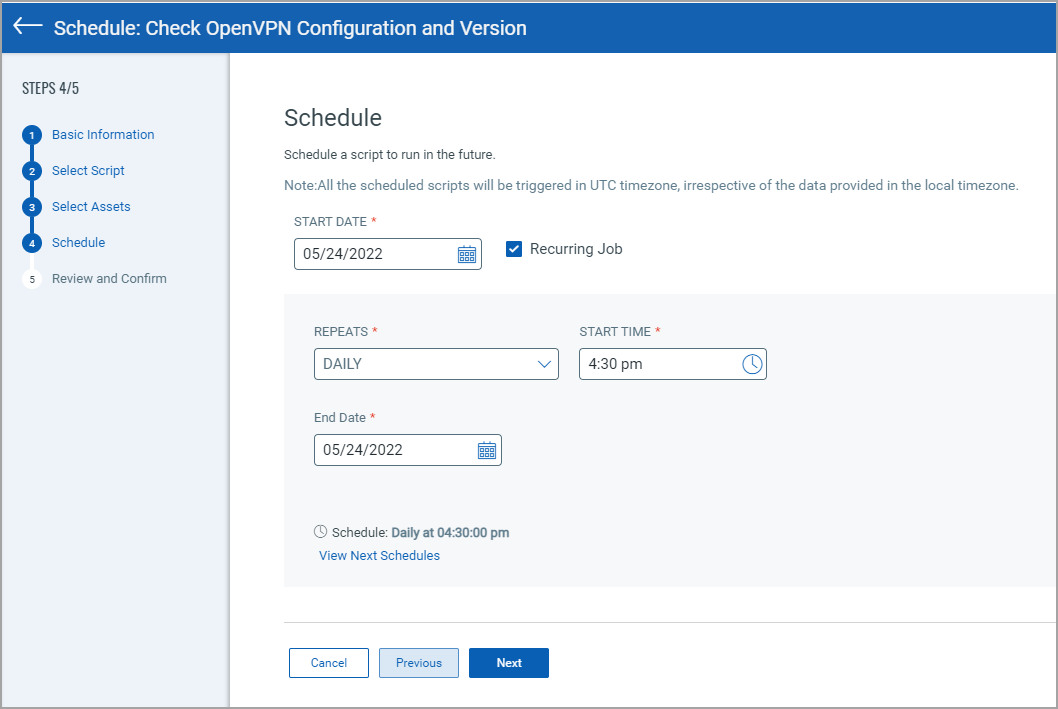
For each recurring job, use the Start Time text box to specify the first execution and the End Date text box to specify the last date for the recurring schedule.
Hourly |
For a script to be executed on an hourly basis, select a value for the hour from the Every drop-down list. |
Daily |
Specify the time from the Start Time drop-down list. |
Weekly |
In the On Day of the Week section, specify the days on which you want the script to repeat its execution. |
Monthly |
If you want to plan the execution of a script with a monthly recurring schedule, you can either specify the script recurrence dates or the days for each month. - Select day of the month: Click this option and then provide the values for date, recurrence interval in months, and the start time. - Select day of the week: Click this option and then provide the values for recurrence day, specific day of the week, recurrence interval in months, and the start time. |
- Click View Next Schedule to view the next three schedules.
Note: The start time of the first script execution is automatically calculated 15 minutes from the current time in your time zone.
10. In the Review and Confirm page, review the information you have provided and then do one of the following:
- Click Save to save the schedule that you have just created. You can activate the schedule later.
- Click Save & Activate to create the schedule and activate it immediately. You can also activate a schedule later from the Scripts > Schedules sub-tab.
Until you activate a schedule, it's status is displayed as inactive.
Note: All the scheduled scripts are executed in UTC time zone, irrespective of the data provided in the local time zone.
Activating and Deactivating Schedules