The Scans > Authentication section is where you'll find authentication records saved in your account, including IBM DB2 records. During scanning the service will authenticate to one or more DB2 instances on a single host using the DB2 records in your account. When there are multiple DB2 instances, you create a separate authentication record for each instance.
See below for help with the settings that appear in the IBM DB2 record.
Note: For the most current list of supported authentication technologies and the versions that have been certified for VM and PC by record type, please refer to the following article: Authentication Technologies Matrix
Quick Links: Why use host authentication
What defines a DB2 instance?
For a vulnerability scan, an instance is defined uniquely by an IP address and port. For a compliance scan, an instance is defined uniquely by an IP address, port, and database name.
Show me an example of multiple DB2 records
Let's say you want to define these DB2 records in your account. In the table below, PC Only=Yes indicates that the check box “Use this record for Policy Compliance scans only” is selected in the record.
| IP Address | Port | Database Name | PC Only | |
| Record 1 | 10.10.31.178 | 50000 | SAMPLE | No |
| Record 2 | 10.10.30.159 | 50000 | TOOLS | No |
| Record 3 | 10.10.30.159 | 50000 | SAMPLE | Yes |
Record 1 and Record 2 will be used for both vulnerability scans and compliance scans. Record 3 will be used for compliance scans only. You’ll notice that Record 2 and Record 3 have the same IP address and port but different database names - this is allowed because Record 3 is used for compliance scans only.
Will this record be used for vulnerability and compliance scans?
By default, DB2 records will be used for both vulnerability and compliance scans. You can select the check box "Use this record for Policy Compliance scans only" if you want this record to only be used for compliance scans.
Follow these steps to create or edit an IBM DB2 record:
1) Review the Setup for IBM DB2 Auth | Setup for IBM DB2 for z/OS Auth setup guide for system and account requirements.
2) Go to Scans > Authentication.
3) Take one of these actions:
3a - To create a new IBM DB2 record, select New > Databases > IBM DB2.
3b - To make changes to an existing IBM DB2 record, select a record in the list and choose Edit from the Quick Actions menu.
4) The New IBM DB2 Record or Edit IBM DB2 Record window appears (depending on the action taken). This is where you will make your record settings.
5) Choose a tab on the left side of the IBM DB2 Record window to see the settings available. Provide the necessary inputs on each tab, then click Save.
See the help below for the settings that appear on each of the tabs within the IBM DB2 record.
Note for Unit Managers: When a Unit Manager edits a record, the Unit Manager only sees the IPs in the record that they have permission to. Any changes made by the Unit Manager to the record settings will apply to all hosts defined in the record, regardless of whether all hosts belong to the user's business unit. The record may contain more IPs that are not visible to the Unit Manager.
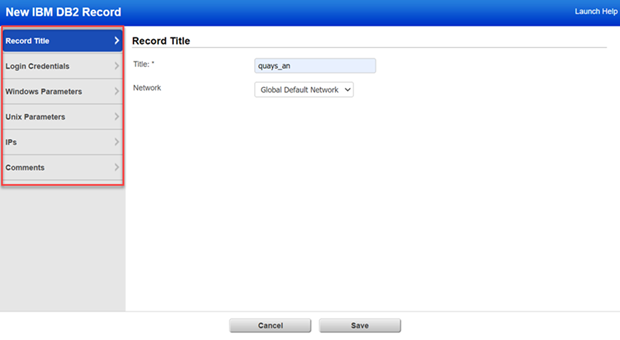
This section has basic settings for the record.
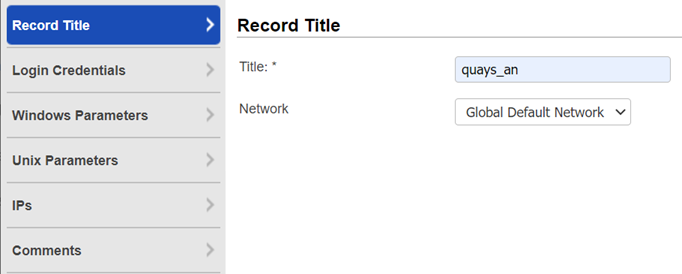
Title - Give the IBM DB2 record a title for easy identification.
Network - (Applicable when the Network Support feature is enabled.) Select the network you want to use for this IBM DB2 record. The Global Default Network is selected by default but you can choose a user-created network from the list.
Login CredentialsLogin Credentials
This section is where you'll provide credentials for the user account to be used for IBM DB2 authentication and information about database instances.
Make sure you reviewed the setup guide mentioned in Step 1 under "What are the Steps" to understand system and account requirements.
Choose Authentication Type: Basic and then enter basic login credentials (username and password).
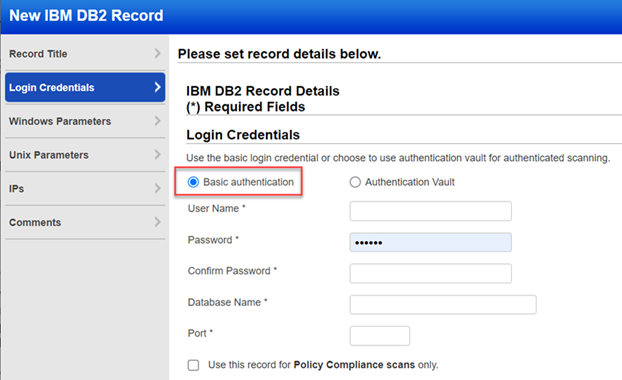
Username - Enter a username for the user account to use for authentication.
Password/Confirm Password - Enter the password for the user account. Then confirm the password.
Database Name – Enter the database name you want to use for authentication.
Port – Enter the port name for the database.
It is strongly recommended that you create one or more dedicated user accounts to be used solely by the scanning engine to authenticate DB2 instances.
Select the checkbox if you want to use the same record for Policy Compliance scans only.
We support integration with multiple third-party password vaults. Just go to Scans > Authentication > Vaults and tell us about your vault system. Then choose Authentication Vault in your record and select your vault name. At scan time, we'll authenticate to hosts using the account name in your record and the password we find in your vault. To learn more, refer to How to use vaults.
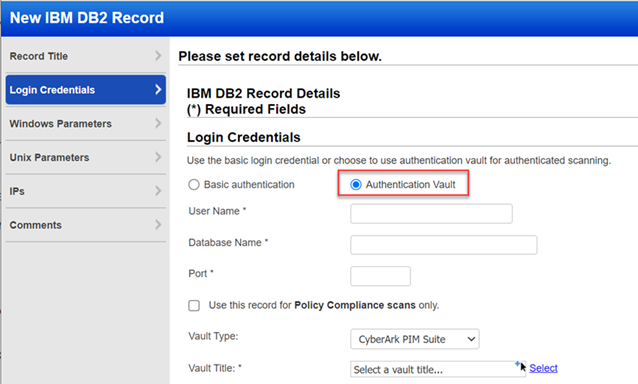
Vault Type - Select the type of password vault you want to use. For each vault type there will be additional information required. The information required depends on the vault type. Please refer to the online help for your vault type to learn more.
Vault Title - Select the valut title by clicking Select. Select an Authentication Vault window opens, search the vault, and select it from the window.
Quick Links: Vault Support Matrix
Windows Parameters (PC only)Windows Parameters (PC only)
Provide details about your IBM DB2 installation to allow the scanning engine to gather DB2 compliance data at the Windows operating system level.
Enter parameters for your IBM DB2 installation. All fields are required and have a limit of 255 characters. These special characters are not allowed: ; & | # % ? ! * ` ( ) [ ] ” ’ > < = ^ /
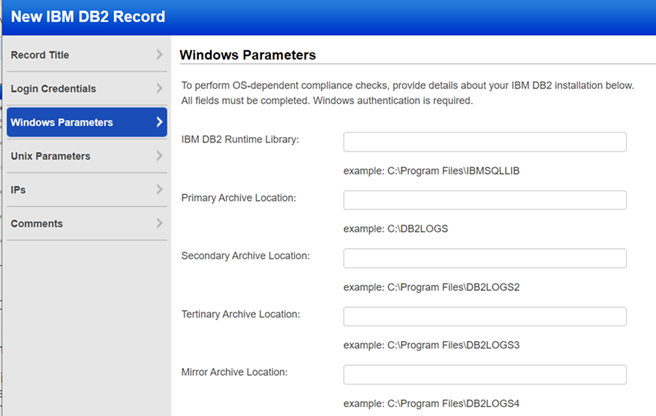
DB2 Installation Directory - Specify the path to the DB2 runtime library if you want the service to perform OS-dependent compliance checks. This is the location where DB2 has been installed on the server.
Primary Archive Location - Specify the path to the primary archive location if you want the service to perform OS-dependent compliance checks. This is the directory where the primary log files are located.
Secondary Archive Location - Specify the path to the secondary archive location if you want the service to perform OS-dependent compliance checks. This parameter specifies the number of secondary log files that are created and used for recovery log files (only as needed). It is set by the DB2 logsecond parameter.
Tertiary Archive Location - Specify the path to the tertiary archive location if you want the service to perform OS-dependent compliance checks. This parameter specifies a path to which DB2 will try to archive log files if the log files cannot be archived to either the primary or the secondary (if set) archive destinations because of a media problem affecting those destinations. It is set by the DB2 fairarchpath parameter.
Mirror Archive Location - Specify the path to the mirror archive location if you want the service to perform OS-dependent compliance checks. If mirrorlogpath is configured, DB2 will create active log files in both the log path and the mirror log path. All log data will be written to both paths. The mirror log path has a duplicate set of active log files. If the active log files are destroyed by a disk error or human error, the database can still function.
Windows Authentication Required
Windows authentication to target hosts is required to gather compliance data from a DB2 installation running on Windows. For this reason, the same hosts defined in this DB2 record must also be defined in Windows record(s) in your account.
Unix ParametersUnix Parameters
Provide details about your IBM DB2 installation to allow the scanning engine to gather DB2 compliance data at the Unix operating system level.
Enter parameters for your IBM DB2 installation. All fields are required and have a limit of 255 characters. These special characters are not allowed: ; & | # % ? ! * ` ( ) [ ] ” ’ > < = ^ \
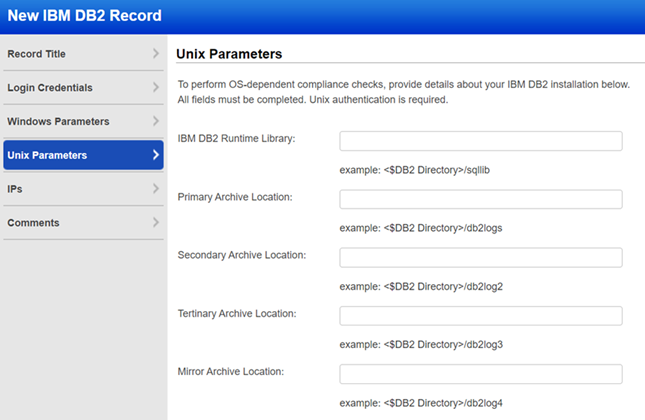
DB2 Installation Directory - Specify the path to the DB2 runtime library if you want the service to perform OS-dependent compliance checks. This is the location where DB2 has been installed on the server.
Primary Archive Location - Specify the path to the primary archive location if you want the service to perform OS-dependent compliance checks. This is the directory where the primary log files are located.
Secondary Archive Location - Specify the path to the secondary archive location if you want the service to perform OS-dependent compliance checks. This parameter specifies the number of secondary log files that are created and used for recovery log files (only as needed). It is set by the DB2 logsecond parameter.
Tertiary Archive Location - Specify the path to the tertiary archive location if you want the service to perform OS-dependent compliance checks. This parameter specifies a path to which DB2 will try to archive log files if the log files cannot be archived to either the primary or the secondary (if set) archive destinations because of a media problem affecting those destinations. It is set by the DB2 fairarchpath parameter.
Mirror Archive Location - Specify the path to the mirror archive location if you want the service to perform OS-dependent compliance checks. If mirrorlogpath is configured, DB2 will create active log files in both the log path and the mirror log path. All log data will be written to both paths. The mirror log path has a duplicate set of active log files. If the active log files are destroyed by a disk error or human error, the database can still function.
Unix Authentication Required
Unix authentication to target hosts is required to gather compliance data from a DB2 installation running on Unix. For this reason, the same hosts defined in this DB2 record must also be defined in Unix record(s) in your account.
Enter or select the target compliance hosts (IPs) that you want to authenticate to with the credentials provided in this record. Each IP may be included in one IBM DB2 record.
Select the target hosts (IPs) to authenticate to.
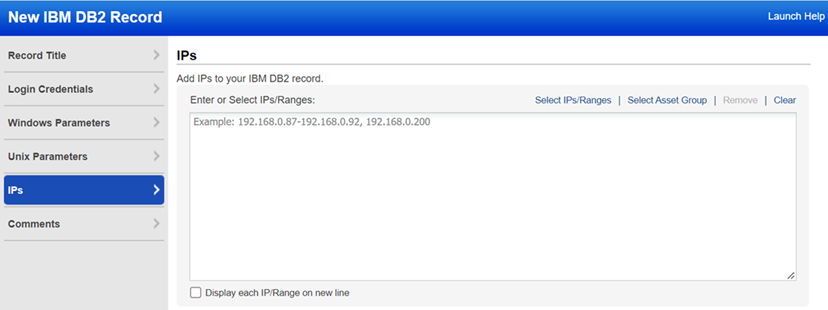
Select IPs/Ranges - Click this link to select IPs/ranges from a list of IPs in your account. The Select IP Addresses window that appears provides a search option so you can easily find what you're looking for. Expand any IP range to see details about the IPs in the range. After selecting IPs/ranges, click Select to add them to the record.
Select Asset Group - Click this link to add IP addresses from asset groups in your account. In the Add IPs from Asset Group window, you'll see the groups listed with the IPs included in each group. There's also a search option so you can quickly find groups on the list. Select one or more groups and click Add. The IPs from the selected groups will be added to the record.
Remove - Click this link to remove IPs/ranges from the record. This is especially useful if you want to remove one or more IPs from within an IP range. In the pop-up that appears, enter the IPs/ranges to remove, and click Remove. The IPs section in the record will be updated with the IPs removed.
For example, let's say the record includes the range 10.10.10.10-10.10.10.250. If you remove 10.10.10.122, the IPs field will be updated to 10.10.10.10-10.10.10.121, 10.10.10.123-10.10.10.250.
Clear - Click this link to clear the entire IPs field.
Display each IP/Range on new line - Check this option to arrange each IP address and IP range on a new line instead of the comma-separated list.
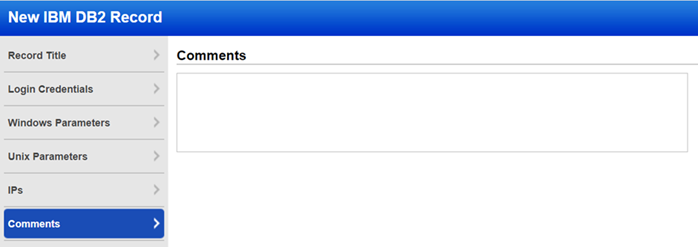
Provide important notes or comments for this record.