Managing Patch Jobs for Linux Assets
Patch Management allows you to deploy patch jobs on Linux assets. You can use a single job to deploy a single patch on multiple assets, multiple patches on a single asset, and multiple patches on multiple assets. You cannot target Windows and Linux assets in a single job. For security purposes, the Linux patches are downloaded manually and stored in a shared folder that must be accessible through a mounted directory on each server. This shared directory helps reduce the traffic, ensures file integrity, and is only exposed to selective servers. The patches are transferred to the repository only after successful assessment on the staging server. We recommend fetching the patch installation files directly from the vendor to assure authenticity and integrity.
Note: For Linux jobs, Patch Management does not fetch patches at run time. You must make the patches available in a Yum repository before triggering a patch job. We recommend creating a shared directory to hold all approved patch files that you must mount on all Yum-based Linux assets. This enables you to scale without caching, proxying and is a more secure approach. It works without exposing your server assets beyond firewalls or tunnels, and it also ensures approved patch rollouts only when you put the patch files in the repository.
Supported Versions
- RHEL 6, 7, and 8
- CentOS 6 and 7
- Oracle Linux 6, 7, and 8
- Amazon Linux and Amazon Linux 2
- Ubuntu Linux 18, 20, and 21
- Debian 9, 10, and 11
Note: You can apply only the latest Debian and Ubuntu patches. Ensure that the latest patches are available at:
- Qualys advisory as a security fix
- Debian and Ubuntu package repository
You cannot apply the intermediate patches because Debian and Ubuntu do not maintain history patches.
Consider this!
- Four out-of-the-box widgets are available exclusively for Linux patches. You can customize and add widgets based on your preferences.
- On the Assets tab for Linux, you cannot view the agent scan status based on the vulnerability scan. Agent scan date would be the date of the latest vulnerability scan on an asset.
- Superseded patches are not applicable for Linux.
- You cannot enable the opportunistic patch download to allow the Cloud Agent for Linux to download the required patches before a scheduled job run begins. The patches must be stored in a repository at a predefined location that is accessible to each asset.
- You can only create deployment jobs for Linux assets. Rollback jobs are not applicable for Linux assets.
- While creating a Linux deployment job, if you select an asset tag that includes Windows and Linux assets, only Linux assets will be added for the job.
- Job title for each job must be unique. You cannot have the same job title as a Windows job. For example, if a Windows job titled Security Patches is created, you cannot have a Linux job titled as Security Patches.
- If a deployment job contains multiple OS patches, then only the job assets with specific OS will have applicable patches installed. For example,
A job that has a mixed set of patches i.e. both RHEL 6 and RHEL 7, but only RHEL6 assets, in this case, the status for RHEL 7 patches will be displayed as Skipped.
- A job that has RHEL 6 patches and also has RHEL 7 assets, in this case, no manifest will be sent and status for asset will be shown as Not Applicable.
Prerequisite
- You must install the Cloud Agent for Linux on each of your Linux assets before you can deploy patch jobs.
- Ensure that the patches that you want to install are available in the agent-side repository for respective OS on the asset during the job execution. This configuration must be setup at the OS specific setting and not specific for Patch Management.
About Zero-Touch Patch Jobs
All QQL-based recurring jobs are known as the Zero-Touch Patch jobs. All zero-touch patch jobs are denoted with the zero-touch icon ![]()
The Zero-Touch Patch Job option allows you to create an automated job to proactively patch current and future Linux vulnerabilities.
Creating Patch Job for Linux Assets
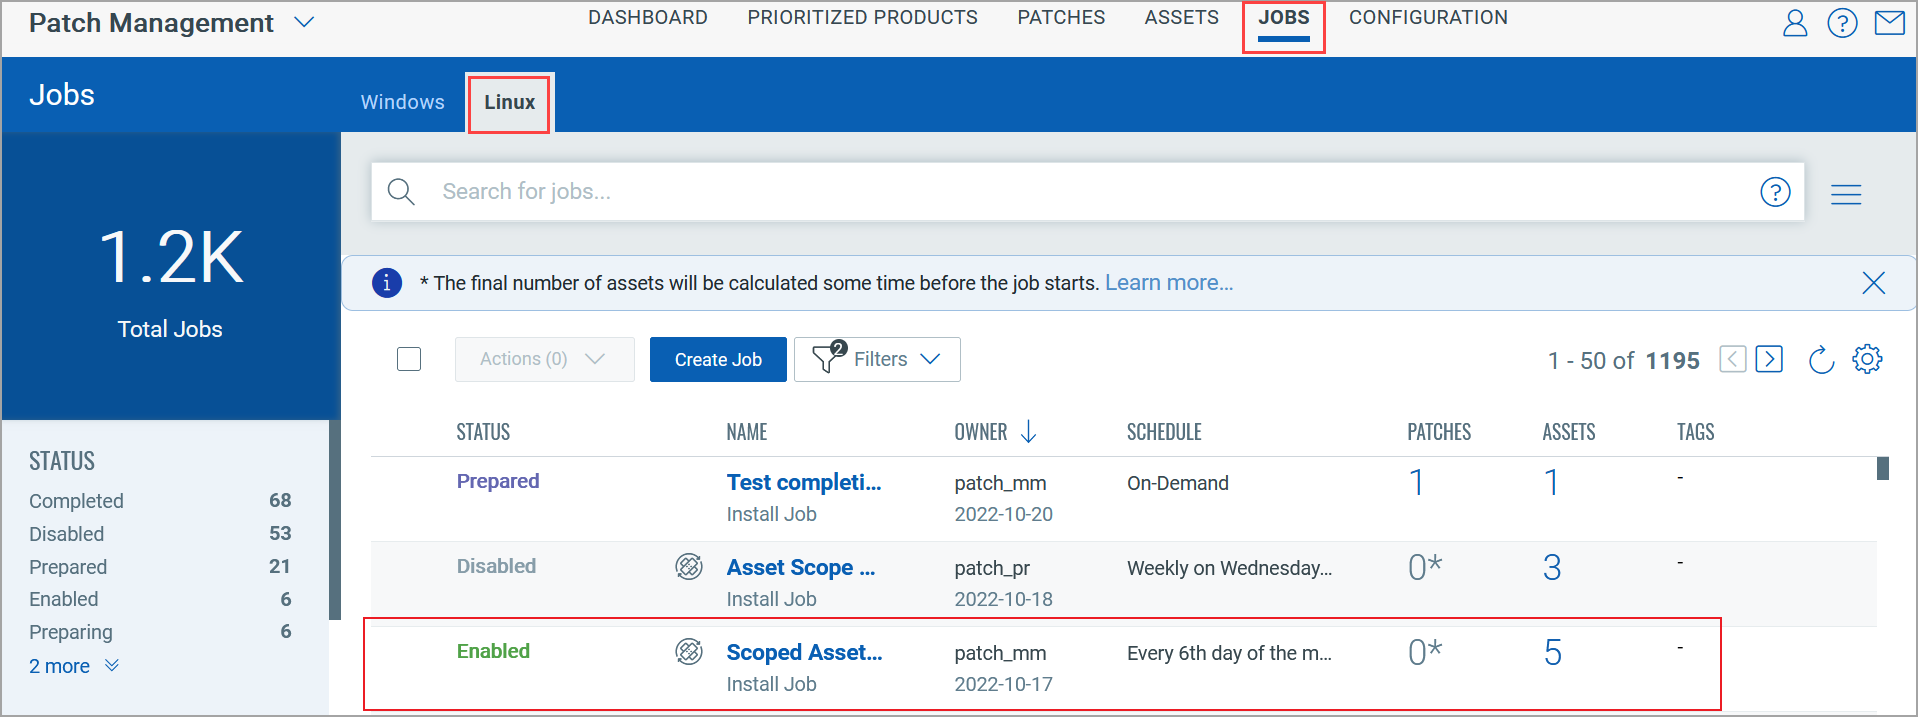
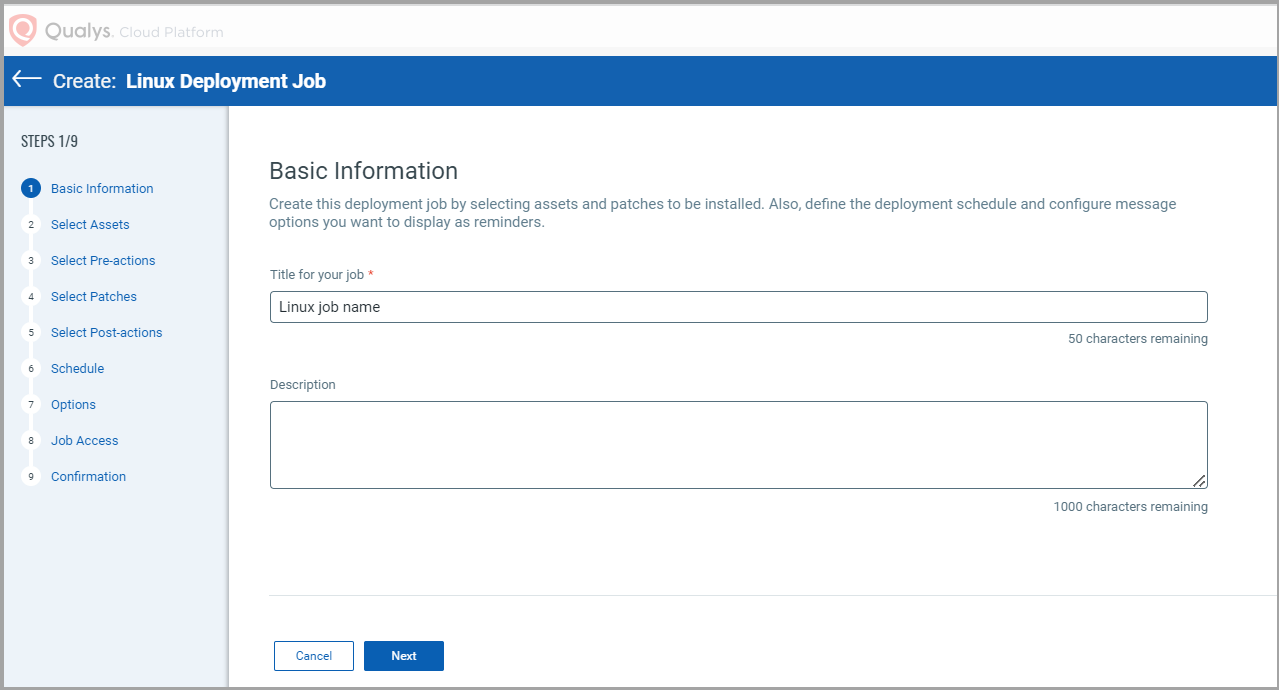
1. Navigate to Jobs > Linux > Create Job.
2. On the Basic Information page, enter a job title and description and then click Next.
3. (Optional) Select Add Exclusion Assets check box to exclude specific assets from the deployment job.
Note: You can include and exclude a maximum of 50 assets from a job.
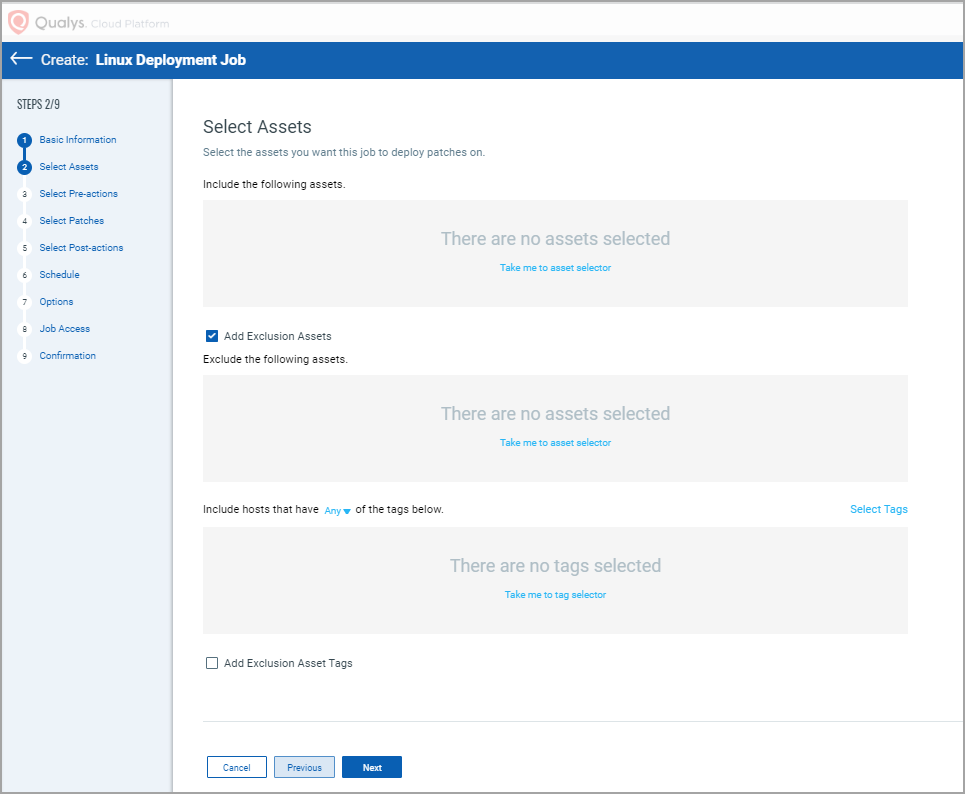
Note: Based on the selected options, the final list of assets is calculated taking into consideration included and excluded assets tags and included and excluded assets.
4. Select assets or asset tags on which you want to apply patches and click Next.
Note: You can include and exclude a maximum of 50 asset tags from a job.
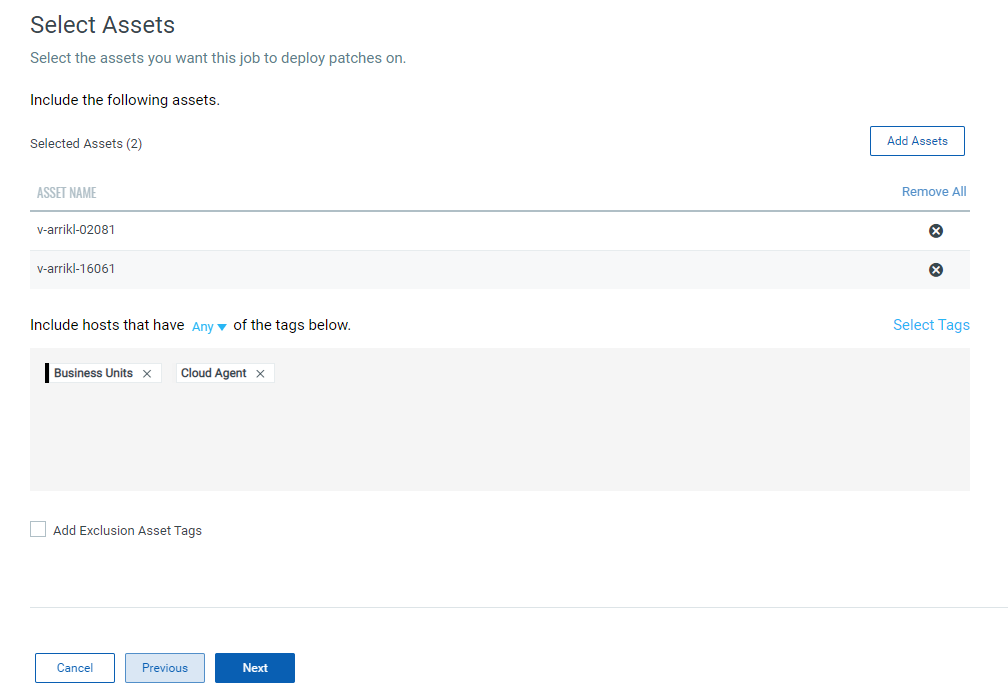
5. (Optional) If you want to exclude the assets with All and Any tags from the deployment job, select the Add Exclusion Asset Tags check box and then select one of the following options and click Next.
- Any – to include assets that have any of the selected tags
- All – to include only those assets that have all the selected tags
The patches are deployed on the selected tags only for assets that are contained in the user's scope.
Note: To understand how final assets are determined for a job, see Which Assets are Included for a Job.
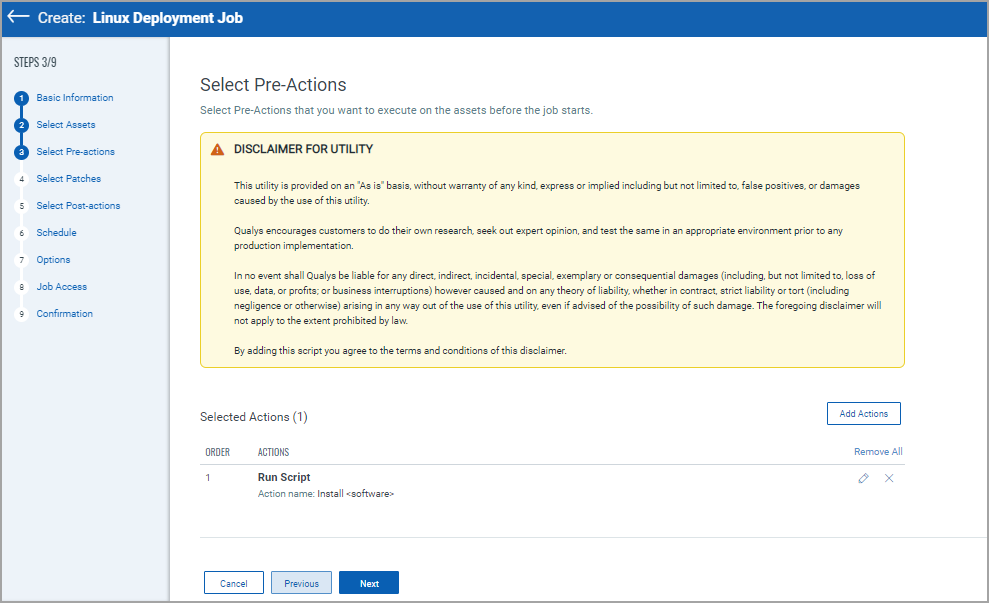
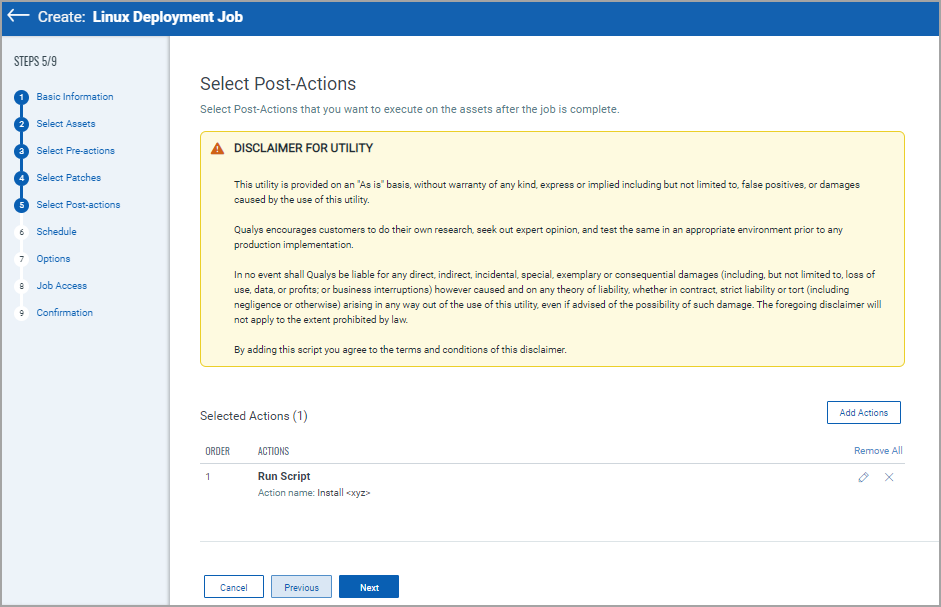
6. Select Pre-action that you want to execute on assets before the job starts. For more information, see About Pre-Actions and Post-Actions.
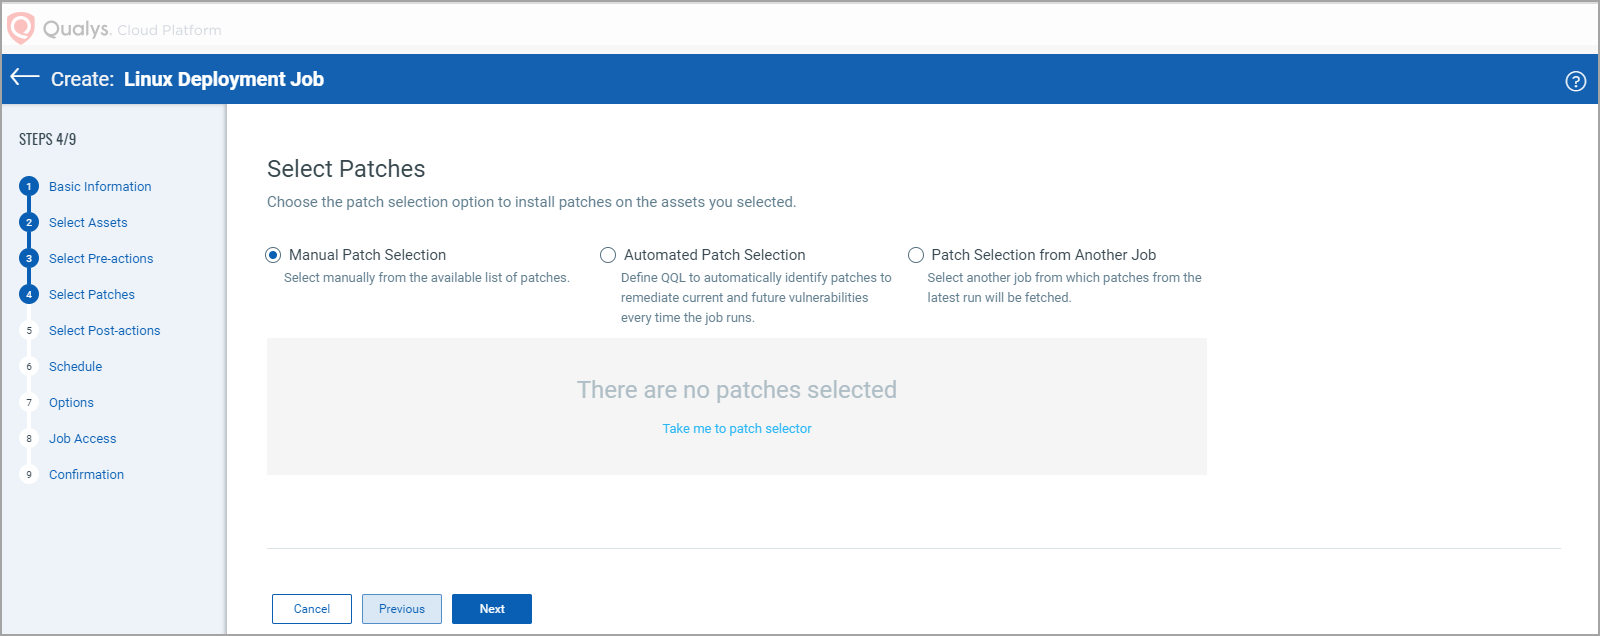
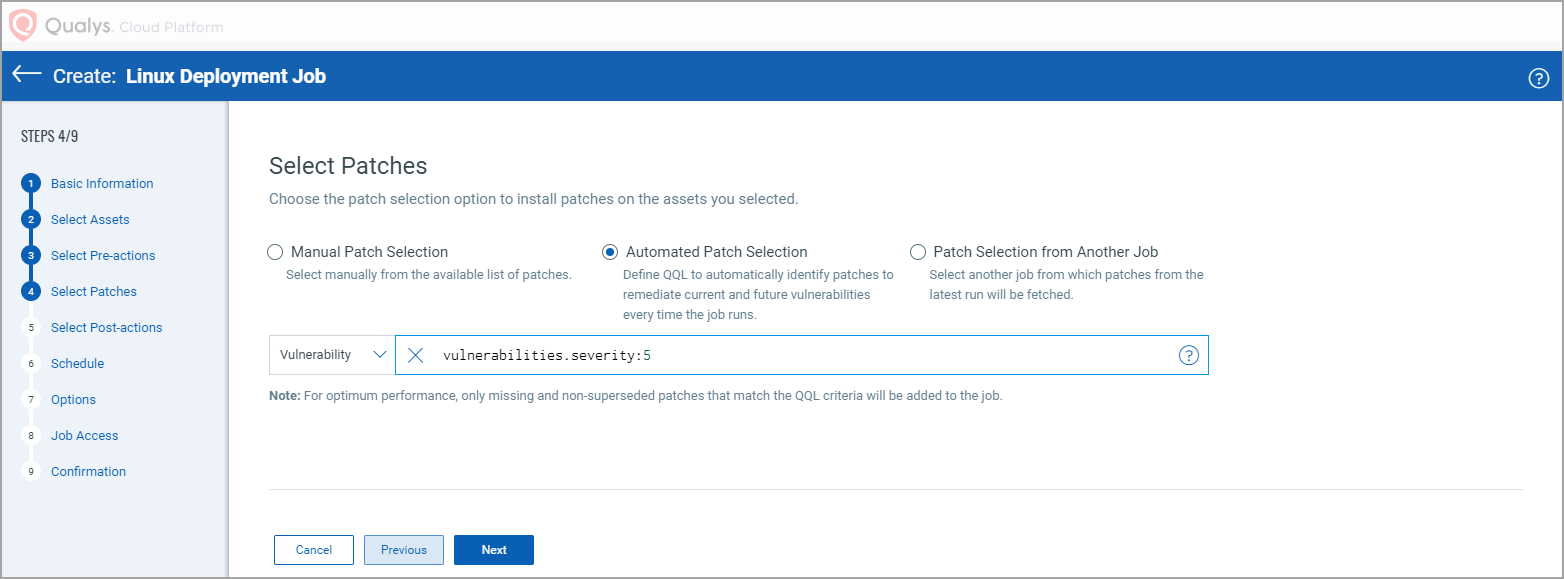
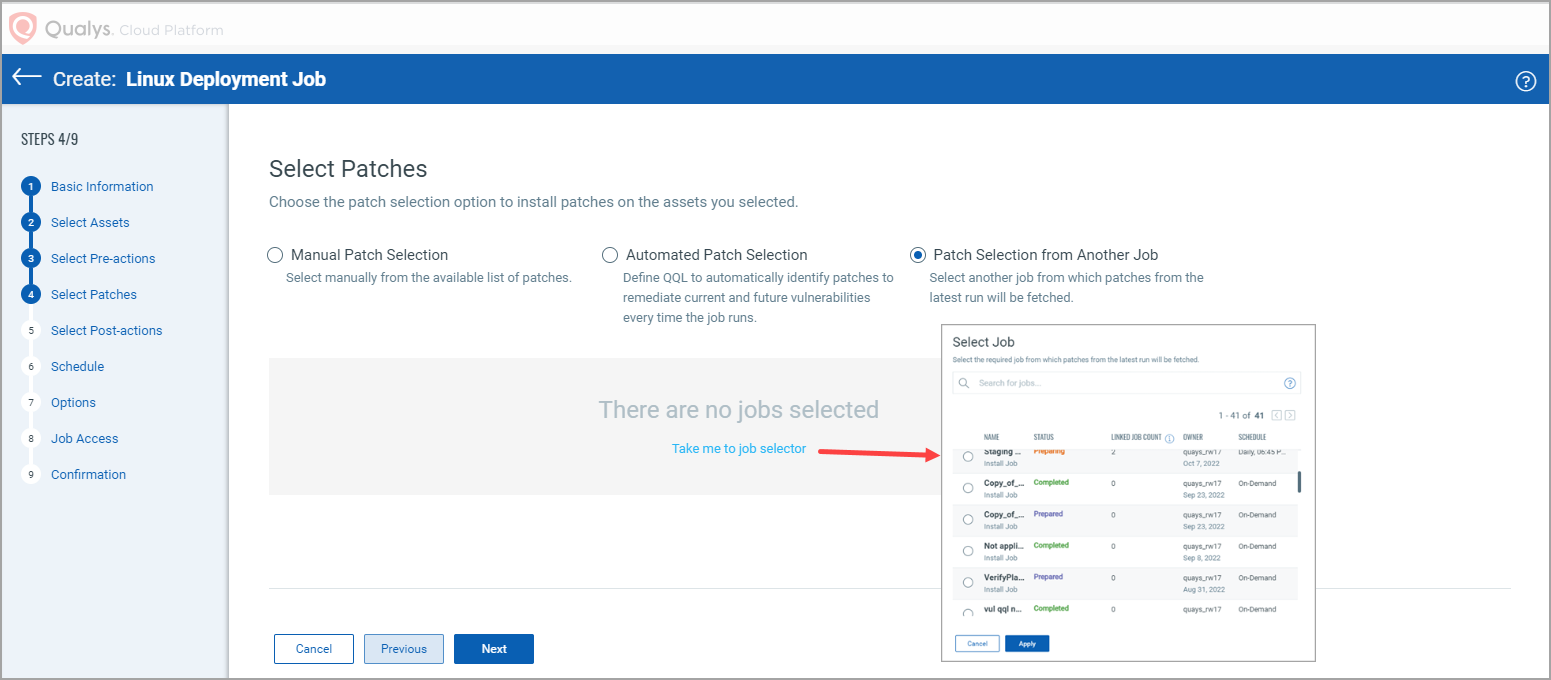
7. Select patches to apply to the assets. You can select one of the following patch selection options:
- Manual Patch Selection
- Automated Patch Selection
- Patch Selection from Another Job
After you select the Manual Patch Selection option, click the Take me to patch selector link to select patches. On the ‘Patch Selector page’ you can use the Within Scope option to view missing patches within the scope of the selected assets or view all available patches. Select the desired patches and click Add to Job and then click Close.
On the Select Patches pane of the deployment job wizard, click Available Patches if you want to add more patches to the job.
You can use the Qualys Query Language (QQL) to create a criteria to automate the patches that need to be installed for a job based on vulnerabilities or patches. The query can be used for run-once and recurring jobs. You cannot use a combination of a QQL and Patch list to select patches that are added to a job. You must create a job that is executed based on the query or select the patches from the Patch List.
Note: You can use vulnerability tokens to create a QQL-based job only if you have a subscription for the VMDR app. You can use the RTI tokens only if you have an active subscription for the Threat Protection app.
Want to add patches later? Go to the Patches tab, and select one or more patches, then from the Quick Actions Menu of a single patch or from the Actions menu (bulk actions) click Add to Existing Job or click Add to New Job. You cannot add patches later to On-Demand or run-once (non recurring) jobs once they are enabled.
Note that when you modify a patch job using the Add to Existing Job option from the Patches tab, you can add patches, but cannot add target assets or asset tags. To apply patches to an asset that is not added to the job, you can 1) edit an existing job from the Jobs tab, 2) select the asset from the Assets tab and use the Add to Existing Job option, or 3) create a new patch job for that asset.
Note: You can add maximum 2000 patches to a single job. Create another job to add patches above 2000. You can choose to run the scheduled job daily, weekly, or monthly.
After you select the Patch Selection from Another Job option, click the Take me to job selector link. From the 'Select Job' Window, select the job from which you want to fetch the patches from its latest run and click Apply.
After selecting the required patches by using the options that are explained, click Next.
8. Select Post-action that you want to execute on assets after the job completes. For more information, see About Pre-Actions and Post-Actions.
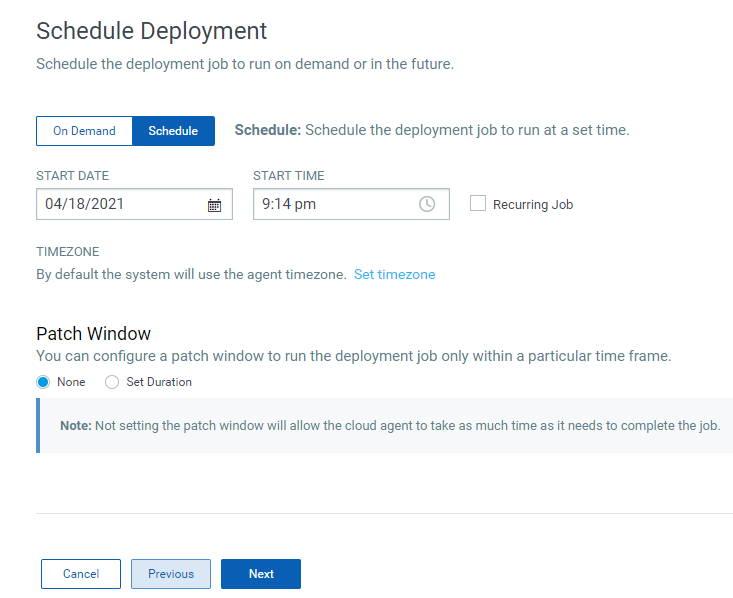
9. On the Schedule Deployment page, select one of the following options and click Next:
- On Demand – to install the patches immediately once the job is created and enabled.
- Schedule – to install the patches at a specified time, set the start date and start time. You can schedule a job to recur daily, weekly, or monthly. For more information, see Scheduling Jobs.
Monthly jobs which are scheduled to run on the 31st of the month will be scheduled every two months (where 31st date is available). You can schedule the job to run on the last day of the month which ensures that the job runs on the last day irrespective of whether the month has 28, 30, or 31 days.
10. Set your Reboot Communication options and click Next.
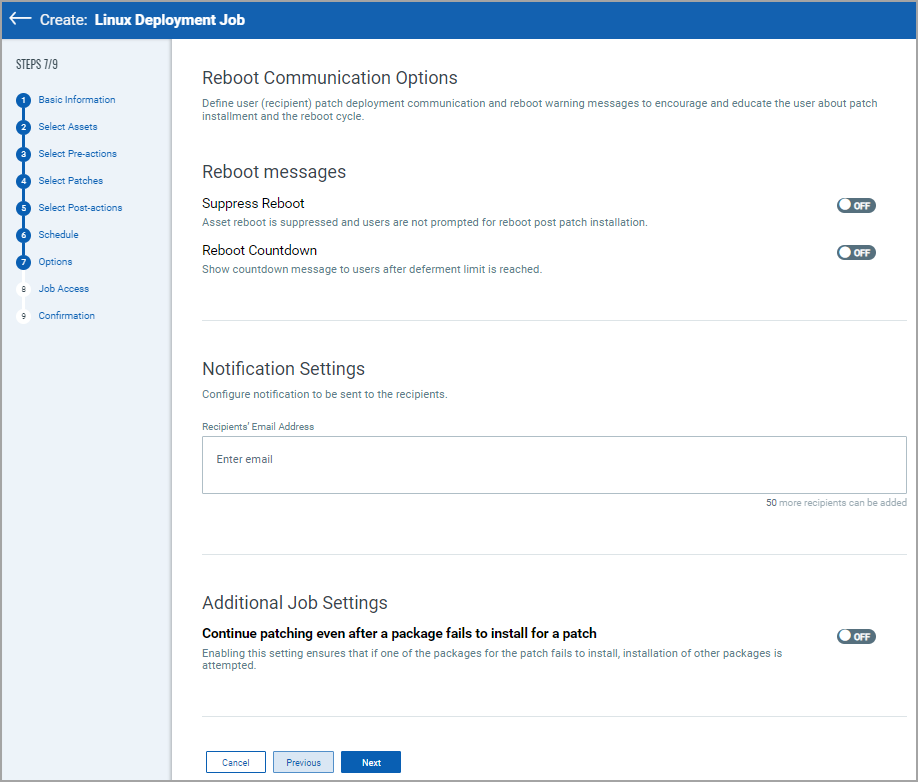
Reboot Messages:
These options are for reboot messages:
Suppress Reboot - This option allows you to patch systems in advance and defer reboot till the maintenance window.
Note: If you enable this option, the agent stops the subsequent patch scans or job deployments and starts again only after the reboot is done.
Reboot Countdown - If deferment limit is set in the Reboot Request, then configure this option to show countdown message to users after deferment limit is reached. When reboot countdown is enabled, this gives the end user an indication of how long it will take before the system is rebooted.
Notification Settings:
You can choose to send email notifications for events, such as a job has started or a job has completed to the intended recipients.
Note: For a recurring job, if the email notification is configured, you will receive the email notification once per day for the job run. If the same recurring job is edited and scheduled again for the same day, you will not receive the email notification again on that day.
The Continue patching even after a package fails to install for a patch option ensures that if one of the packages for the patch fails to install, an attempt to install other packages is made.
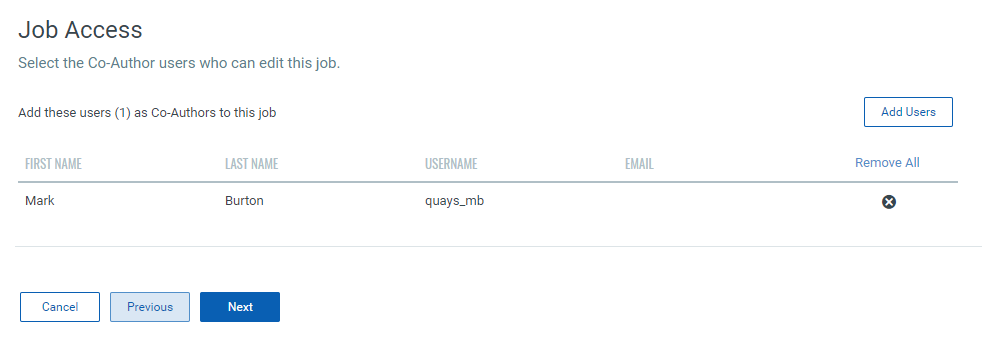
11. On the Job Access page add the co-author who can edit the job and click Next.
12. On the Confirmation page, review the settings and click Save to create the job or click Save and Enable to deploy the job immediately.

You must enable the disabled job in order to run it. To enable a disabled job, simply go to the Jobs tab, then from the Quick Actions Menu of a job, click Enable. The Save & Enable option should be chosen only when you are confident that job is correctly configured, because this job will begin executing as soon as you "Save" the job. This option is available only when creating a Job the first time, not during editing the job.
Tip: You can use the Disable option to temporarily disable a scheduled job. You can then re-enable the job later at your convenience. On-Demand or run-once (non recurring) jobs cannot be edited or disabled once they are enabled.