JFrog Artifactory Private Registry
Follow the steps below to add a JFrog Artifactory Private registry in order to scan JFrog Artifactory repositories. The sensor will use the Artifactory Native API with AQL (Artifactory Query Language) for the listing phase of the registry scan to collect image metadata information for the repository provided in the registry scan schedule.
Admin level privileges are required because of the Include fields used in the AQL query.
AQL Query
The AQL query used by the sensor has the following values:
a) Primary Domain: "items"
b) Search Criteria: "repo", "path" and "name"
c) Include fields: "repo", "path" and "modified"
Steps to Add JFrog Artifactory Private Registry
Complete these steps to add your registry:
1) Download the Registry sensor (Sensor version 1.11 or later). Go to Configurations > Sensors > Download Sensor and pick Registry. Select the environment where you want to deploy the sensor and follow the installation instructions on the screen. Ensure the registry sensor is in Running state and continue to the next step.
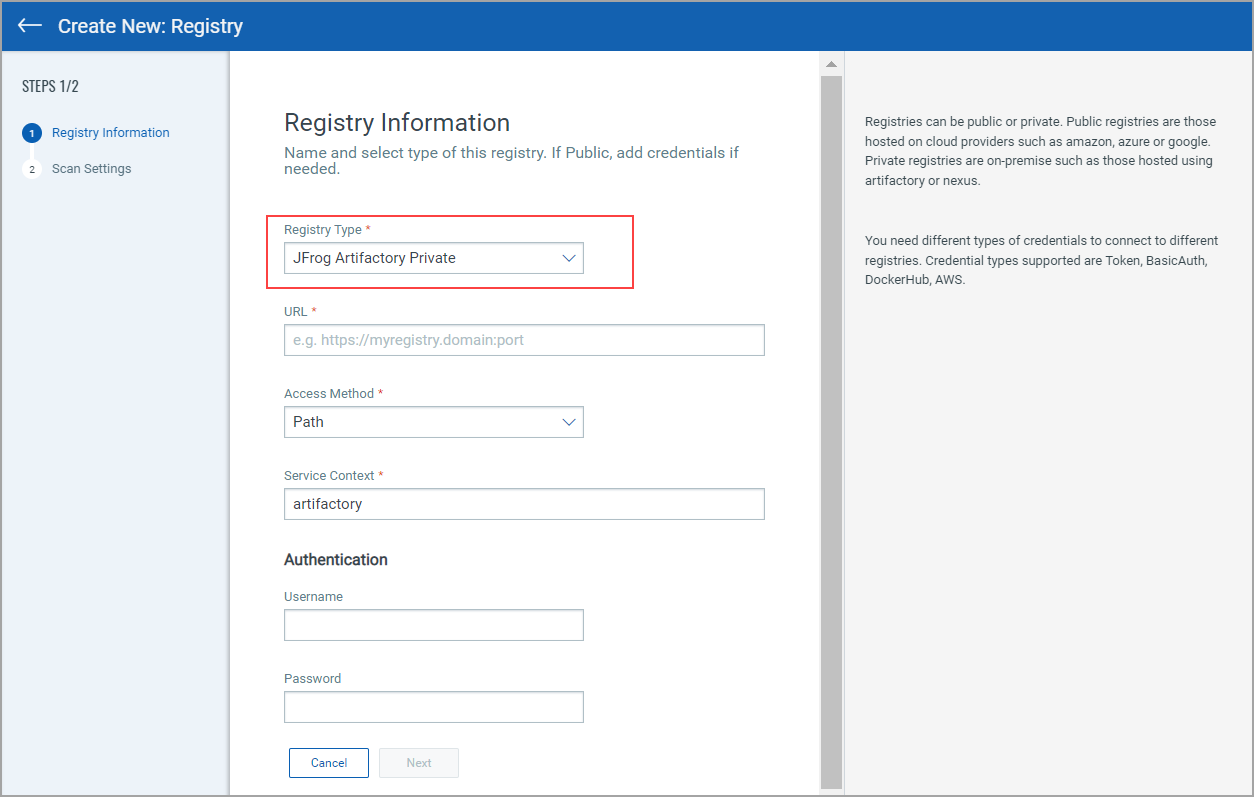
2) Go to Assets > Registries > New Registry to add your registry and set up a scanning schedule.
3) Provide the following information:
Registry Type: Choose registry type JFrog Artifactory Private.
URL: Enter the registry URL.
Access Method: Choose Path (for direct access to Docker registries) or Sub Domain (for access to Docker registries through a reverse proxy).
Service Context: Enter the service context value configured as part of the Base URL for reverse proxy configuration.
Authentication: Enter authentication credentials for connecting to your registry. Provide the username and password for an account with Admin level privileges. Admin level privileges are required because of the Include fields used in the AQL query as described in the AQL Query section above.
4) After adding registry information, click Next to enter scan settings. Like with other registry types, you can choose to scan immediately (On Demand) or on an on-going basis (Automatic). For help with scan settings, see Configure Scan Settings.