Salesforce (SFDC) Connector
Setup your SFDC account to enable it for scanning by SaaSDR before you create the connector.
Prerequisites
- System Admin to login to SFDC Setup UI and perform steps 1 and 2 as mentioned below.
Follow these steps to create a SFDC Connector:
1) Create application and get Application ID Application Key
3) Create Connector in SaaSDR with SFDC as application
Create application and get Application ID, Application Key
1) On the SFDC console, navigate to Home, under Platform Tools in the left navigation pane, select Apps > App Manager.
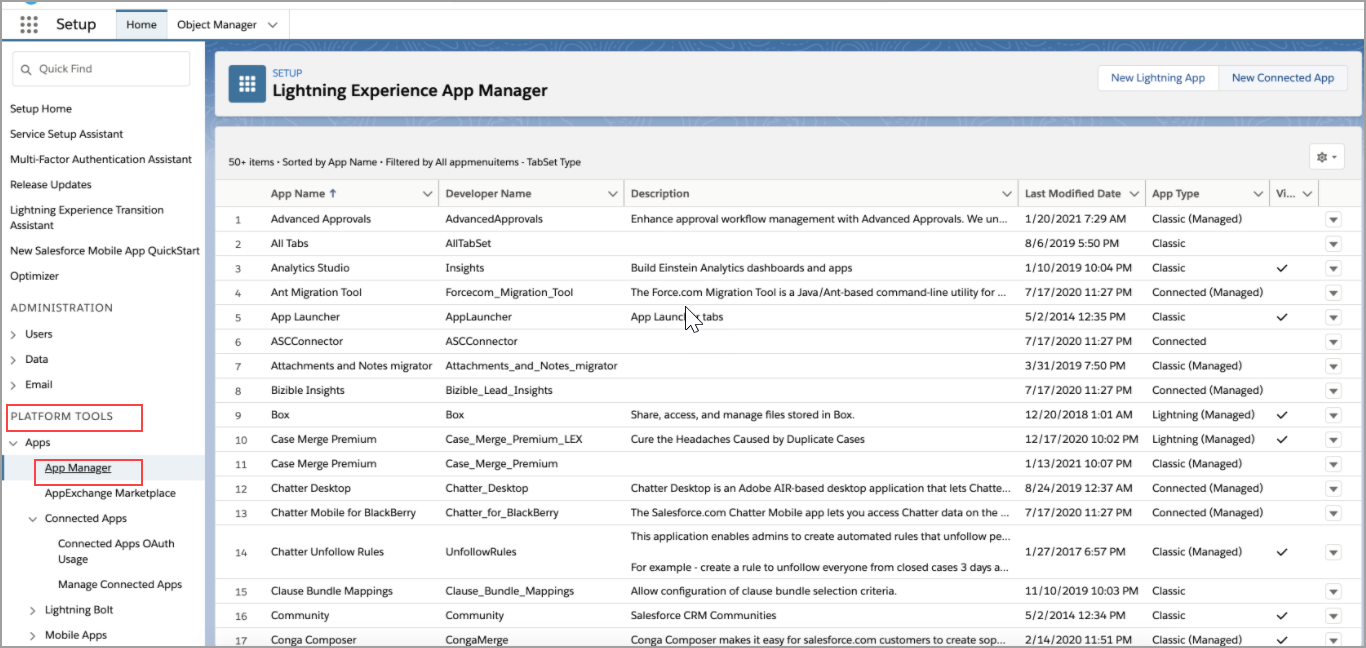
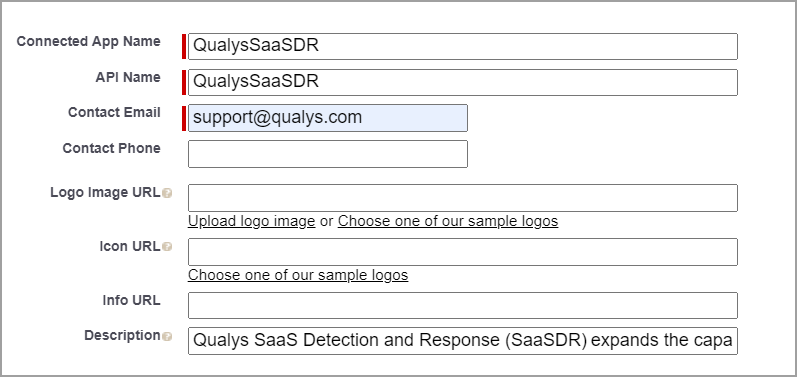
2) Click New Connected App and provide these details:
a. Name: QualysSaaSDR (without hyphen)
b. Contact Email: [email protected]
c. Info Url: User must leave this field blank
d. Description: Qualys SaaS Detection and Response (SaaSDR) expands the capabilities of the Qualys Cloud Platform to help enterprises secure and manage their Salesforce instances.
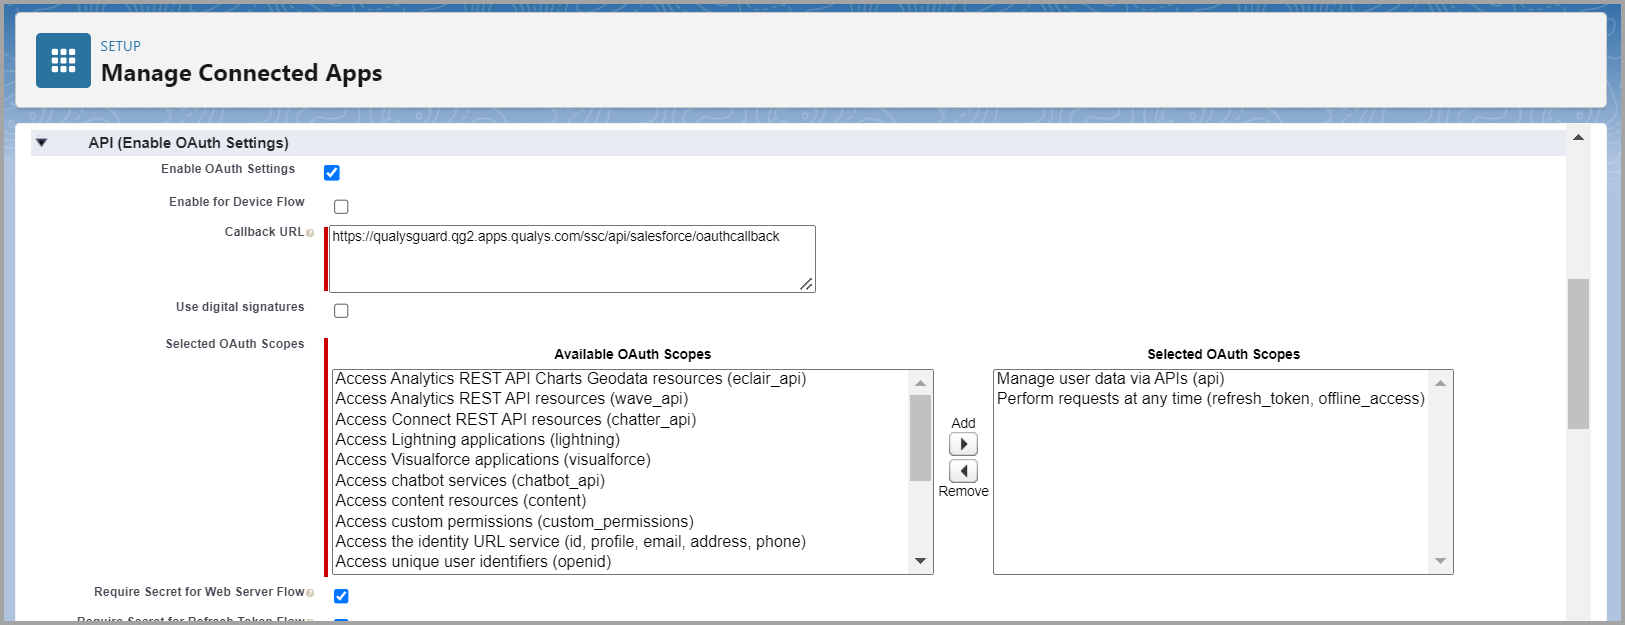
3) Enable OAuth setting:
a. Callback URL: Copy the URL from the SaaSDR connector creation dialog box. (Example: https://qualysguard.qualys.com/ssc/api/salesforce/oauthcallback)
b. Scopes: Move the following 2 scopes to the right column:
- Manage user data via APIs (api)
- Perform requests at any time (refresh_token, offline_access)
4) Click Save > Confirm.
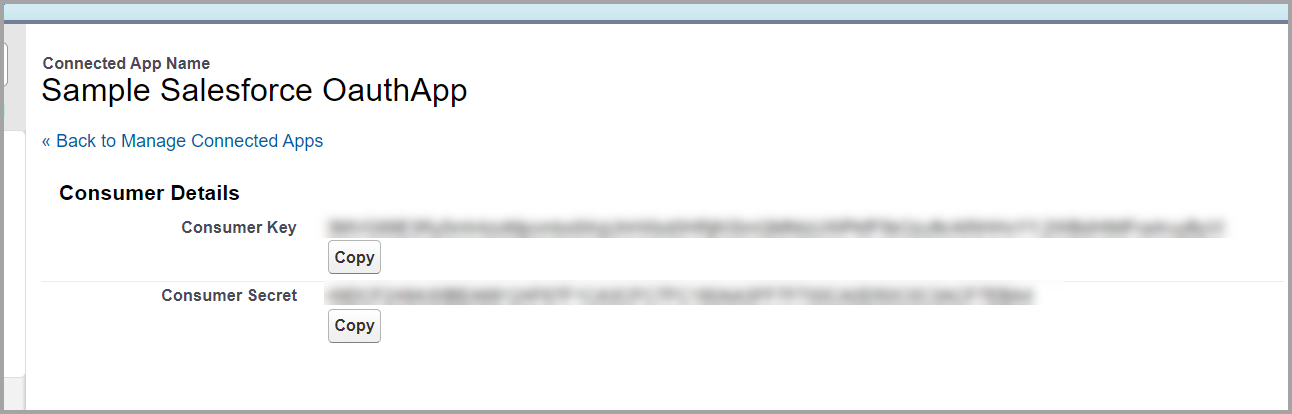
5) The newly created application is displayed with its properties. Click the Manage Consumer Details to view the Consumer Key and Consumer Secret.
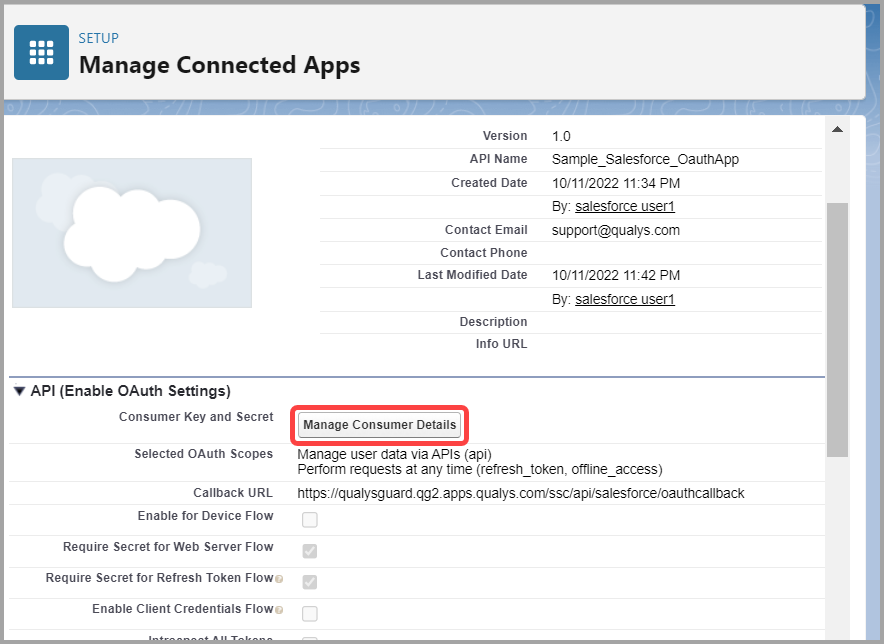
6. You can copy or save these Consumer Key and Consumer Secret details, that might be useful in the later steps.
Enable Permissions
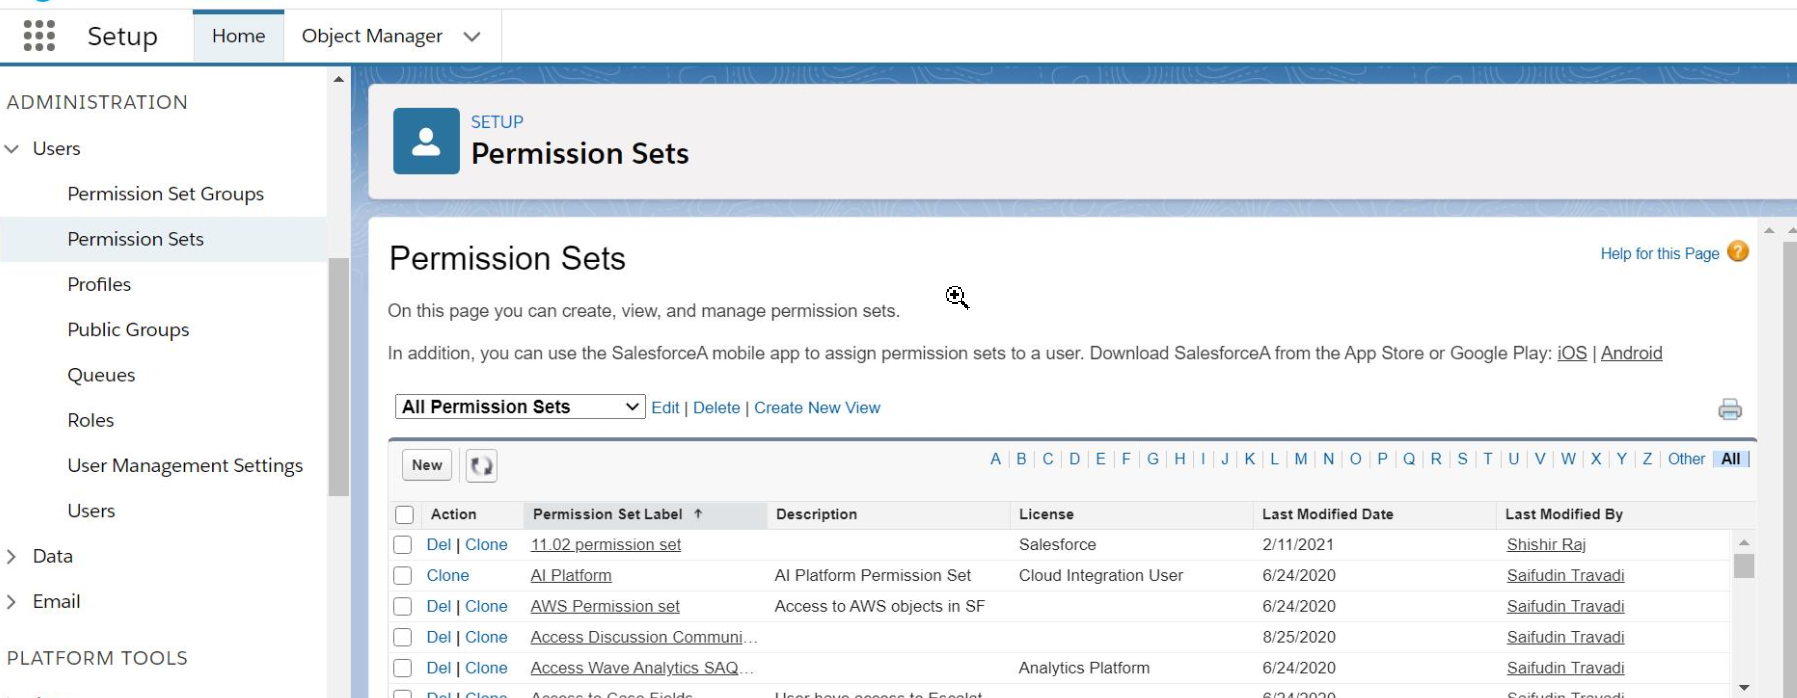
1) On the SFDC Console, navigate to Administrator > Users > Permission Sets.
2) You can choose to add permissions to an existing Permission Set (recommended) or create a new permission set. Select the permission set you want to edit or click New Permission Set to create a new permission set.
3) Navigate to App > App Permissions. Enable the Query All Files permission.
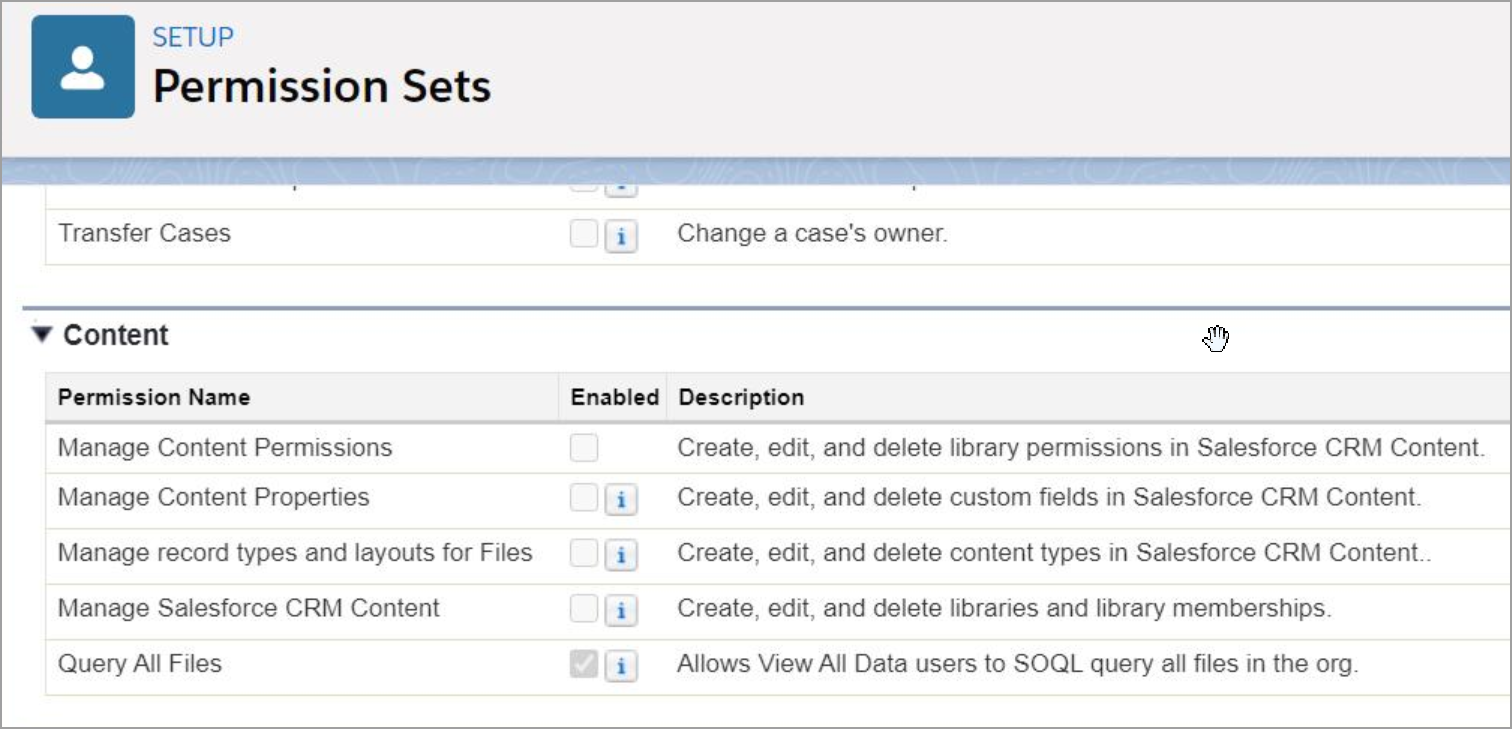
4) Navigate to System > System Permissions. Enable:
a. Manage Certificates permission
b. Customize Application permission
5) Next, we need to associate this new permission set to an Administrator User which would be used to create the connector.

Create Connector in SaaSDR with SFDC as application
1) Now, on the SaaSDR UI, go to Configuration > Connectors and click Create Connector.
2) On the Create Connector page, select Salesforce from the SaaS drop-down menu.
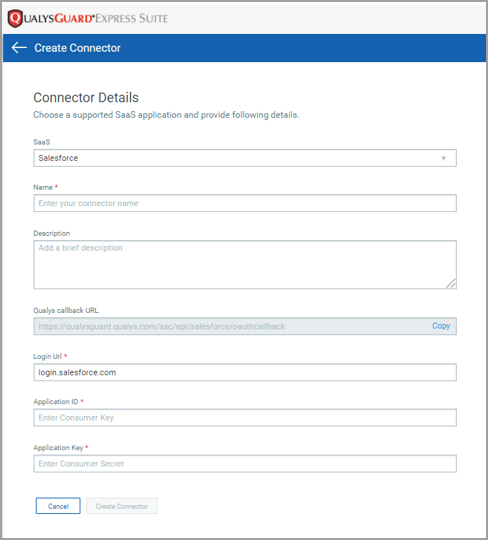
3) Provide the consumer key and secret as Application ID and Application Key in SaaSDR app.
4) Click Create Connector.
You will be redirected to the login page of the application where you need to login using your username. Once your connector is created, it is listed in the Configurations > Connectors list. Here you can check the status and other details of the connector.
That's it!
Once the application is connected, a scan is initiated to pull metadata from the application. This step may take some time to complete based on the number of resources to be catalogued in your application.