Microsoft Office 365 Connector
SaaS Detection and Response (SaaSDR) enables you to understand the compliance posture of your SaaS applications. For Office 365, you can validate your environment against CIS controls using SaaSDR.
The Center for Internet Security (CIS) has published CIS benchmarks for O365 that can be validated using SaaSDR. Several of these controls can only be validated using PowerShell commands executed in your Azure environment. To accomplish this, you also need to install the PowerShell Module (PM) in your Azure environment as mentioned in Step 4.
Prerequisites
1) The instructions involve running a script that uses the Azure CLI. Please make sure you have the Azure CLI v 2.45.0 installed.
To download Azure CLI, click here.
2) For Windows, ensure you have a bash terminal installed, for example Cygwin. This is used to execute the script to complete the install.
3) An active paid subscription of Microsoft Azure to create a serverless deployment containing the following resources-
- Azure Function App
- Azure Storage Account
- Azure Key Vault
All these resources would be created in a separate Azure resource group for easy management.
4) On your local computer, you must temporarily disable proxy while executing the scripts.
5) You must have the following two users:
-
User 1 with Global Reader and Privileged Role Administrator permissions. The MFA must be disabled for this user. This user scans the O365 domain.
-
User 2 with Global Administrator permissions and an active paid subscription of Microsoft Azure.
Installation
Follow these steps to create a Office 365 Connector:
2) Create Connector in SaaSDR with Office 365 as application
Create Azure Resources
1) Download the qualys_azure_setup.zip file by clicking here. This file contains the required code for the Azure functions that validate individual controls as well as the script to be executed (qualys_azure_installation.sh).
2) Unzip the file that you downloaded in a temp folder.
3) Open Bash Terminal.
4) Execute the qualys_azure_installation.sh script as - sh qualys_azure_installation.sh.
You can use the following command line parameters while running the script:
| Parameter | Mandatory/Optional | Description |
|
-v |
Optional |
Powershell runtime version. Supported version: 4 (default value). |
|
-p |
Optional |
The SKU plan for the function application. The higher the plan, the faster the function application. Minimum supported version: B2 (default value). Supported versions: Note: The cost of the Azure function application increases with higher plans. |
|
-S |
Optional |
The SKU type for the storage account. Minimum supported type: Standard_LRS Supported types: Note: The cost of the Azure function application increases with the increase in SKU type. |
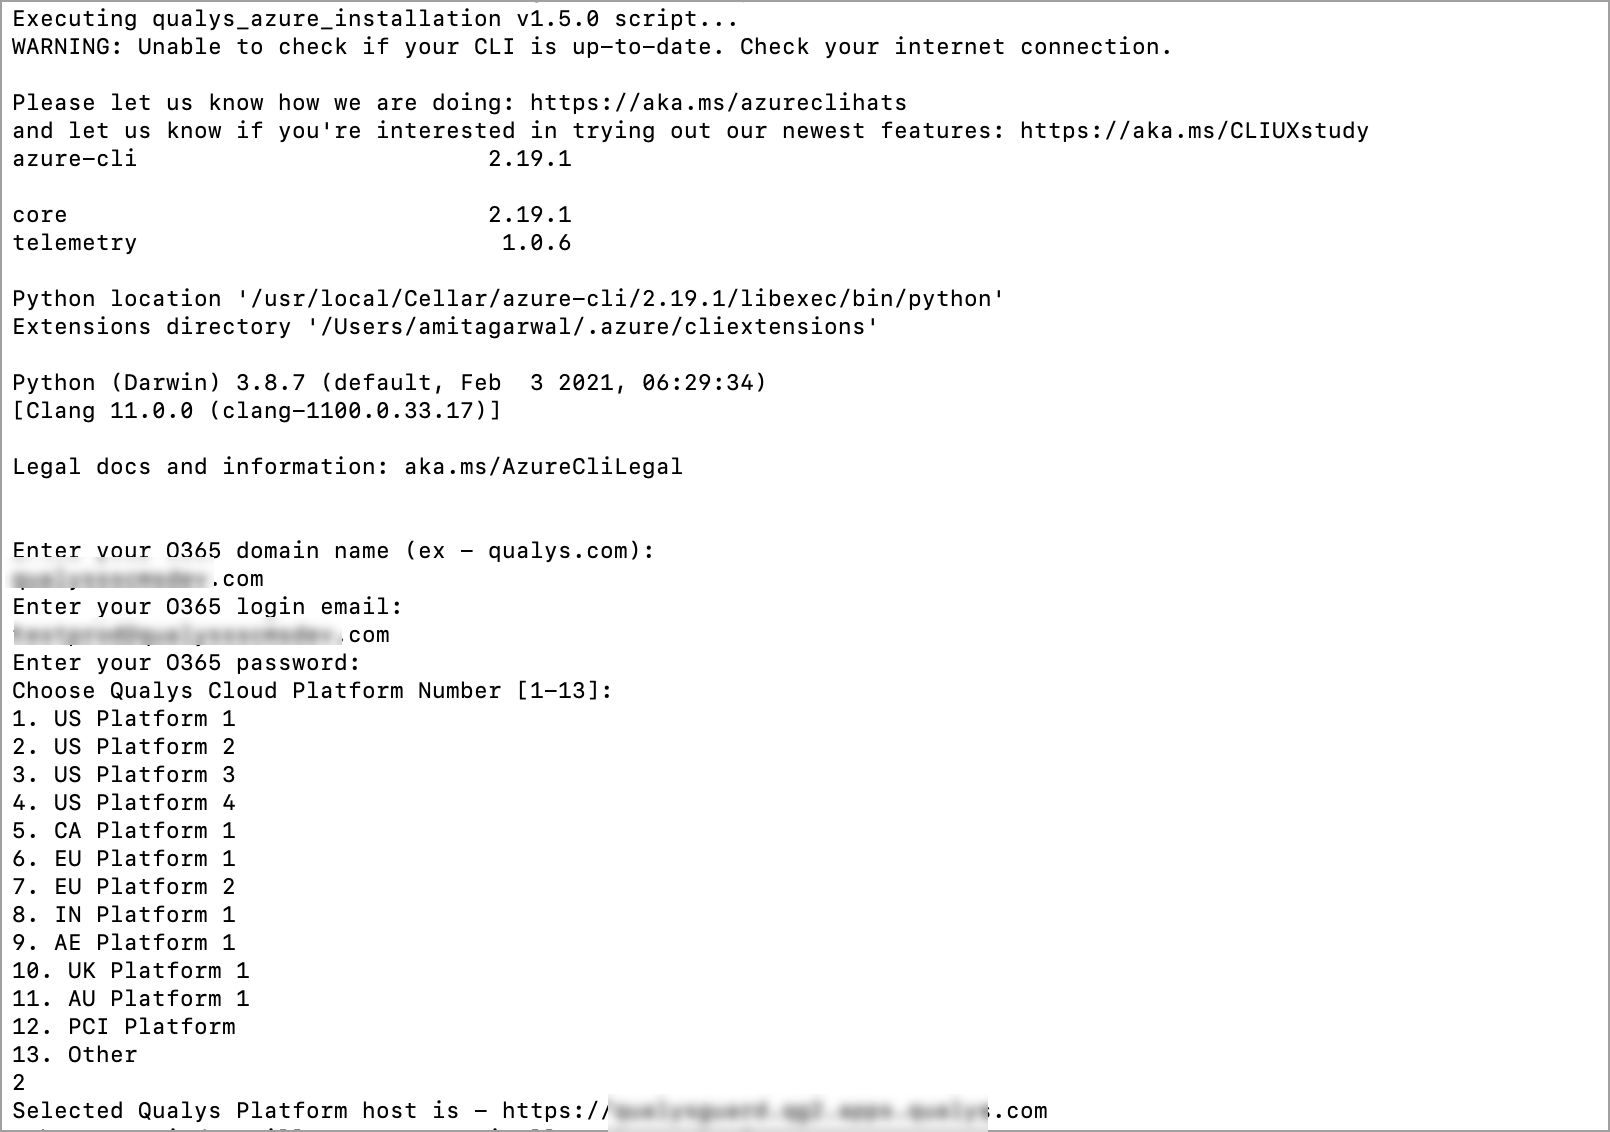
5) Enter O365 domain you wish to scan and the credentials of User 1. The prerequisites for the user are:
a. User must have the following permissions -
- Global Reader
- Privileged Role Administrator
b. Must have MFA disabled. This is required because not all powershell modules support alternate/modern way of authentication. If MFA is enabled, the controls related to the MSOL module will show the Error status.
Note: To disable the MFA for the user go to Azure Active Directory > Users > "Per-user MFA" feature.
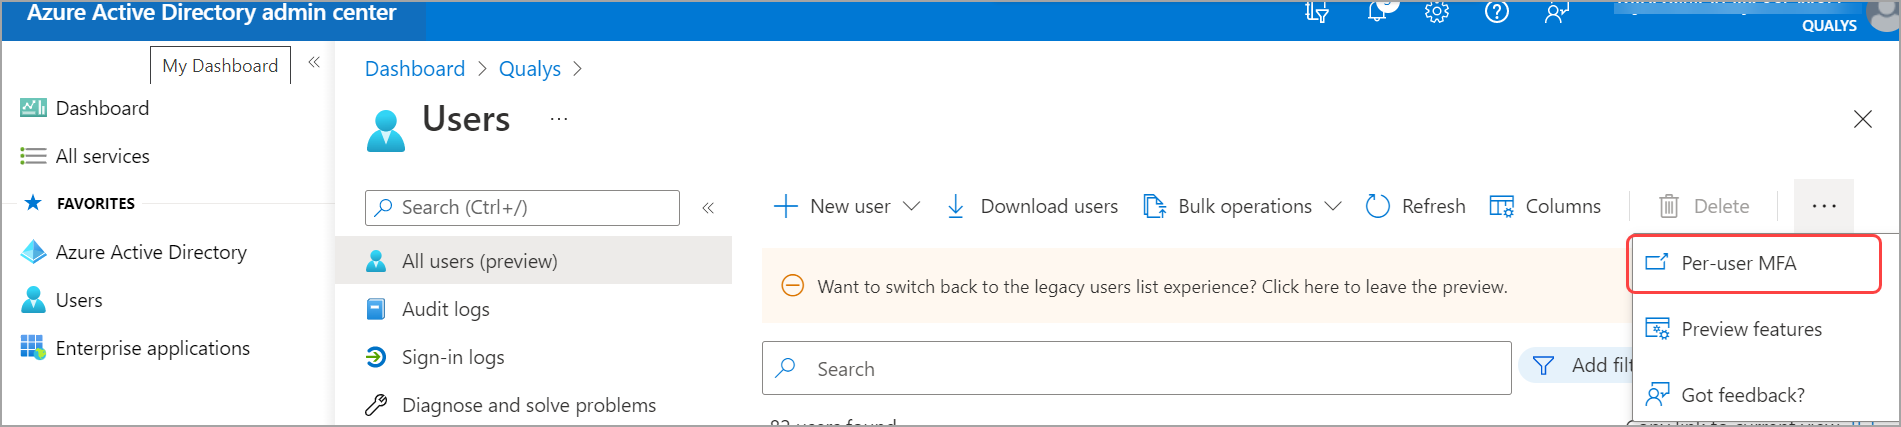
Ensure that for all the MFA policies in the organization, this user is excluded from enabling the MFA policy.
6) Select the Qualys Cloud Platform Number from the displayed list. You can find this number where Customer’s subscription has been enabled.
You will be redirected to a browser window where you can login to Microsoft Azure portal.
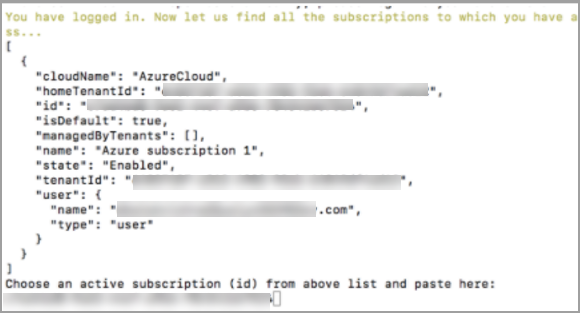
7) Log in using User 2 credentials to an active paid subscription of Microsoft Azure.
8) Once you are logged in, choose an active paid subscription from the list of the displayed subscriptions.
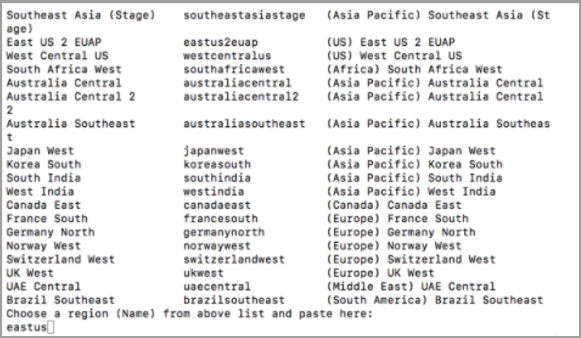
9) Choose the region in which the functions need to be installed.
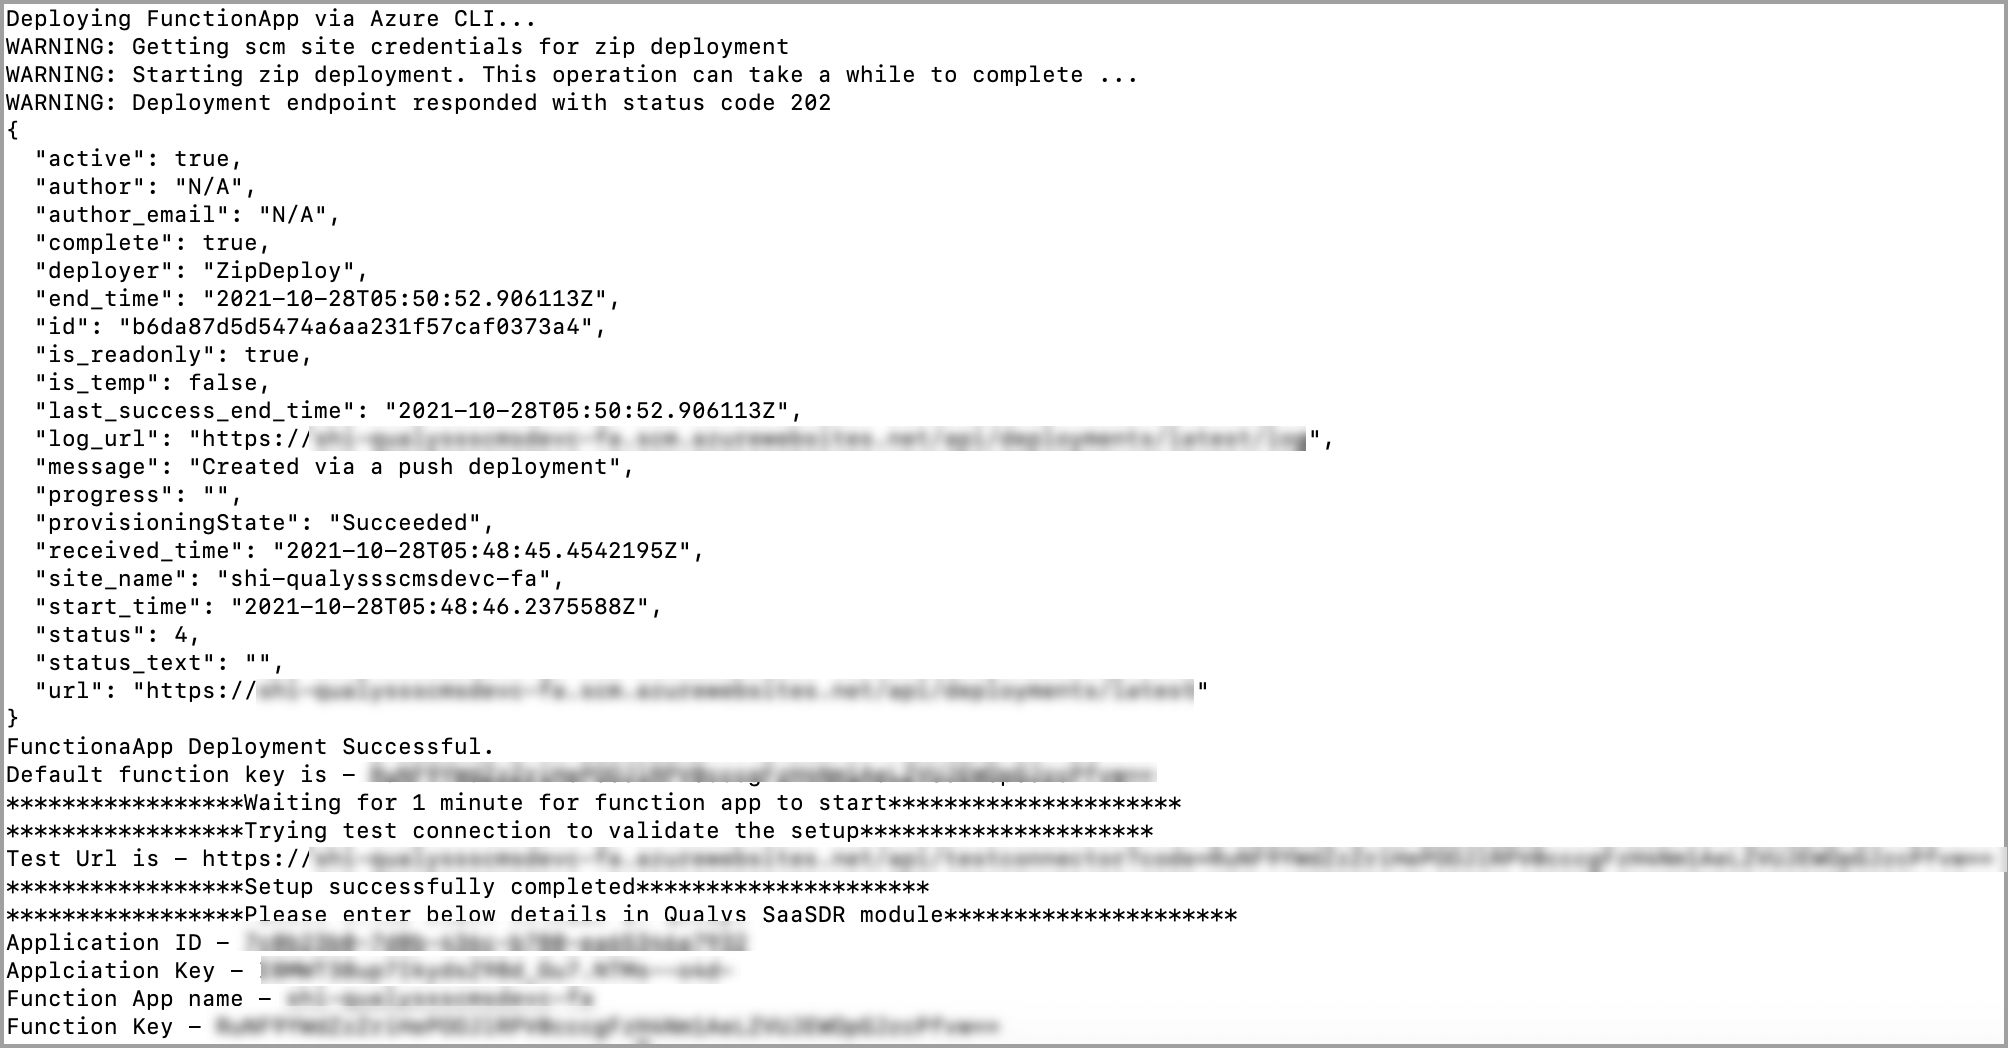
10) After all the resources are created, uploading of the functions is initiated. This step will take about 10-15 minutes. Please do not stop this upload.

11) Once the functions are uploaded, the Application ID, Application Key, Function Name and Function Key are displayed at the console.
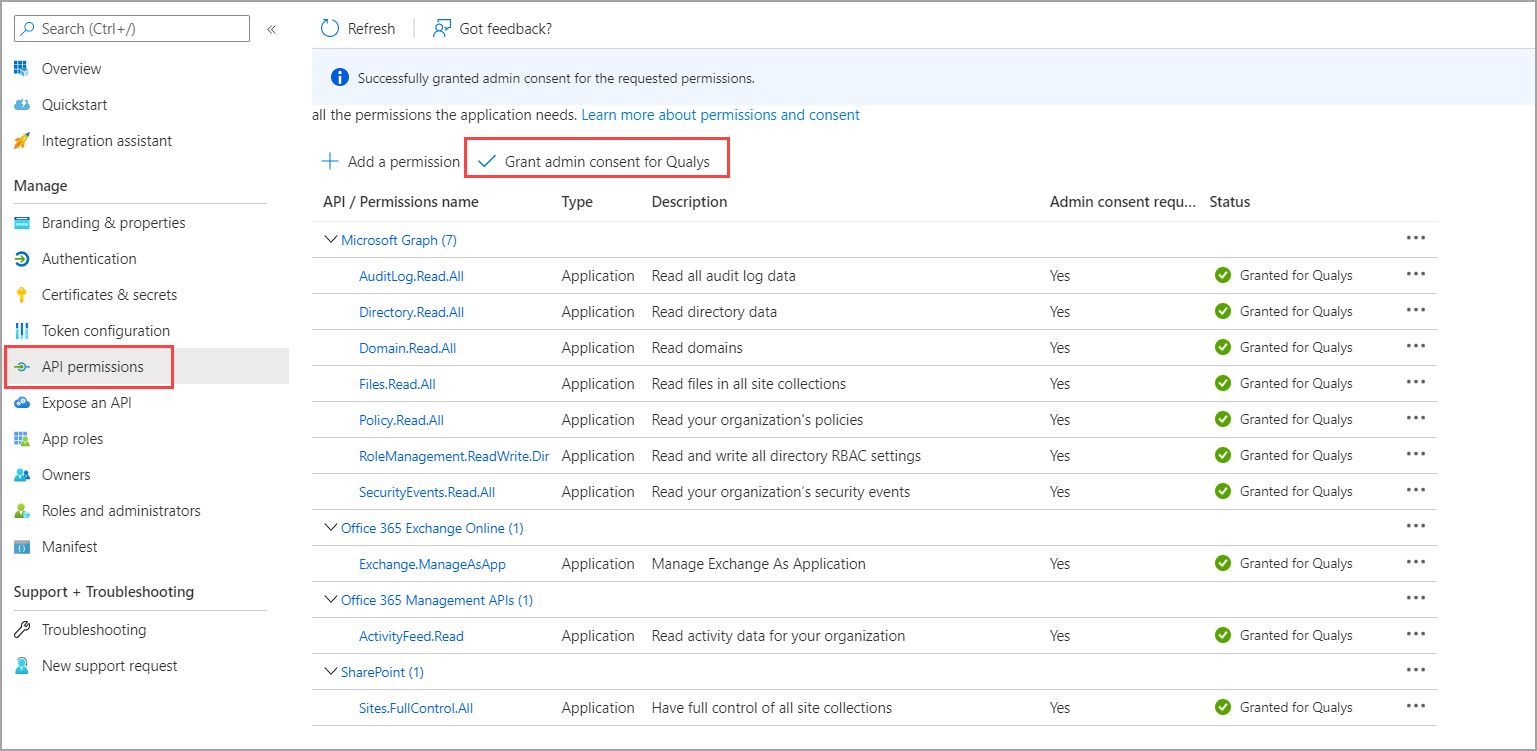
12) Once app deployment is successful, go to the Azure portal (https://portal.azure.com/) to grant consent for the required permissions.
i) Go to Azure Active Directory > App registrations
ii) Select the registered app
iii) Go to API permissions and click Grant admin consent for Qualys
Create Connector in SaaSDR with Office 365 as application
1) On the SaaSDR UI, go to Configuration > Connectors and click Create Connector.
2) On the Create Connector page, select Office 365 from the SaaS drop-down menu.
3) Provide the Application Id, Application Key, Function Name and Function Key received in the previous steps.
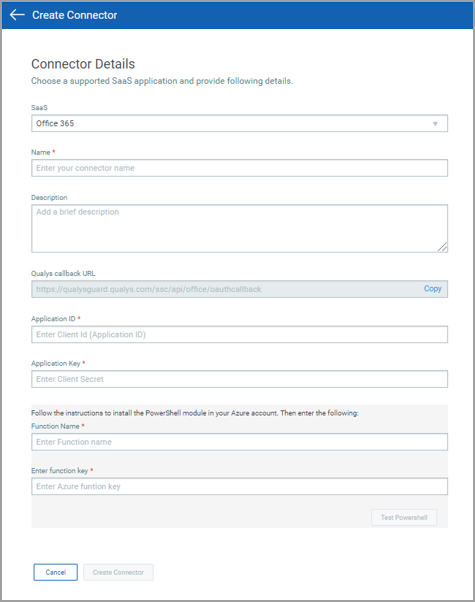
4) Click Create Connector.
You will be redirected to the login page of the application where you need to login using your administrator credentials (This user must be a Global Administrator to be able to Grant Access to newly created application). Once your connector is created, it is listed in the Configurations > Connectors list. Here you can check the status and other details of the connector.
That's it!
Once the application is connected, a scan is initiated to pull metadata from the application. This step may take some time to complete based on the number of resources to be catalogued in your application.