The Connector for Amazon continuously discovers Amazon EC2 and VPC assets using an Amazon API integration. Connectors may be configured to connect to one or more Amazon accounts to automatically detect and synchronize changes to virtual machine instance inventories from all Amazon EC2 Regions and Amazon VPCs.
Get an overview of the steps to secure Amazon Web Services using Qualys: steps to sync inventory and metadata from an AWS account, deploy Qualys sensors, scan, and view the security and compliance of your AWS EC2 instances.
Watch Video Series | Download User Guide
The AWS connectors with cross-account roles use Qualys accounts. If you do not wish to use Qualys account, you can use the base account feature to set up the AWS connectors. You can configure your own AWS account as a base account while setting up the AWS Connectors instead of using Qualys account.
You can create only one base account per account type. Ensure that the AWS account ID for which you configure that base account has policies associated in the AWS console.
Before you create a new connector, create a base account for the same account type (region). If you do not create a base account, you can still create a connector.
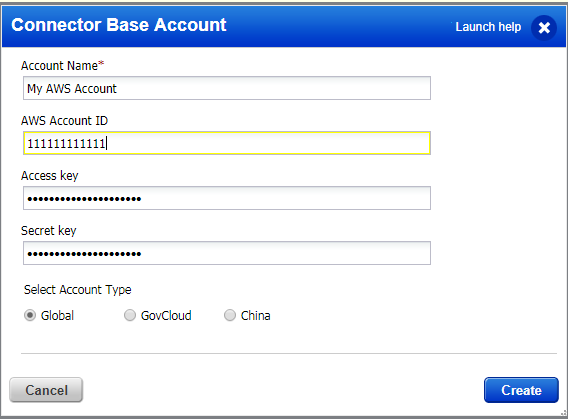
Go to Connectors > Connectors and then click Configure Base Account. Provide name, AWS account ID, access and secret keys and then select the account type. Show meShow me
We recommend you setup one EC2 connector per AWS account. Our connector wizard walks you through the steps - set up ARN authentication, select EC2 regions and activate your EC2 assets for scanning.
- Cross-Account Role Authentication: This lets you grant Qualys access to your AWS EC2 instances without sharing your AWS security credentials. Qualys will access your AWS EC2 instances by assuming the IAM role that you create in your AWS account. This eliminates the overhead of managing IAM user keys in your Qualys subscription. For more information, refer to Securing Amazon Web Services using Qualys (pdf).
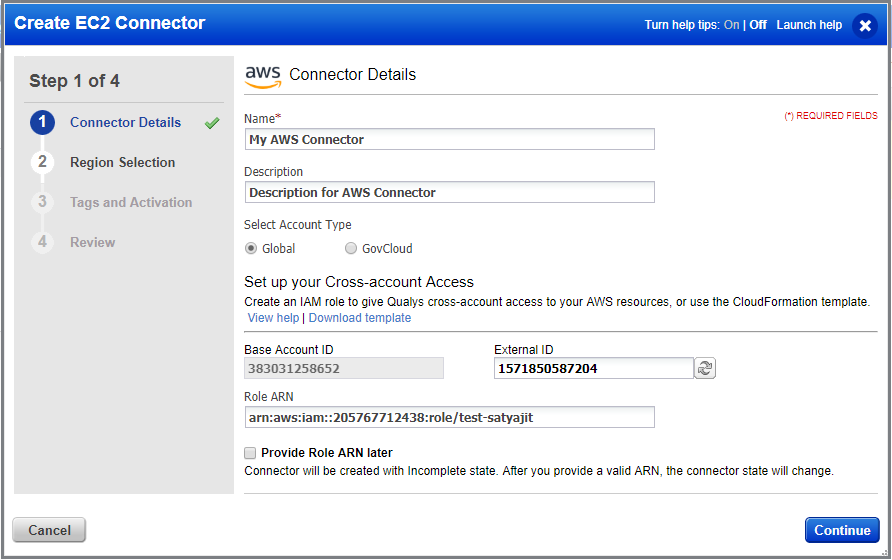
1) Choose AssetView (AV) from the app picker. Then navigate to the Connectors tab, and click Create EC2 Connector.

2) You will need to provide a name description and select account type. Provide the Role ARN and click Continue. Learn moreLearn more
Qualys supports the creation of AWS EC2 connectors using a cross-account access role. This allows you to grant Qualys access to your AWS EC2 instances without sharing your AWS security credentials. Qualys will access your AWS EC2 instances by assuming the IAM role that you create in your AWS account. This eliminates the overhead of management of IAM user keys in your Qualys subscription.
You must associate valid AWS IAM (Identity and Access Management) credentials with sufficient privileges to read from your AWS account through the EC2 APIs. This credential comes in the form of an AWS IAM Access Key pair, which must be created by your AWS administrator and then typed/pasted into your Qualys EC2 Connector configuration.
AWS provides various out-of-the-box “read only” permission policy templates, many of which would allow our EC2 Connector to work. As of this writing, these three templates are known to include sufficient access for the Qualys EC2 Connector:
- Read Only Access
- Amazon EC2 Read Only Access
- Security Audit.
If you wish to provide absolute minimum permissions by creating a custom AWS permission policy, note that only the following Amazon EC2 API permissions are actually needed by the Qualys EC2 Connector as of this writing:
- DescribeInstances
- DescribeImages
- DescribeNetworkInterfaces
You can associate these permissions at the User level or Group level in AWS IAM.
Qualys discovers and syncs asset inventories every 4 hours. Asset inventory is independent of a scan.
The wizard will walk you through the steps for selecting EC2 hosts to scan.
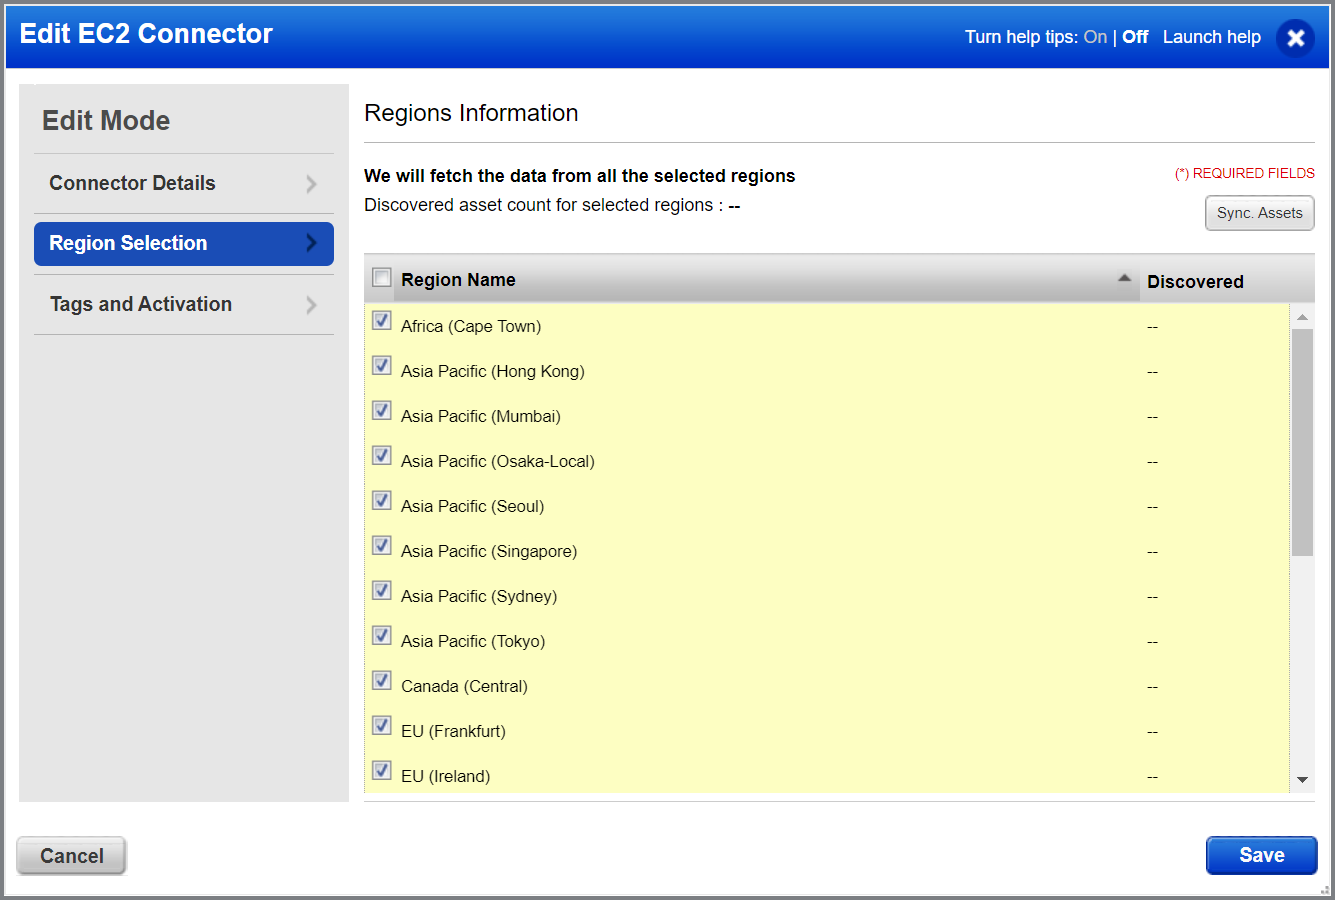
3) Select the regions you want to collect EC2 data from.
You can use the Sync Assets button to get the asset count for each region. If you select only a few regions here, you can later modify them to add additional regions.
Tip: We recommend selecting all regions. This gives you the visibility of whether someone has turned up an instance in another region.
4) EC2 assets must be activated for your Qualys license to scan them.
If you are going to use the virtual scanner in AWS, you must activate your assets here or manually from AssetView. By choosing “Automatically activate,” we'll automatically activate all discovered EC2 assets (size medium and above). This makes them ready for scanning.
By default, assets with instance type m1.small, t1.micro or t2.nano are excluded from activation. These assets will be imported to Qualys; however, they won’t be activated for VM, PC or SCA. Please reach out to your Technical Account Manager or Qualys Support to lift this limitation and allow assets with these instance types to be auto-activated based on the connector settings.

5) While creating the EC2 Connector, use the CreateConnector in CloudView option (available in the Tags and Activation panel) to enable that EC2 connector to be available in the CloudView App. This will save you from creating a separate connector in CloudView. Once enabled in AssetView, disabling this option late will not remove the corresponding connector from CloudView. You need to remove the connector from the CloudView application explicitly.
6) EC2 Scans with Qualys relies upon a “scan-by-tag” workflow.
Tip: Associate a Qualys tag to all of your EC2 instances. To scan using a virtual scanner, the use of tags is required. It’s recommended you create at least one generic Asset Tag (for example, "EC2") and have the connector automatically apply the EC2 tag to all imported assets.
You can also create dynamic tags that allow you to tag your EC2 assets automatically based upon the IP address of the discovered EC2 instances & other EC2 attributes.
Click Finish to complete the connector creation.