Qualys scanners support IEEE 802.1q VLAN tagging protocol. When connected to a suitably configured trunk port, VLAN scanning allows the scanner to tag frames with the target VLAN ID, enabling your switching fabric to move scan traffic across your network, and allowing the scanner to participate in the VLAN. Participation in the VLAN allows the scanner to scan devices in the same VLAN directly as a “neighbor”. This eliminates dependencies on Layer 3 devices, such as firewalls, load balancers, IDS/IPS and so forth.
- A potential increase in overall scan performance by reducing the delays associated with transiting Layer 3 devices
- Better OS and service fingerprinting since Layer 3 devices often modify packet headers or change the handling of non-RFC compliant datagrams
- Reduction of compute and other resources on Layer 3 devices particularly half open connection state tables
- Reduction of “ghost host” issues due to inappropriate responses from Layer 3 devices to datagrams destined for unused NAT and VIP addresses
Use of VLAN tagging does not preclude the simultaneous use non-VLAN tagged scan traffic on the same interface. Neither does it require the use of a dual-NIC configuration on the scanner.
- VLAN scanning must be enabled for your subscription. Please contact Support or your Technical Account Manager to enable this feature.
- The scanner must be connected to a trunk port.
- The trunk port must be configured to allow the necessary VLANs to the interface.
- Public/Private cloud provider distributions and offline scanner appliances do not support VLAN trunking.
- Physical scanners support up to 4094 IPv4 VLANs and up to 3270 IPv6 VLANs for devices with a serial number over 29000 and up to 99 VLANs for devices with a serial number under 29000.
- Virtual scanners (except public/private cloud provider and offline scanner images) support up to 4094 IPv4 VLANs and up to 3270 IPv6 VLANs.
For more information about the currently supported Virtual and Cloud platforms, see Qualys Virtual Scanner Appliance: Platform Qualification Matrix.
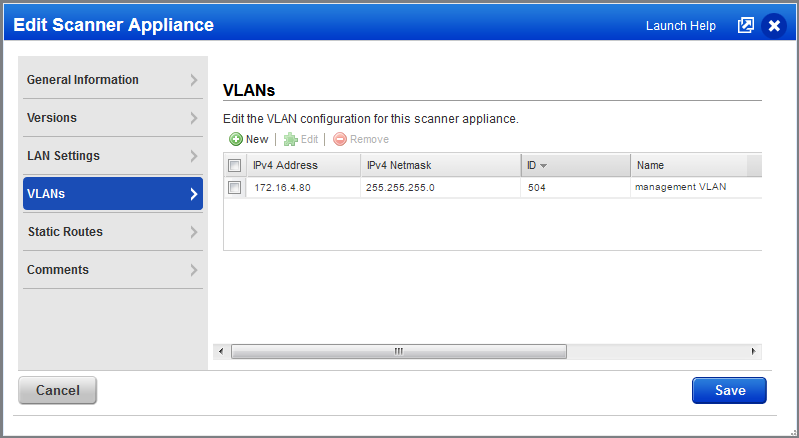
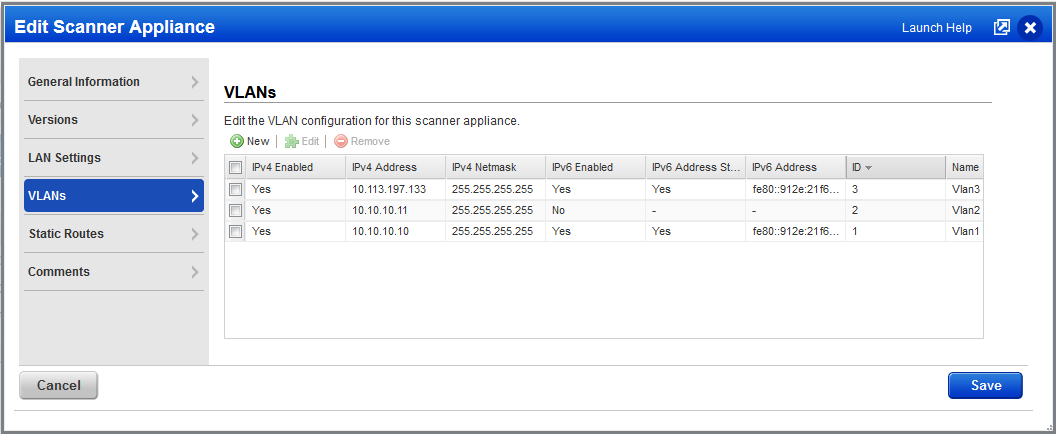
The following information is required for each VLAN the scanner is configured to participate in.
You’ll define a single “native” VLAN on the appliance. This is required only if the appliance needs to reach the Qualys datacenter over a VLAN-tagged network segment. Both Static and DHCPv4 IP addresses are supported in this case.
You’ll define VLANs in the Qualys UI for scan traffic only. The following information is required for each VLAN the scanner is configured to participate in.
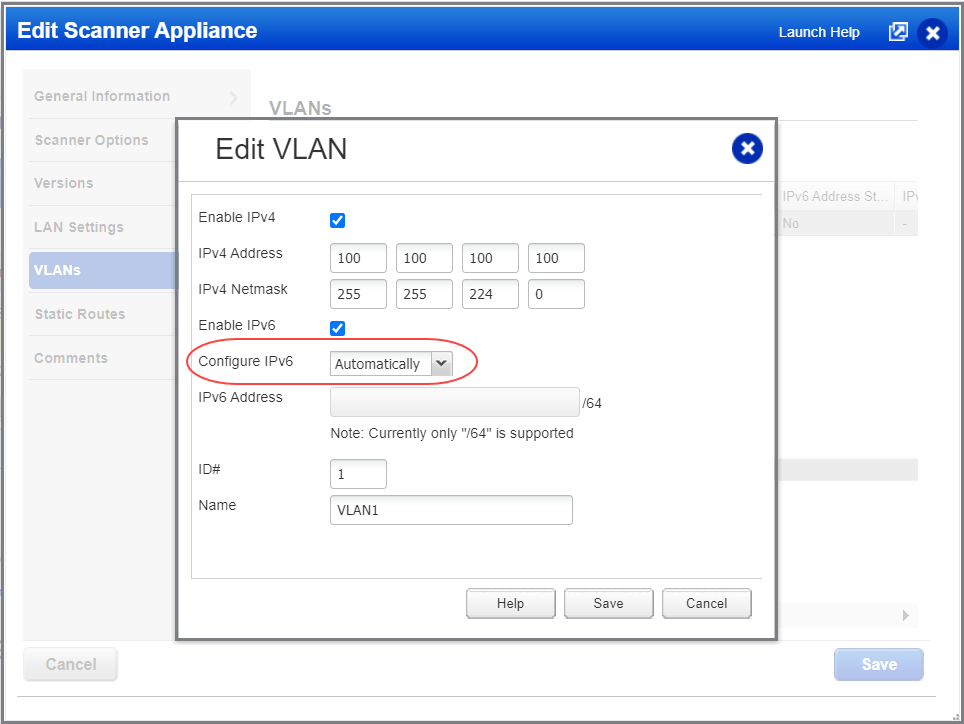
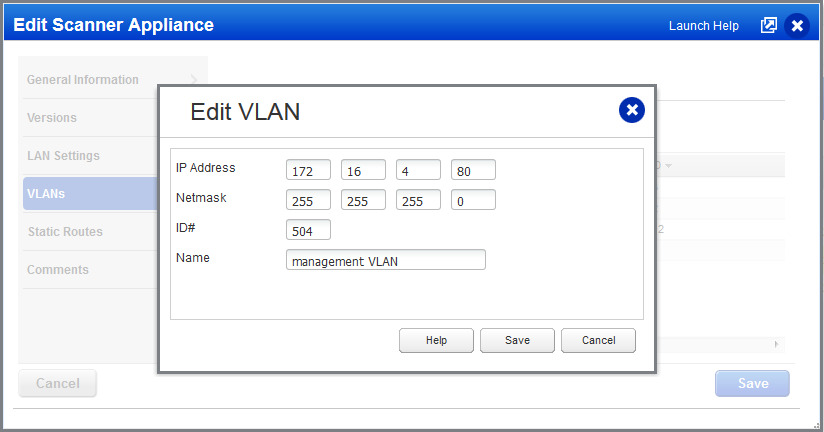
IP Address – The IP address must be unique per appliance. This means the same IP address cannot be defined in another VLAN configuration for the same appliance. For IPv4, only a static IPv4 address is supported. If your account is configured to allow IPv6, then you can provide a static IPv6 address or we can get the IPv6 address from SLAAC (RA). We do not support DHCPv4 or DHCPv6 for UI-defined VLANs.
Netmask – A valid netmask defining the subnet. Example: 255.255.255.0
ID – A VLAN ID. You may specify a number between 0 and 4094, inclusive. The VLAN ID must be unique per appliance. This means the same VLAN ID cannot be defined in another VLAN configuration for the same appliance.
Name – A VLAN name to identify the VLAN configuration in the VLANs list.
It is possible to configure a single (“native”) VLAN from the appliance console. This can be configured using the LCD panel (for a physical appliance) or virtual appliance console.
**Note**
This VLAN cannot be viewed or edited within the user interface.
This VLAN takes precedence if VLAN with the same tag is defined in the user interface.
These steps assume you have already deployed, connected and verified that the scanner appliance is operational.
1) Configure the trunk port on the switch to allow the necessary VLANs.
2) Log in to Qualys as a Manager, go to Scans > Appliances, select the appliance, and choose Edit from the Quick Actions menu.
3) Choose the VLANs tab on the left.
4) Click New (or Edit to change existing VLAN information). Enter the IP address, subnet mask, ID, and a name for the new VLAN as shown below. When you have finished entering all the required VLAN information click Save.
Once configured the scanner will automatically use 802.1q VLAN tags for traffic matching a configured VLAN address and netmask. This will allow your switching fabric to move the traffic using Layer 2, enabling the scanner to scan targets in those subnets as a neighbor. Traffic for IPs not matching any of the configured VLANs will be sent via the default network interface and default gateway as per normal operations.
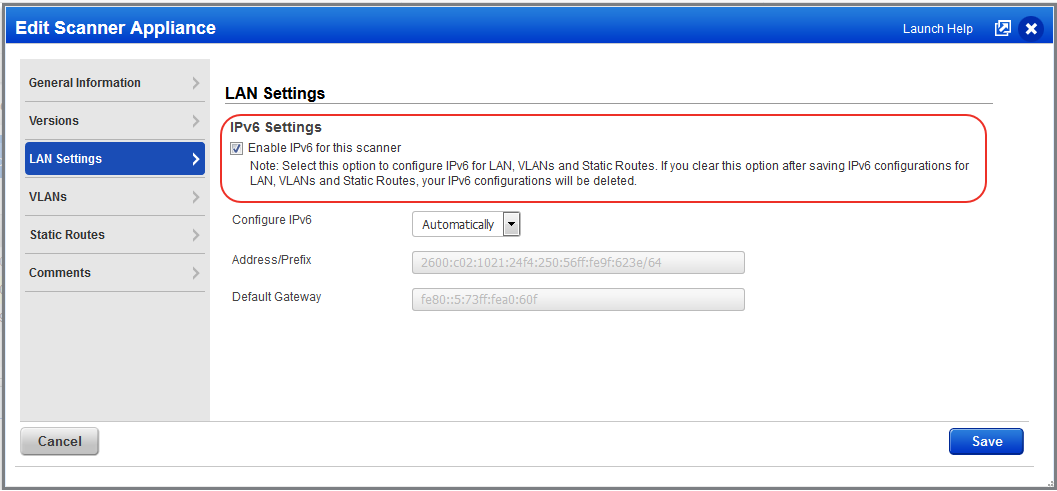
The IPv6 Scanning feature must be enabled for your account. Please contact Support or your Technical Account Manager if you would like have this feature turned on.
You must enable IPv6 on the scanner to add IPv6 configurations. Select "Enable IPv6 for this scanner" on the LAN Settings tab.
On the VLANs tab you'll see IPv4 and IPv6 configurations that have been configured for the appliance.
When you create or edit a VLAN, click the Enable IPv4 option to add IPv4 details and click the Enable IPv6 option to add IPv6 details. You can choose to enable IPv4 only, IPv6 only or both.
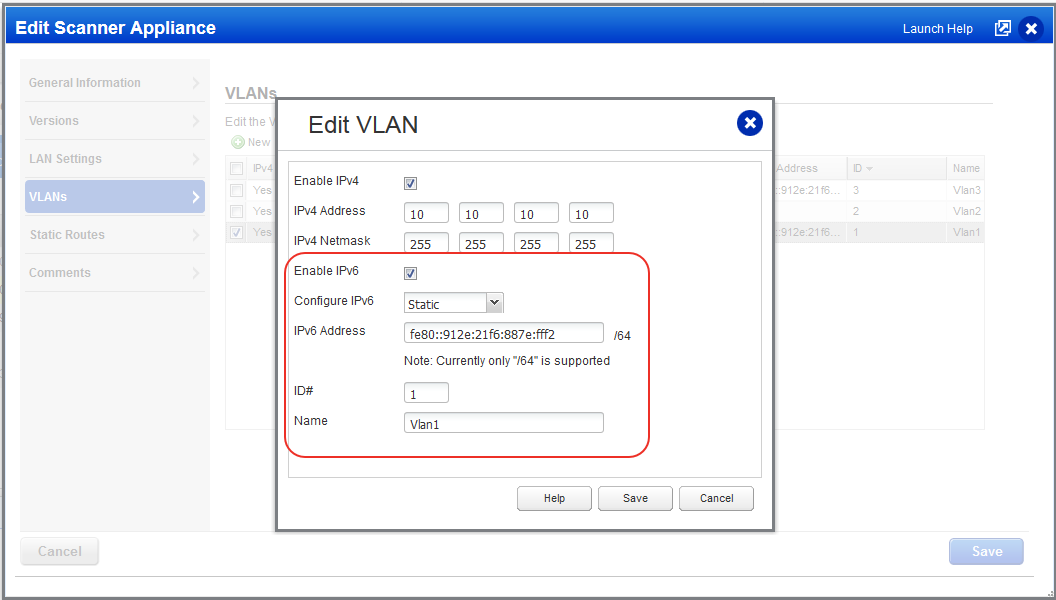
When you enable IPv6, you must choose Static or Automatically to define how you want to configure the IPv6 address. When you choose Static, you’ll enter the static IPv6 address. When you choose Automatically, we’ll get the IPv6 address from the Stateless Address Autoconfiguration (SLAAC) via Router Advertisements (RA). Note that DHCPv6 is not supported.