How to configure scanner proxy settings (in AWS)
Specify the proxy server as part of the instance configuration in Amazon AWS. You'll enter proxy settings in the User Data field - the same field where you enter the personalization code.
PERSCODE=12345678901234
PROXY_URL=username:password@proxyhost:port
Formatting
If you have a domain user, the format is domain\username:password@proxyhost:port
If authentication is not used, the format is proxyhost:port
proxyhost is the IPv4 address or the FQDN of the proxy server.
Examples
PROXY_URL=jdoe:[email protected]:3128
PROXY_URL=jdoe:[email protected]:3128
Want to edit the scanner proxy settings?
You'll need to go to your AWS instance and stop it. Then update the User Data field with updated proxy information.
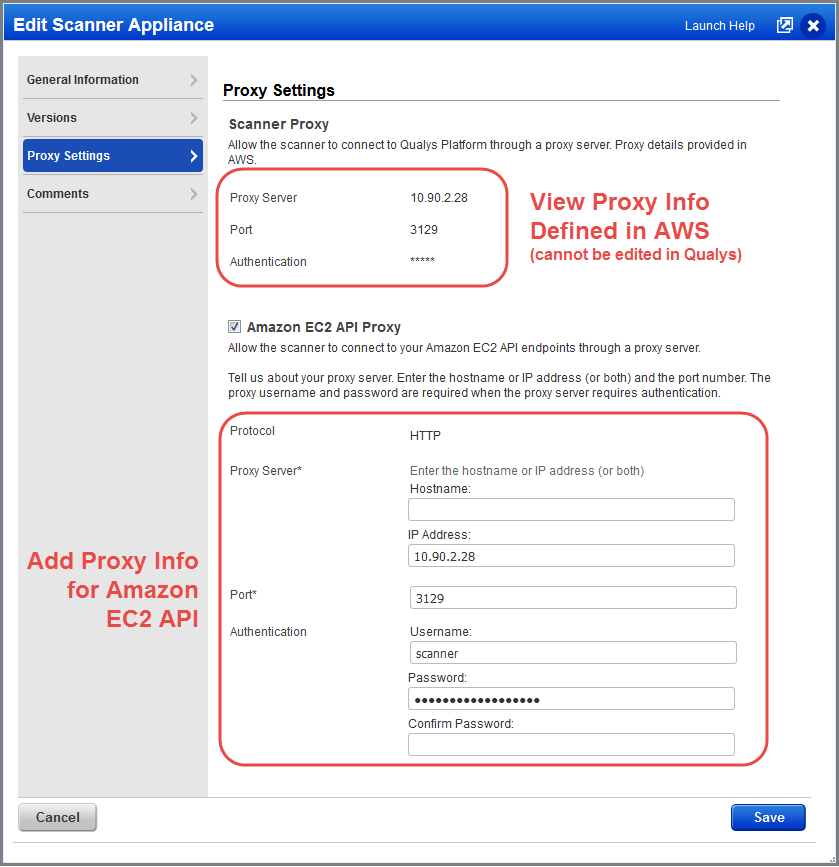
How to configure API proxy settings (in Qualys UI)
Have a proxy server for connecting to your Amazon EC2 API endpoints? If yes, you can edit your scanner appliance in the Qualys UI to provide details about the proxy server. Enter the proxy server's hostname and/or IP address, port, and authentication credentials (if required by the proxy server).
You must allow the EC2 Region endpoints to be accessible via the proxy. Identify the URL to an endpoint from here - http://docs.aws.amazon.com/general/latest/gr/rande.html#ec2_region
Sample Proxy Settings