Instead of manually setting a default expected value for your File Integrity checks, you can choose the "Use scan data as expected value" option in the UDC and we’ll set the expected value for you based on the actual value returned by the scan.
It’s a 2-step process to set this up:
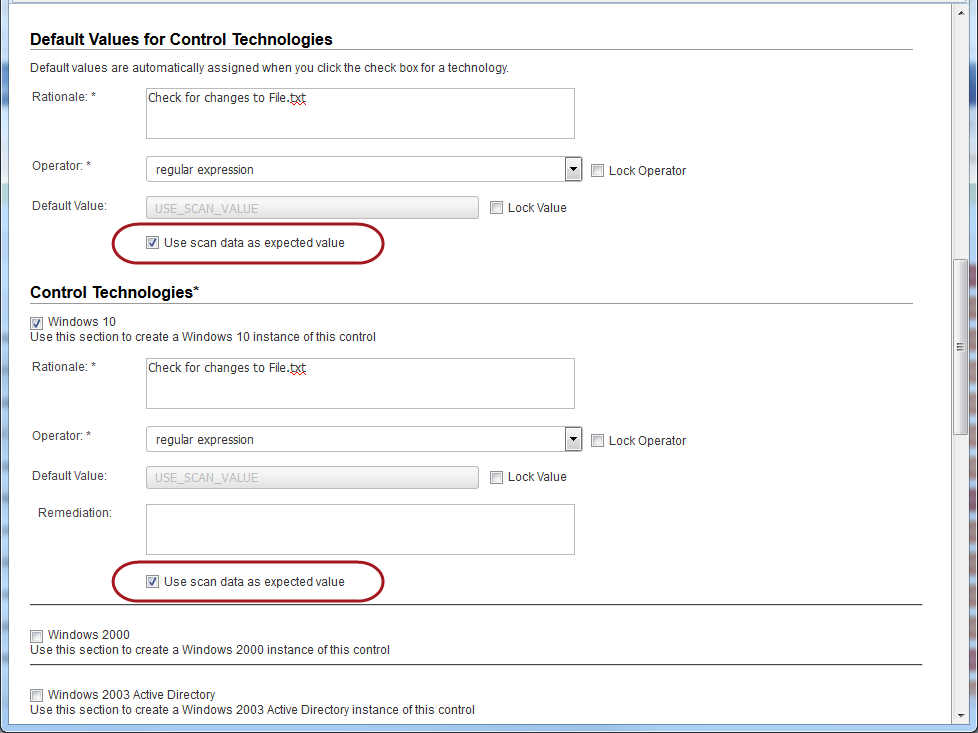
Go to PC > Policies > Controls > New > Control, and choose File Integrity Check for Windows or Unix. Select “Use scan data as expected value” for individual technologies or make it the default for all technologies. When selected, you’ll see USE_SCAN_VALUE in the Default Value field. Show meShow me
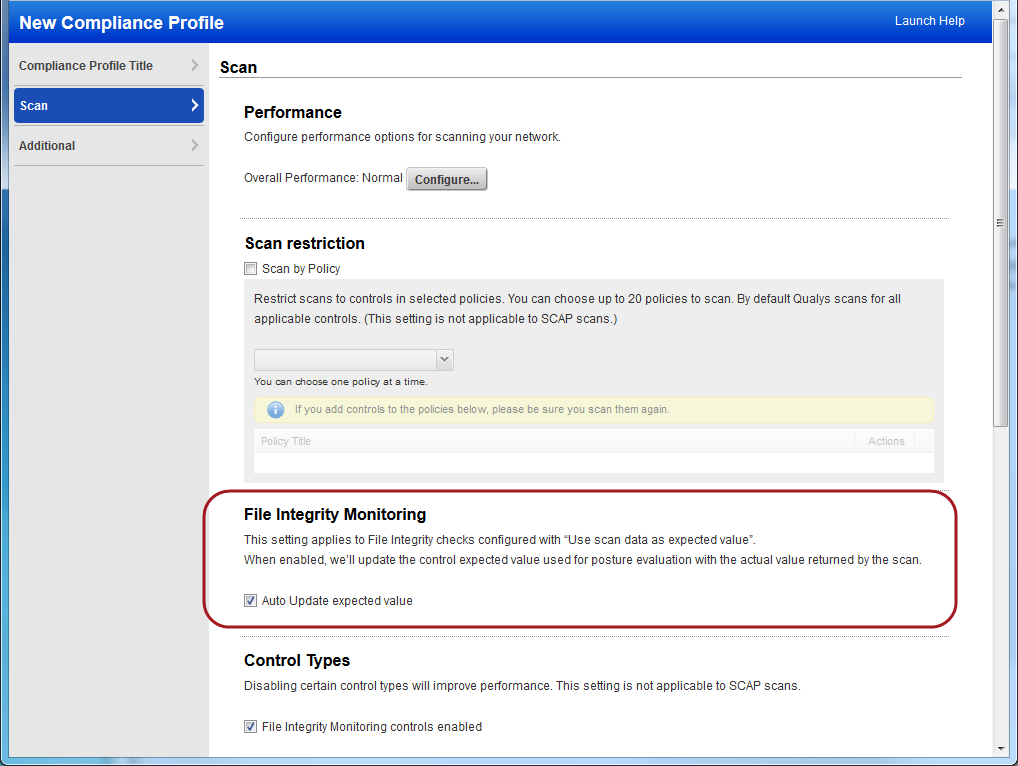
Go to PC > Scans > Option Profiles. Create a new profile or edit an existing one. On the Scan tab, select "Auto Update expected value" under File Integrity Monitoring. You must also select "File Integrity Monitoring controls enabled" to include these controls in your scan. Show meShow me
If you have Cloud Agent, enable "Auto Update Expected Value" under Agent Scan Options section in the control. When enabled, we’ll update this control’s expected value with the actual value collected from each cloud agent scan.
To generate reports reflecting results for each agent scan, schedule your compliance reports to run in between the scan interval defined for your agents.
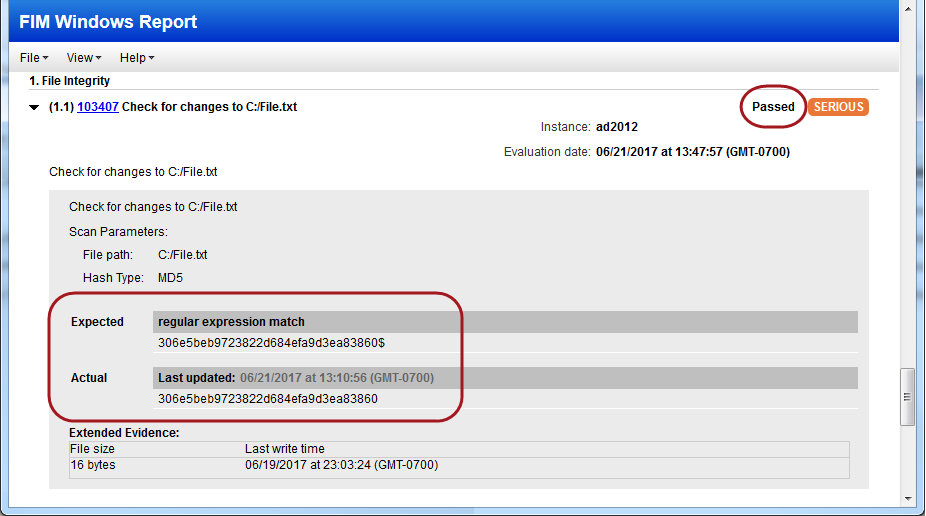
When you first add the control to a policy you’ll see USE_SCAN_VALUE as the expected value for the control.

After your first scan, we’ll update the expected value with the actual file hash returned by the scan.

You’ll see a posture of Passed for this control in your compliance reports, and you’ll continue to see a posture of Passed as long as the file does not change.
If the file changes a different file hash will be returned by the scan and you’ll see a posture of Failed in your reports. This is because the expected value and the actual value no longer match.
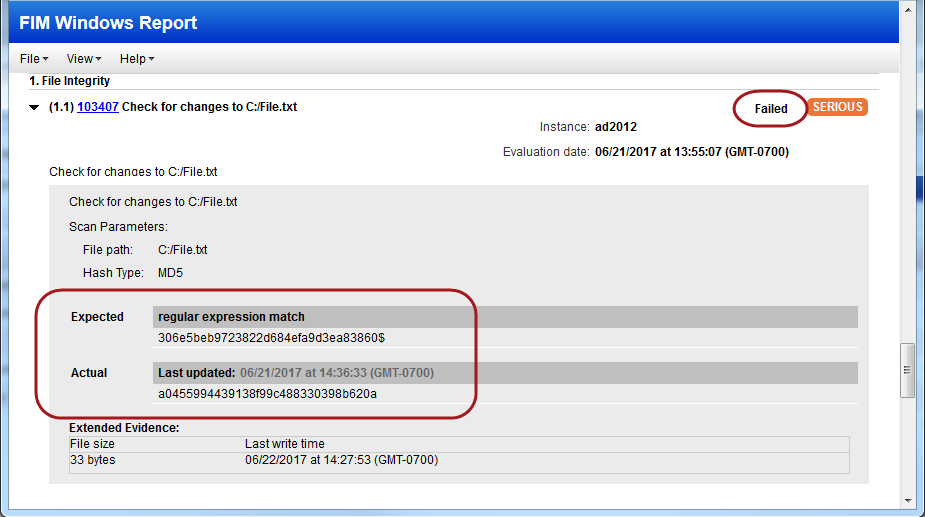
Launch another scan with "Auto Update expected value" enabled in your compliance profile and we’ll automatically update the expected value for your control in the policy with the value returned by the most recent scan. Now the new value will be used for posture evaluation.

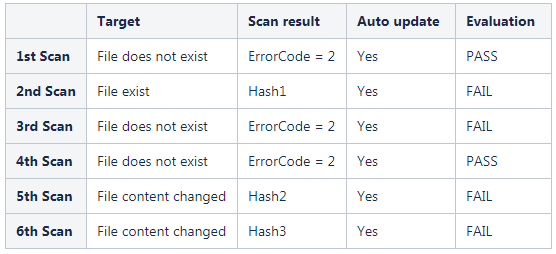
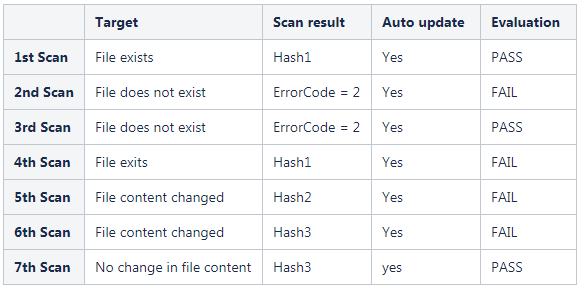
Handling ErrorsIn cases where the error codes 2, 27, 28, or 45 are returned then the control posture is not marked as Error in the report. Depending on when error is encountered the posture of the control is marked Pass or Fail. |
|
File does not exist in the 1st scan |
|
File exists in the 1st scan |
|