This section provides information about registering your azure application in the active directory, assigning vault API permission to authorize the application to use vault APIs, creating and uploading a self-signed certificate and specifying a vault access policy for the application.
When you create an Azure key Vault authentication record, you will provide the ID of your azure application and to authenticate to this application provide the same certificate that you have uploaded in the application with the private key of the certificate. This enables the scanner to access the vault on behalf of the application.
- Sign in to the Azure Portal using your account credentials.
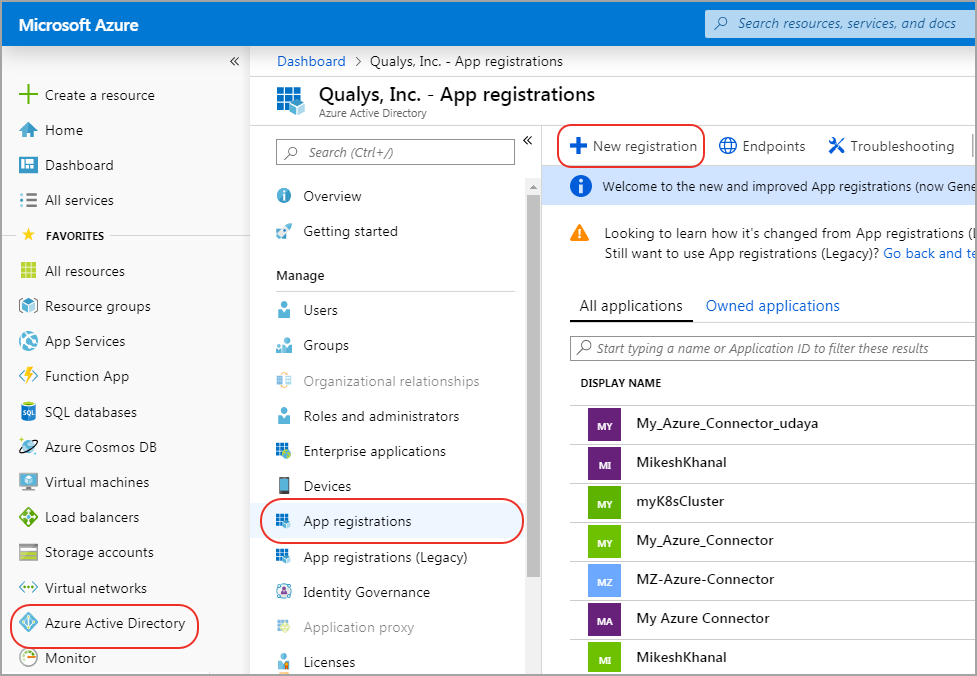
- Select Active Directory > App registrations > New registration.
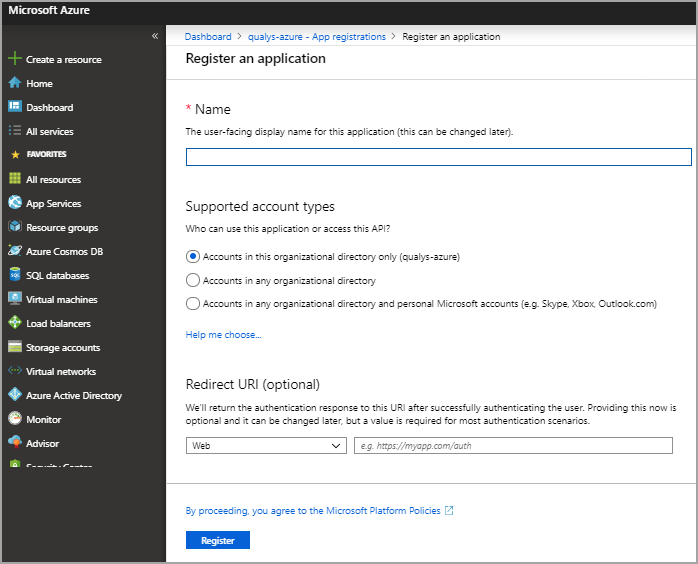
- Provide application name and other required information and click Register to create the application.
Authorize the application to use vault APIs to communicate with vaults.
- On the Azure portal, select Active Directory > App registrations and select the application that you have created.
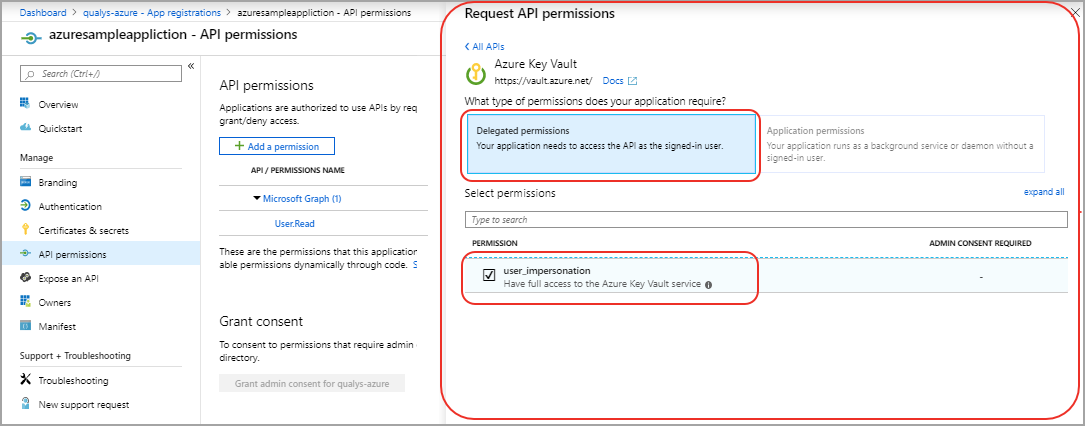
- Go to Settings > API permissions > Add a permission and click Azure Key Vault.
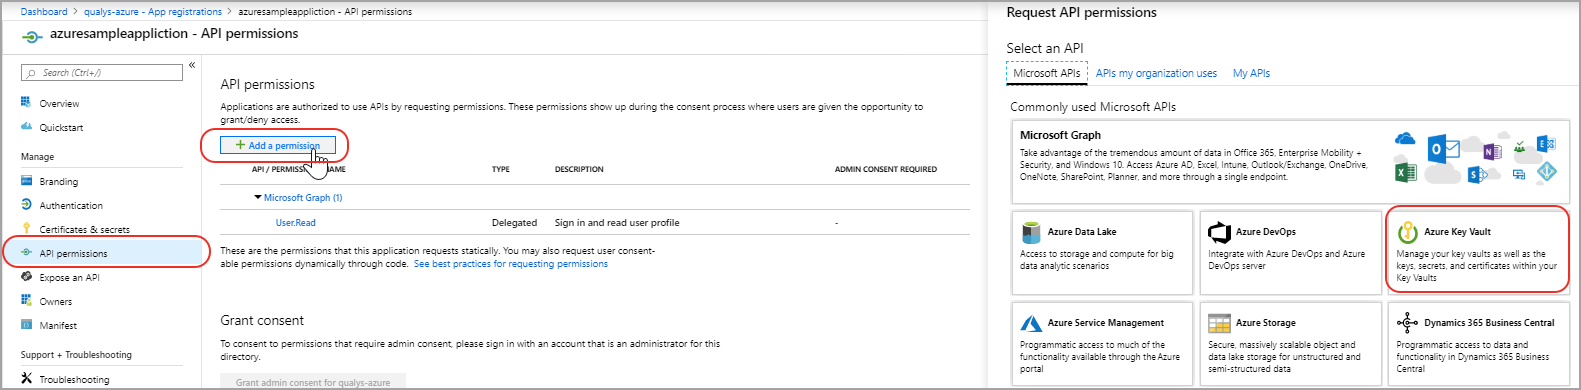
- Select Delegated Permissions > Have full access to the Azure Key Vault service in Request API permission.
Note that Full access means that the application is authorized to access the vault API. It does not mean that the application is granted full access to any vault or secrets. Actual vault access permissions are configured later.
- Click Done and Choose Yes for Grant Permissions.
- Create a self-signed certificate. Create the certificate in OpenSSL using the following command:
- Next, you will be prompted to enter other information at the command prompt. Provide all the information to create the certificate.
- Specify the certificate along with the private key when you create an Azure key vault record in VM for the scanner to use the certificate to obtain a login token for accessing the vault.
This allows clients or scanner appliances which are in possession of the certificate and private key to authenticate on behalf of the application.
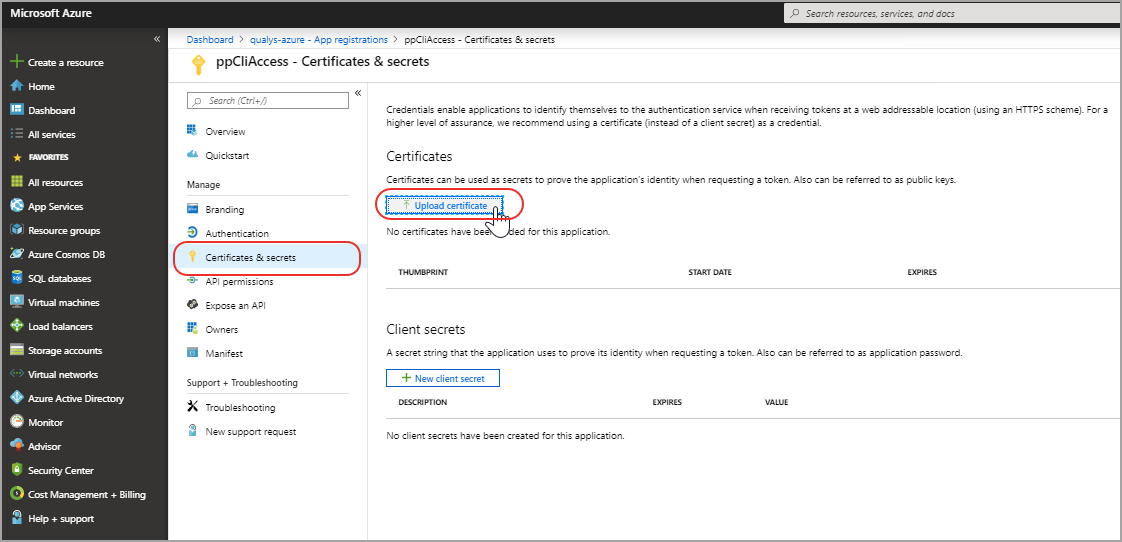
- On the Azure portal, select Active Directory > App registrations and select the application that you have created.
- Go to Settings > Certificates & secrets > Upload certificate.
- Select the "cert.pem" file created in the previous step and then click Save. The certificate will show up under "Public Keys".
Configure what the application (and, on its behalf, scanner appliances) can do in a vault.
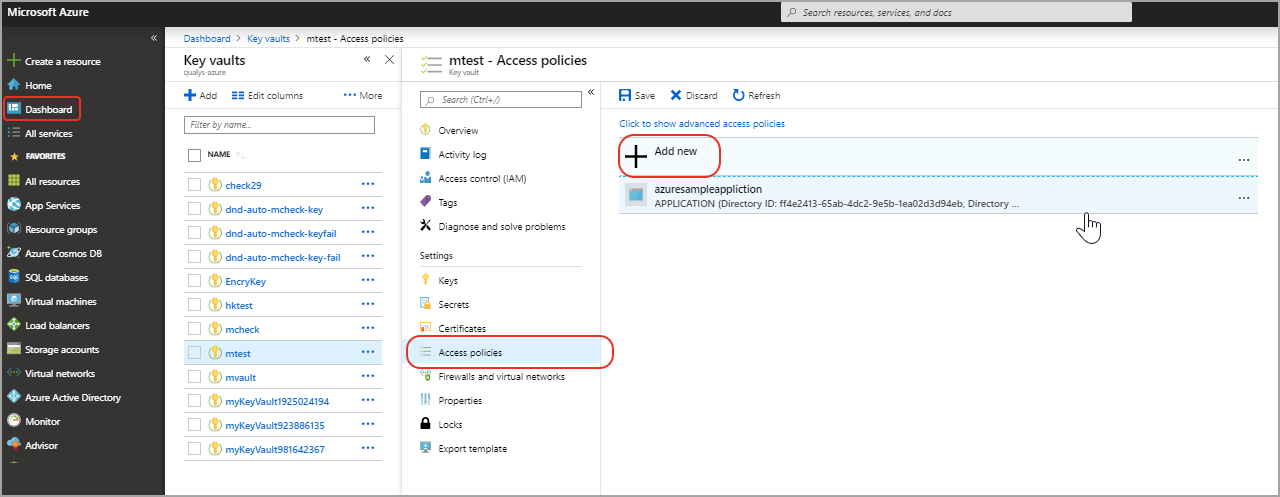
- On the Azure portal, go to Dashboard. Select your vault.
- Go to settings and select Access policies > Add new to create a new policy for the vault application.
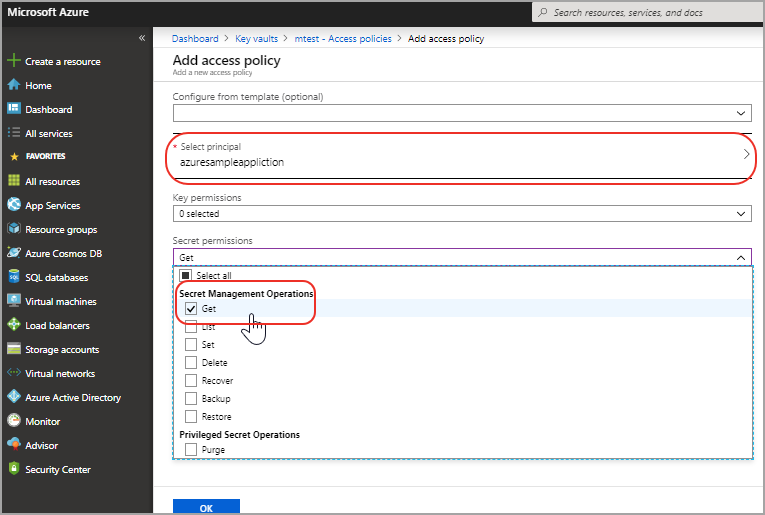
- Specify the application name in the “Select principal” field and from the Secret permissions drop-down, select “Get” in Secret Management Operations. This gives the application permission to fetch the secret from the vault.
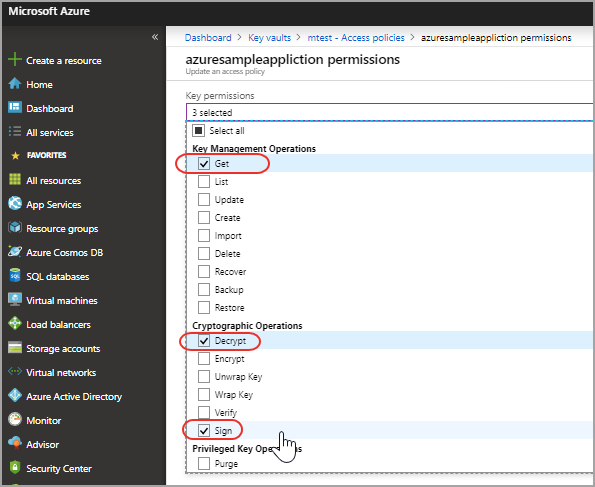
To prepare for future hardware security modules (HSM) the following permissions should also be enabled:
- Go to Key permissions > Key Management Operations and select Get.
- Go to Key permissions > Cryptographic Operations > Decrypt.
- Go to Key permissions > Cryptographic Operations > Sign.
- Click OK and Save.