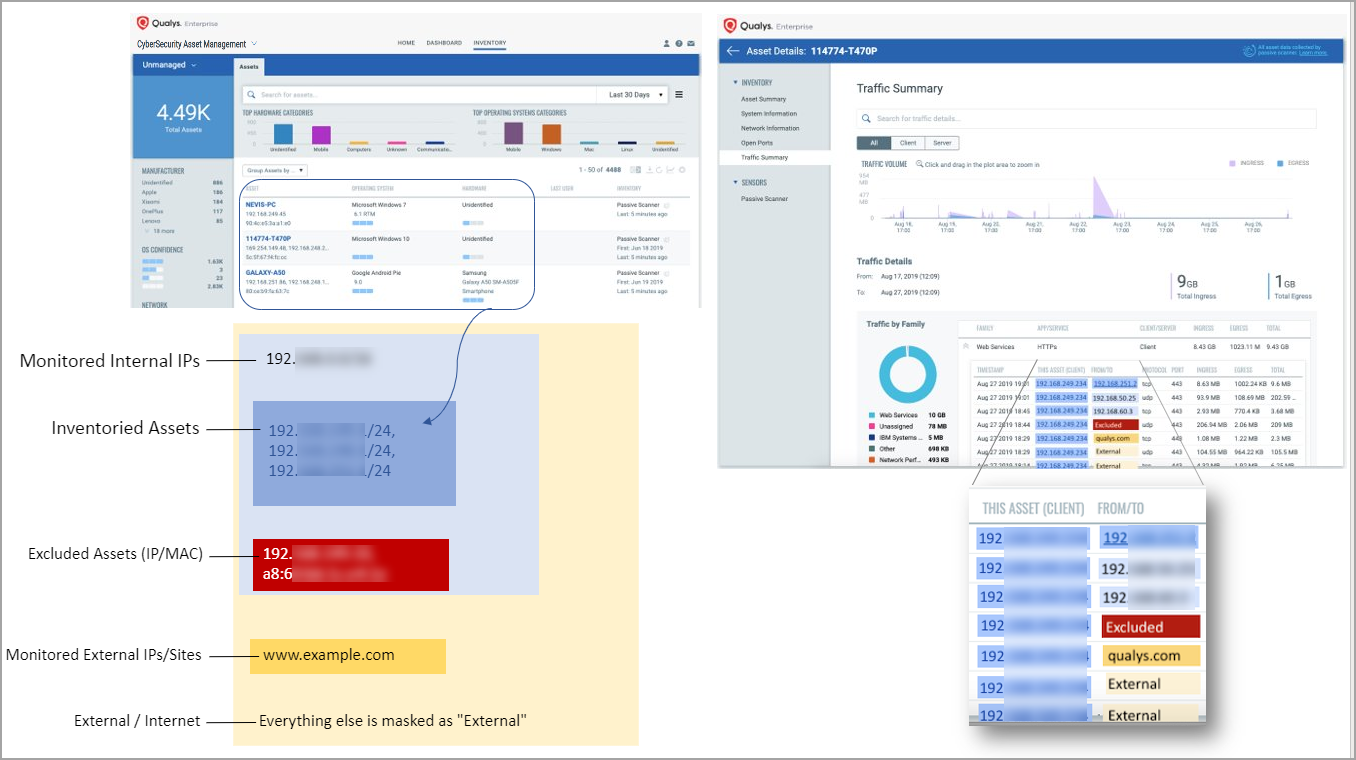
Network Passive Sensor can see traffic flows between two types of IP addresses. These IP addresses can be internal (within your network) or external (outside your network).
You can configure how you want to categorize your assets discovered by the sensors while monitoring traffic flow. All these assets are listed in the Assets tab of Global AssetView/CyberSecurity Asset Management.
Assets can be defined as Internal Assets, Excluded Assets, and External Assets.
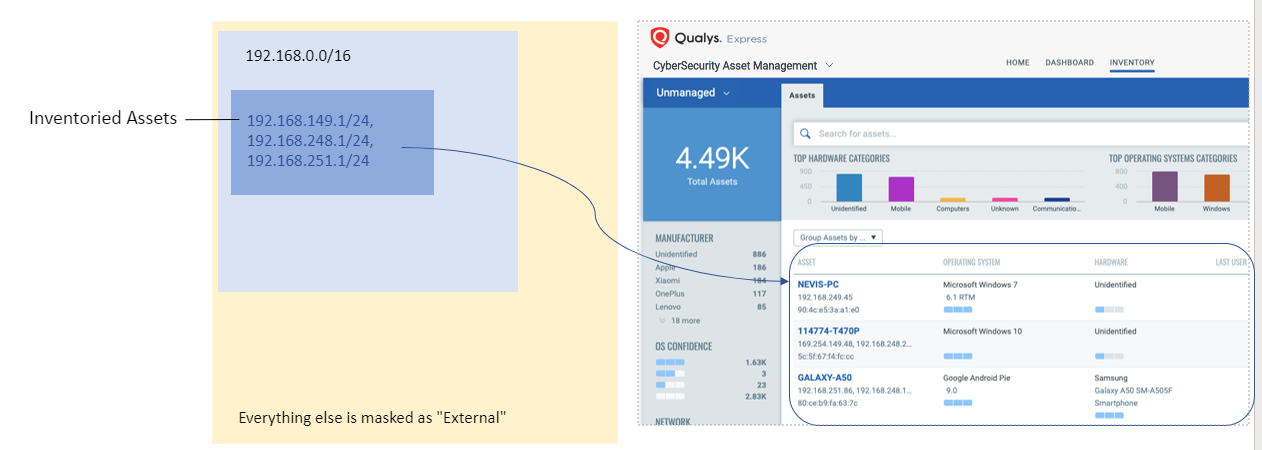
Define Internal IP ranges that you want to monitor. IP addresses in these internal ranges will be individually tracked for traffic analysis and inventoried in detail.
While registering a sensor, in Define Internal Assets step, you can add IP ranges within your network to monitor. The assets discovered for these IP addresses will be individually inventoried and tracked for traffic analysis. You'll be able to select IP ranges from default list or can create custom IP ranges.
Alternatively, you can add internal assets, simply go to Configuration > Internal Assets > Add.
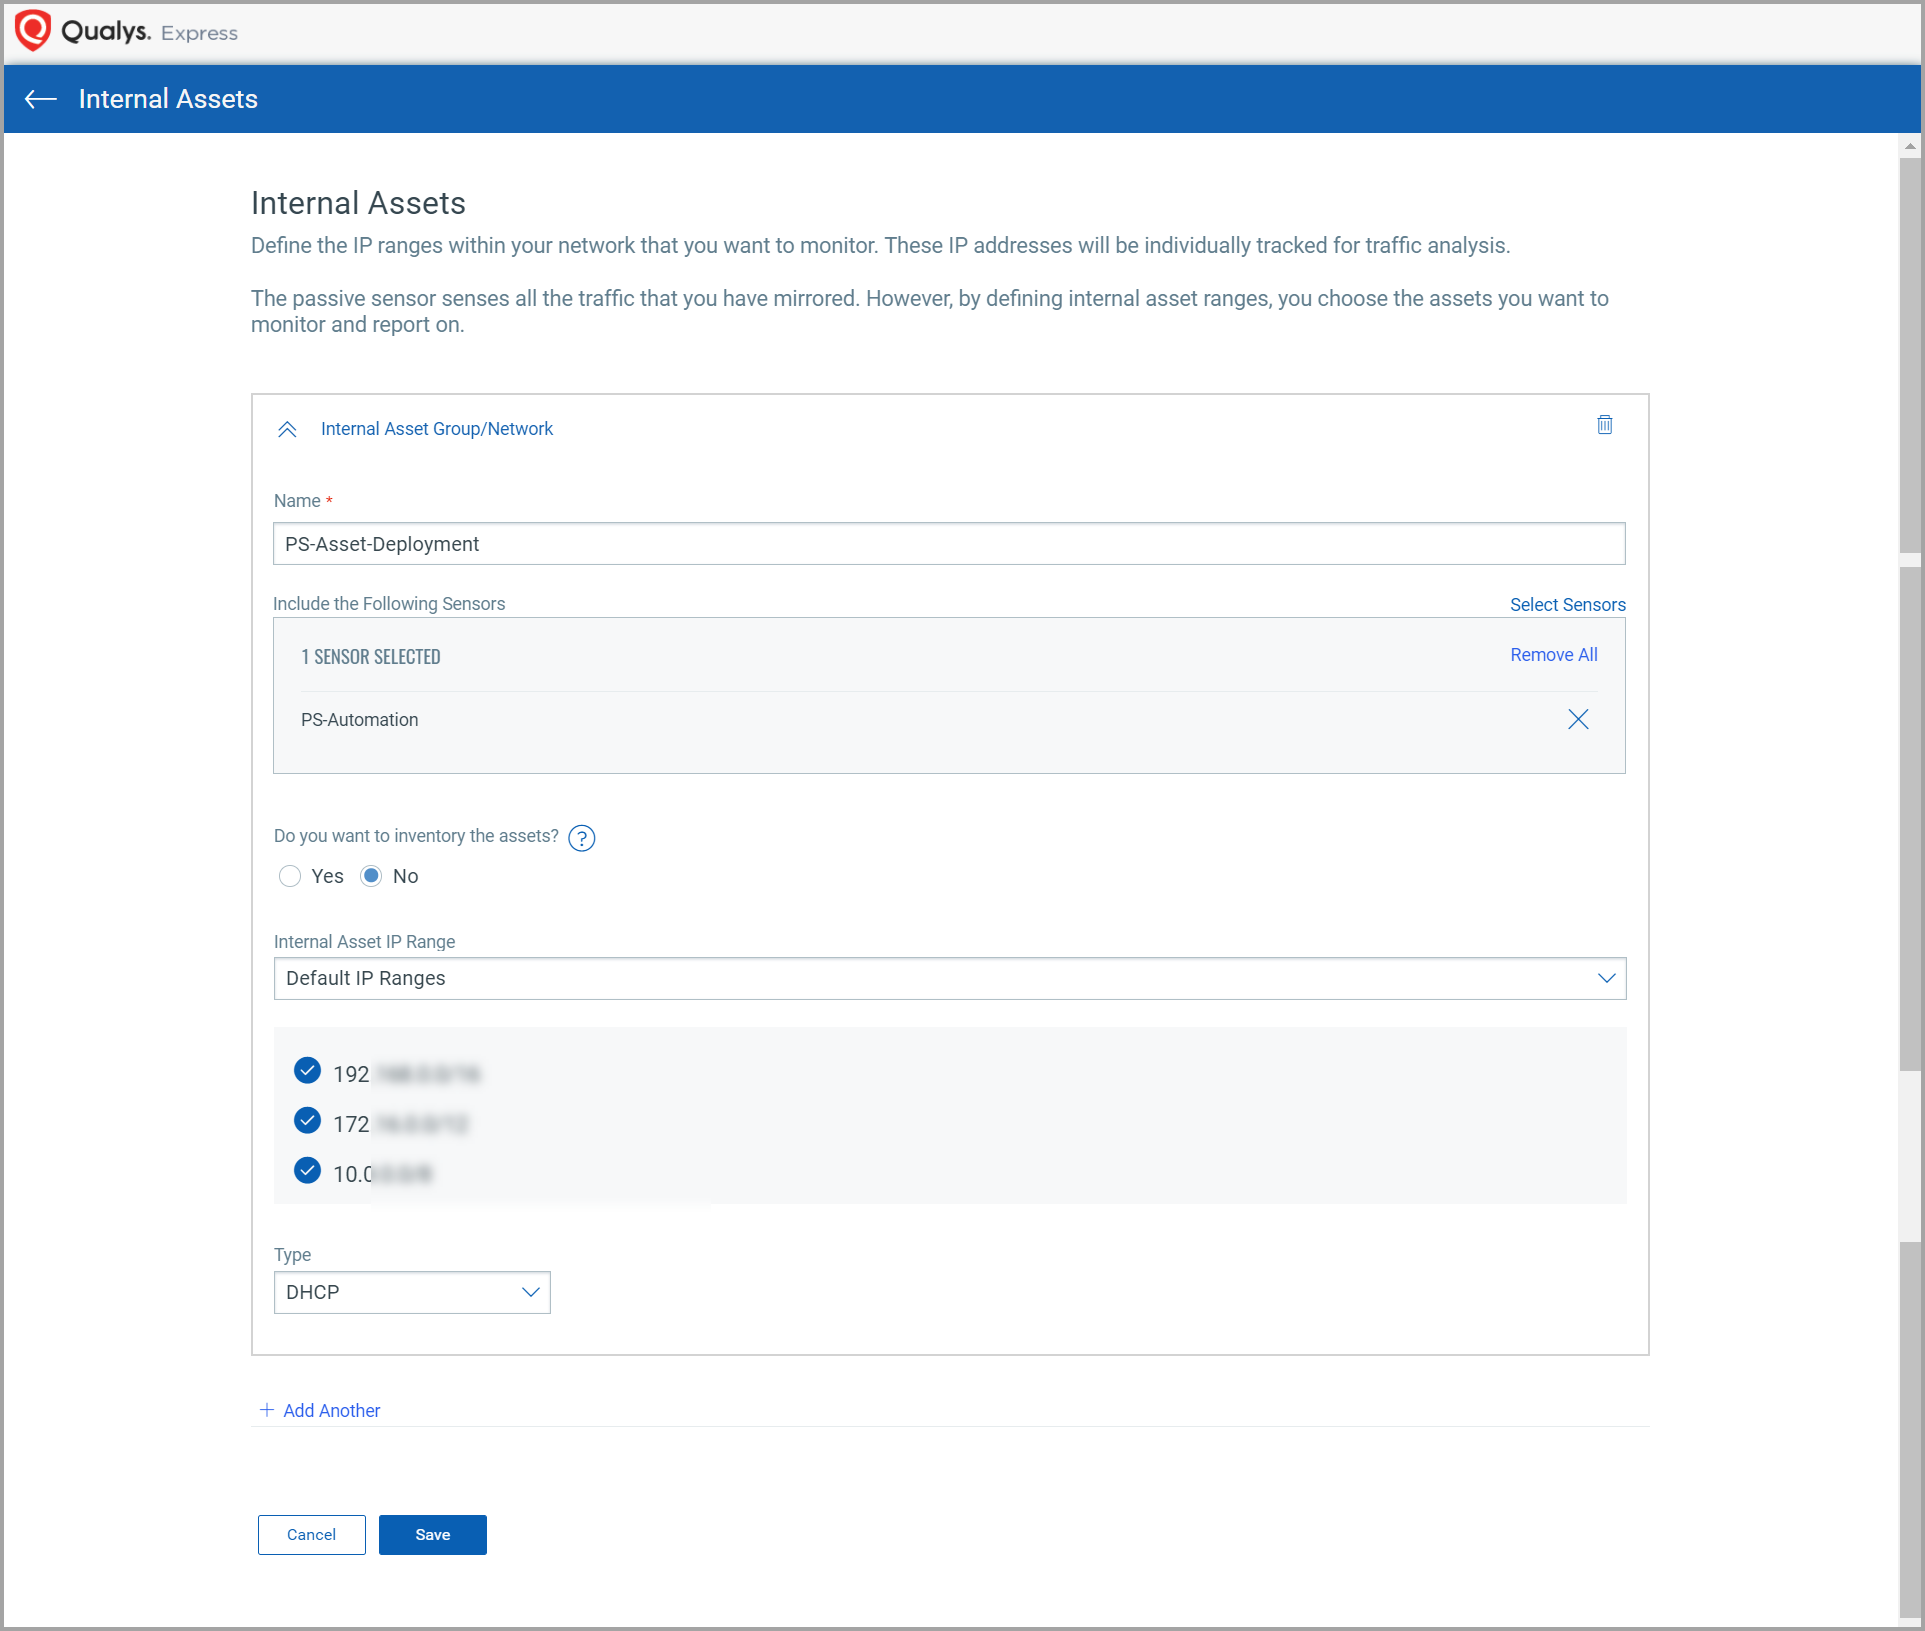
Here, you’ll define the IP ranges within your network you want to monitor. The assets discovered for these IP addresses will be individually inventoried and tracked for traffic analysis. You can use default IP ranges, IP range tags, or customized IP ranges options to define range of internal assets. Select Do you want to inventory the assets check box for marking inventoried assets.
To complete the sensor setup and to start sensing assets you must define Internal Asset ranges. The passive sensor senses all the traffic that you have mirrored. However, by defining internal asset ranges, you choose the assets you want to monitor and report on.
1 - Default IP Ranges
This option defines internal assets discovered within default internal ranges for your network. Click Select Sensors to select sensor from the list of sensors for which you want to define internal asset.
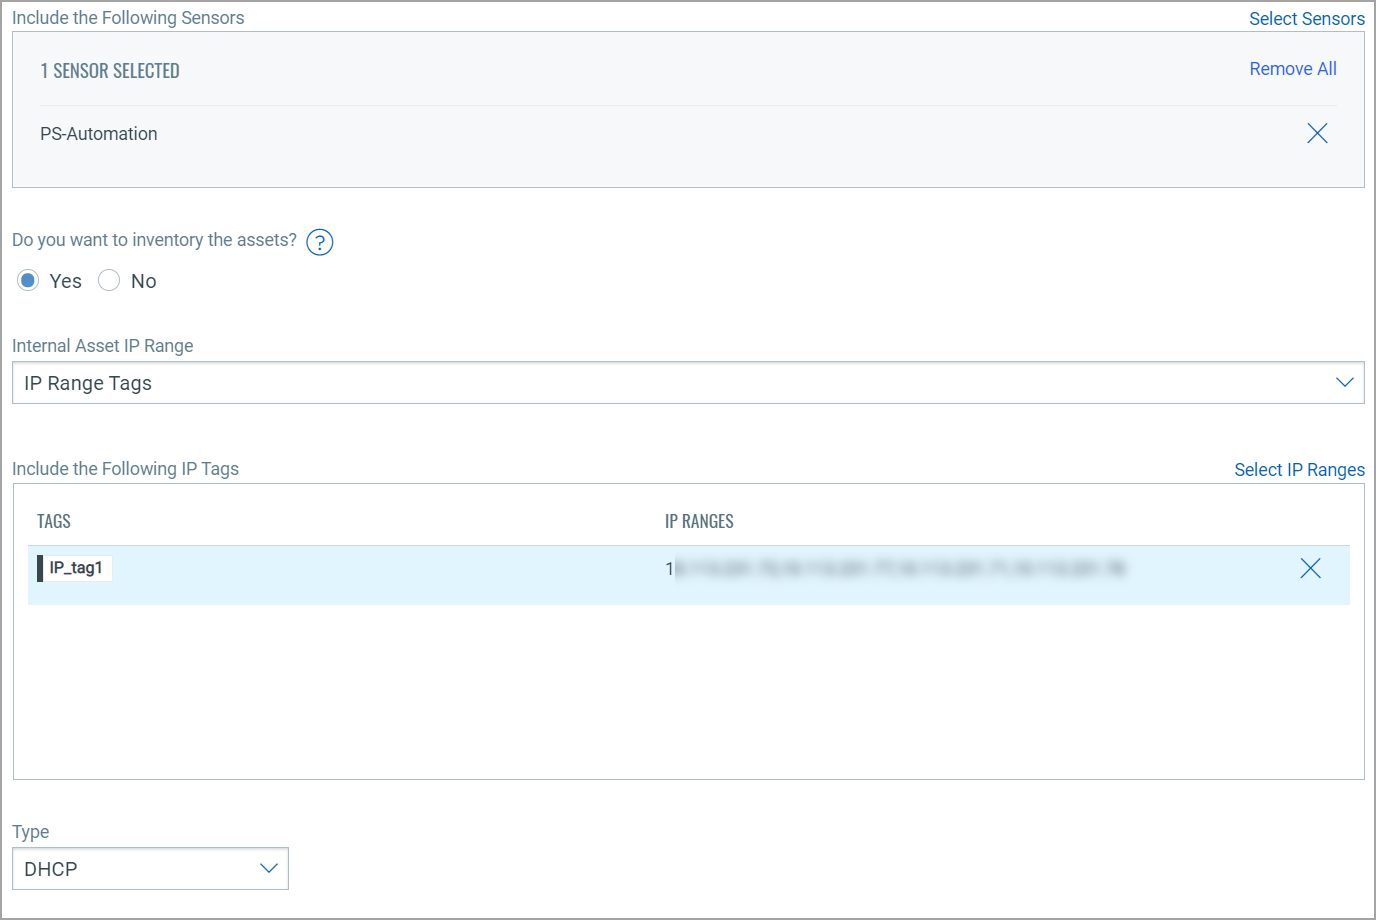
2 - IP Range Tags
This option defines internal assets discovered with IP range tags. These are the dynamic tags created with ‘IP Address In Range(s)’ rule engine. Click Select Sensors to select sensor from the list of sensors for which you want to define internal asset. Click Select IP Ranges to select IP tags from the list of tags for which you want to define internal asset.
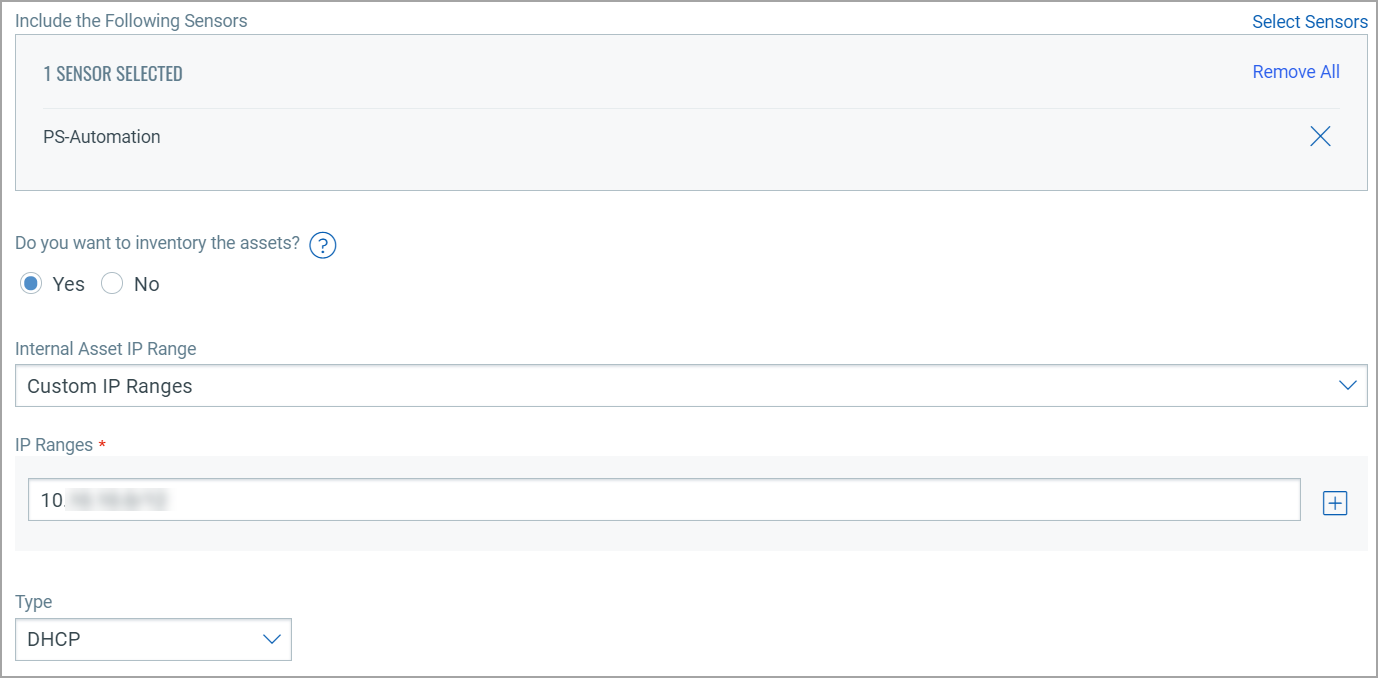
3- Custom IP Ranges
This option defines internal assets discovered with custom IP ranges. You can provide IP ranges for monitoring. Click Select Sensors to select sensor from the list of sensors for which you want to define internal asset.
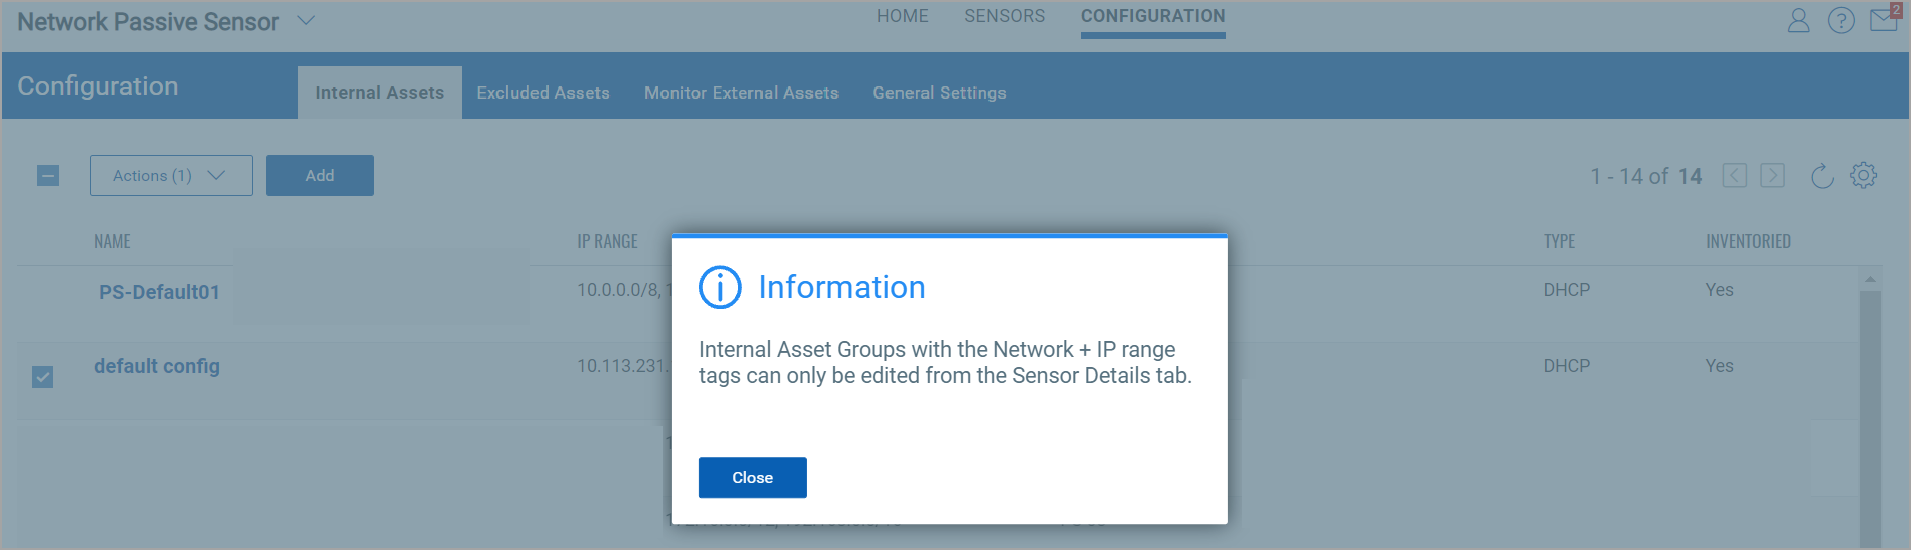
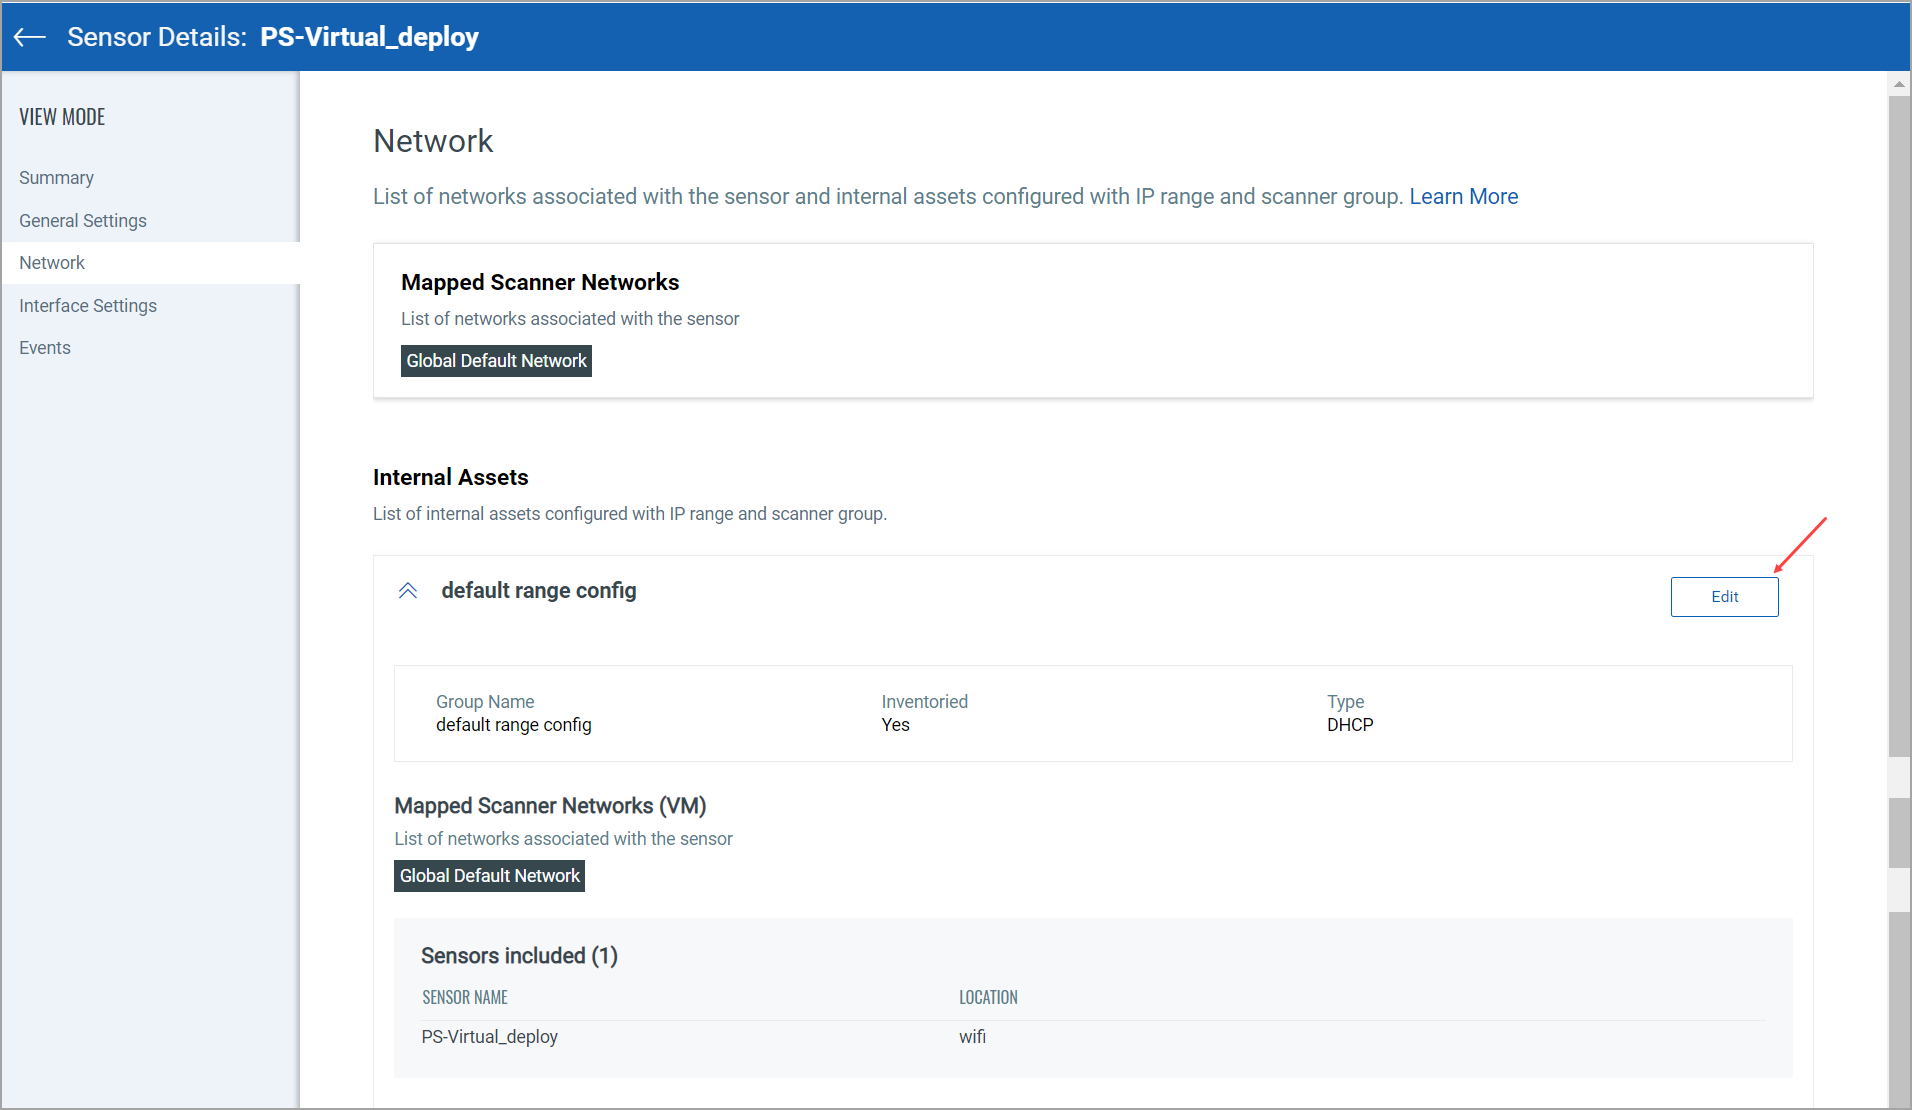
Once you've added the Internal Asset Groups with the Network and IP range tags and if you want to edit these configuration settings, then go to the Sensor Details tab and edit the configuration.
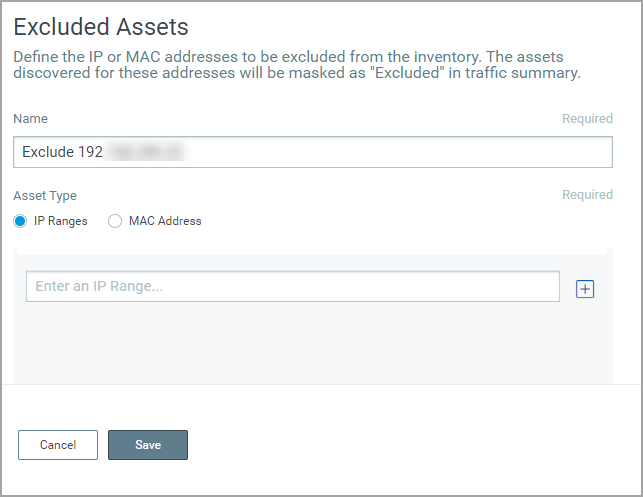
Define the assets you want to exclude from the inventory. The assets discovered for these addresses will be masked as "Excluded" in traffic summary.
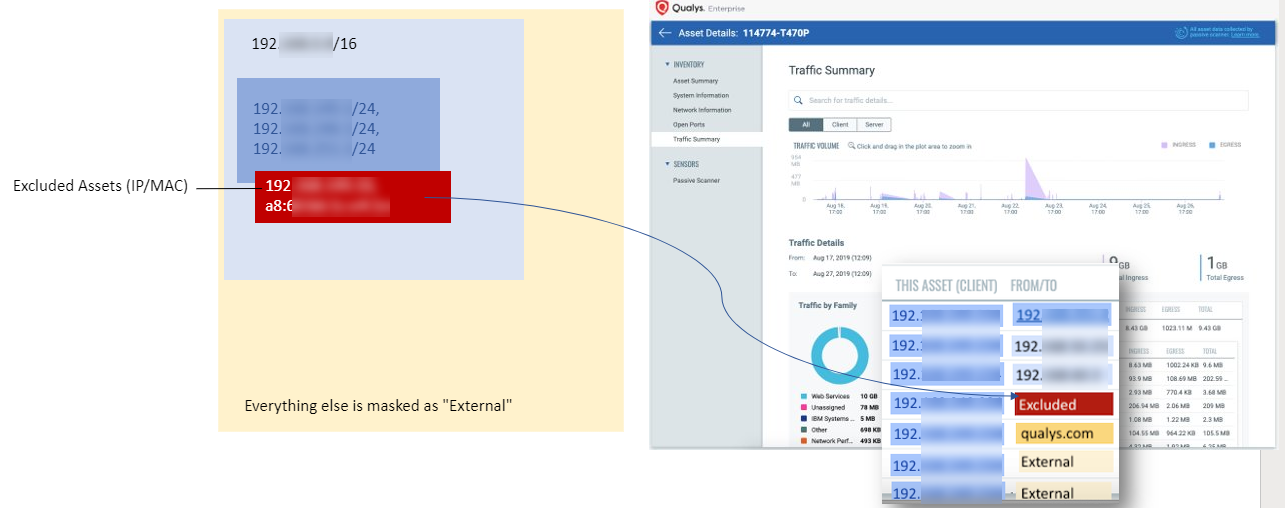
To add excluded assets, simply go to Configuration > Excluded Asset > Add.
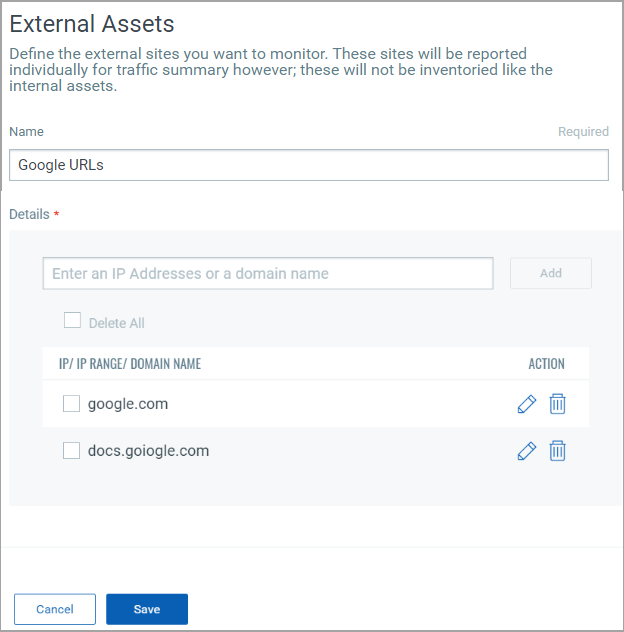
Define the external sites you want to monitor. These sites will be reported individually for traffic summary however; these will not be inventoried like the internal assets.
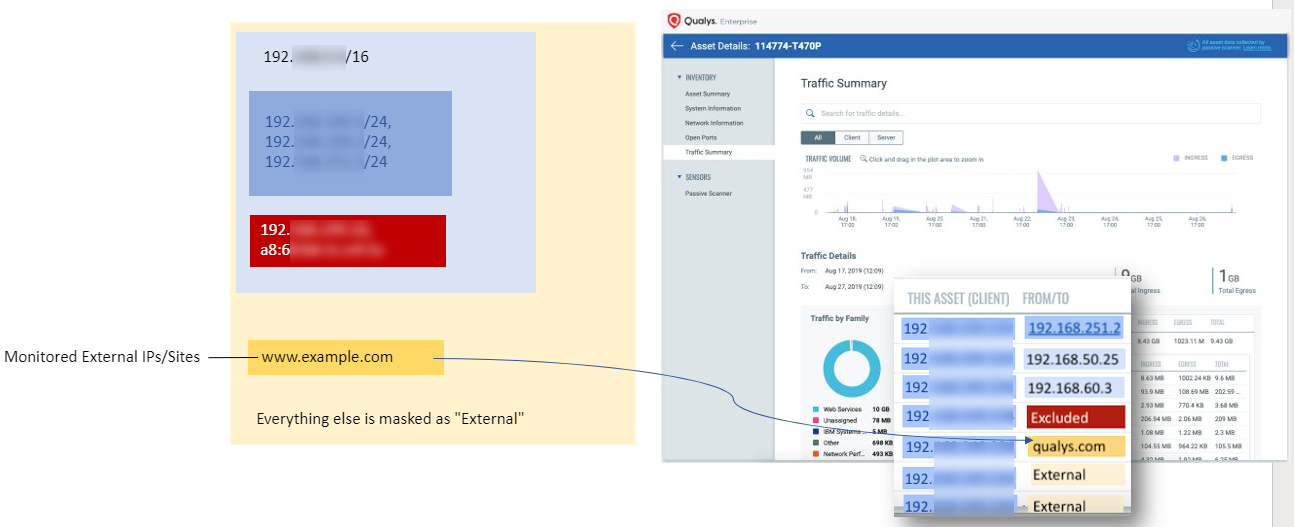
To add external assets, simply go to Configuration > Monitor External Asset Group > Add.
All these discovered assets are reported to Qualys Asset Inventory where you can see detailed information about them as well as traffic summary, etc.
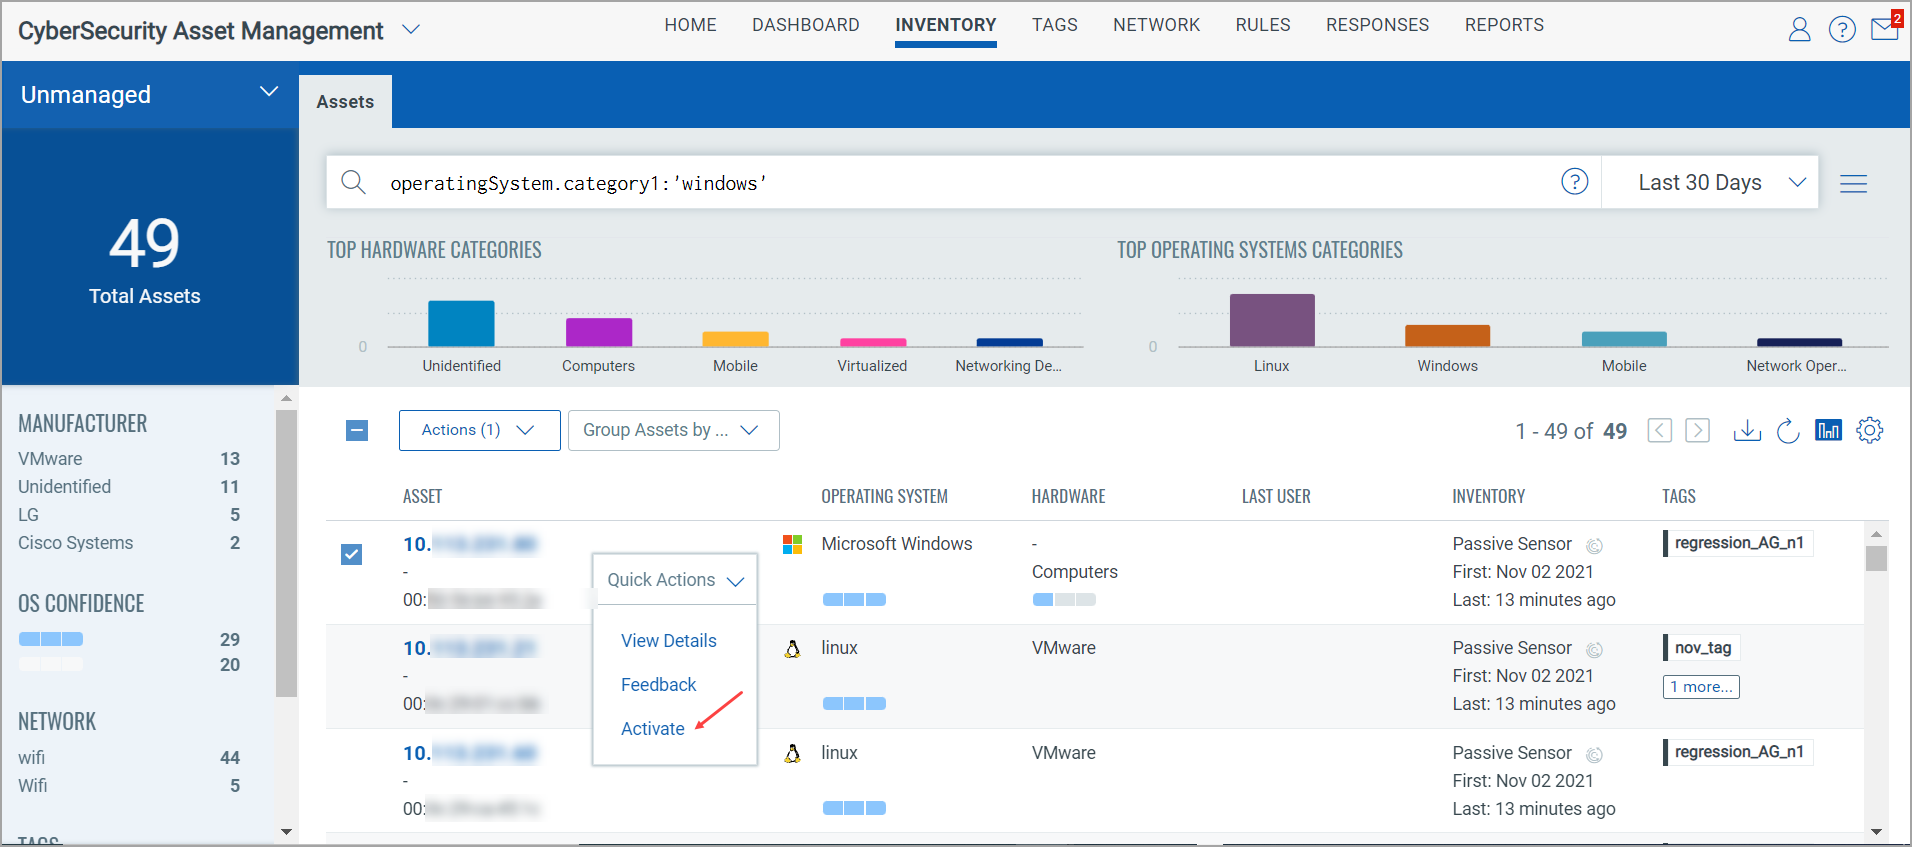
If an asset discovered by Passive Sensor is already known by active scans or by cloud agents then it is considered a managed asset and the asset data is correlated and merged. If the asset is previously unknown, then it is placed in the unmanaged list of assets.
In the Inventory column of Asset Inventory, the Asset the source is marked as Passive Sensor to indicate that the asset was discovered by a passive sensor.
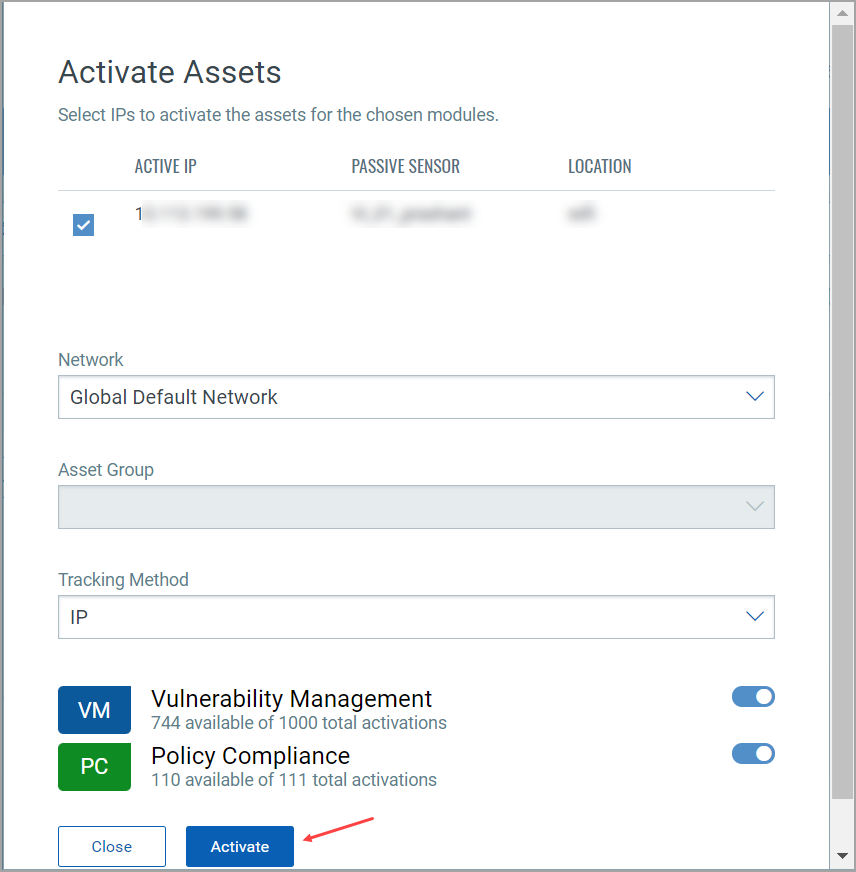
Now you can add IP addresses of un-managed assets into an IP range which can be scanned for VM and PC. The scans themselves have to be triggered via the respective VM or PC modules. You can choose one or more assets whose active IP (by default) is selected. You may then choose to add the selected IP(s) or IP of a different interface to be activated for scan. If your account has Network subscription, then you can choose from a list of Networks that the user has admin rights to, for adding the IPs. While adding a single IP, the Network associated with the sensor appliance that reported the asset, is chosen as the default network to add the IP to.
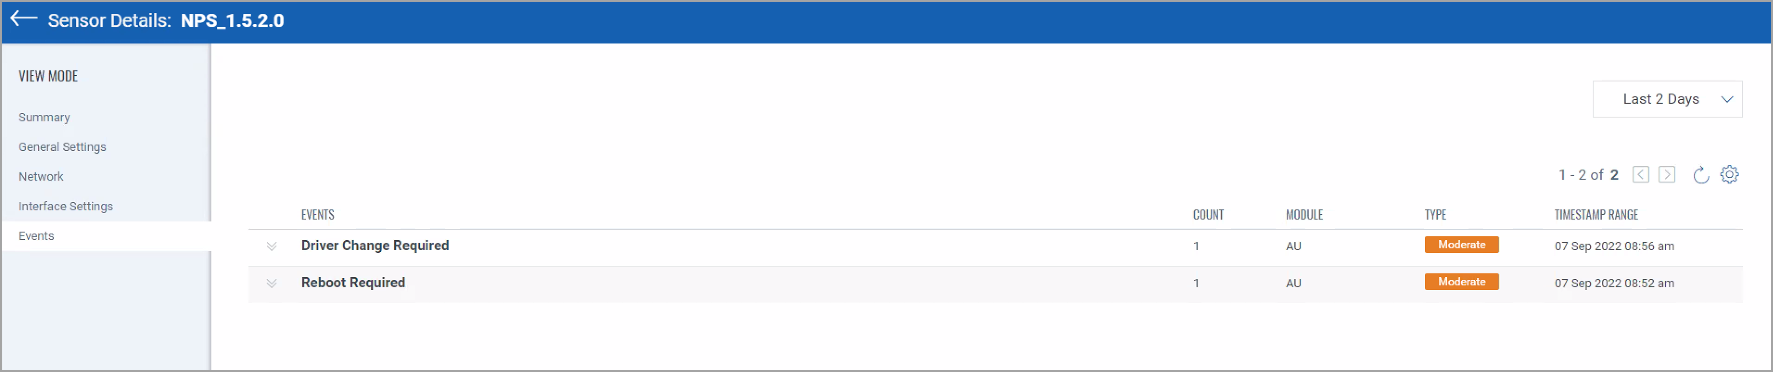
In this tab, you can configure your mail address/addresses to receive the alert notification for events like Driver Change Required, Reboot Required, and Asset Reporting Stopped.
Navigate to Configuration > General Settings and go to the recipient’s text box and add the e-mail or you can add multiple e-mails using comma separated. Click Save.

After you've added the recipients, you'll receive the events in your e-mail inbox.
Also, you can see the events generated in the events section of the sensor details page.